




If your class has been asked to set up a museum corner this term, School Museum is the project you cannot leave to the last week. The handwritten notes for Class 6 Vocational Education Kaushal Bodh Chapter 5 School Museum cover all seven activities, Tables 5.1 to 5.3, the label format and the visitors book, according to the 2026-27 Kaushal Bodh syllabus.
- Length: 38 handwritten pages following the book's own order, Activity 1 to Activity 7.
- Must-learn part: what an artefact is, what a curator does, and how each material is cared for.
- Also on this page: a quick recall table, a five point mistake list and links to the other chapter resources.
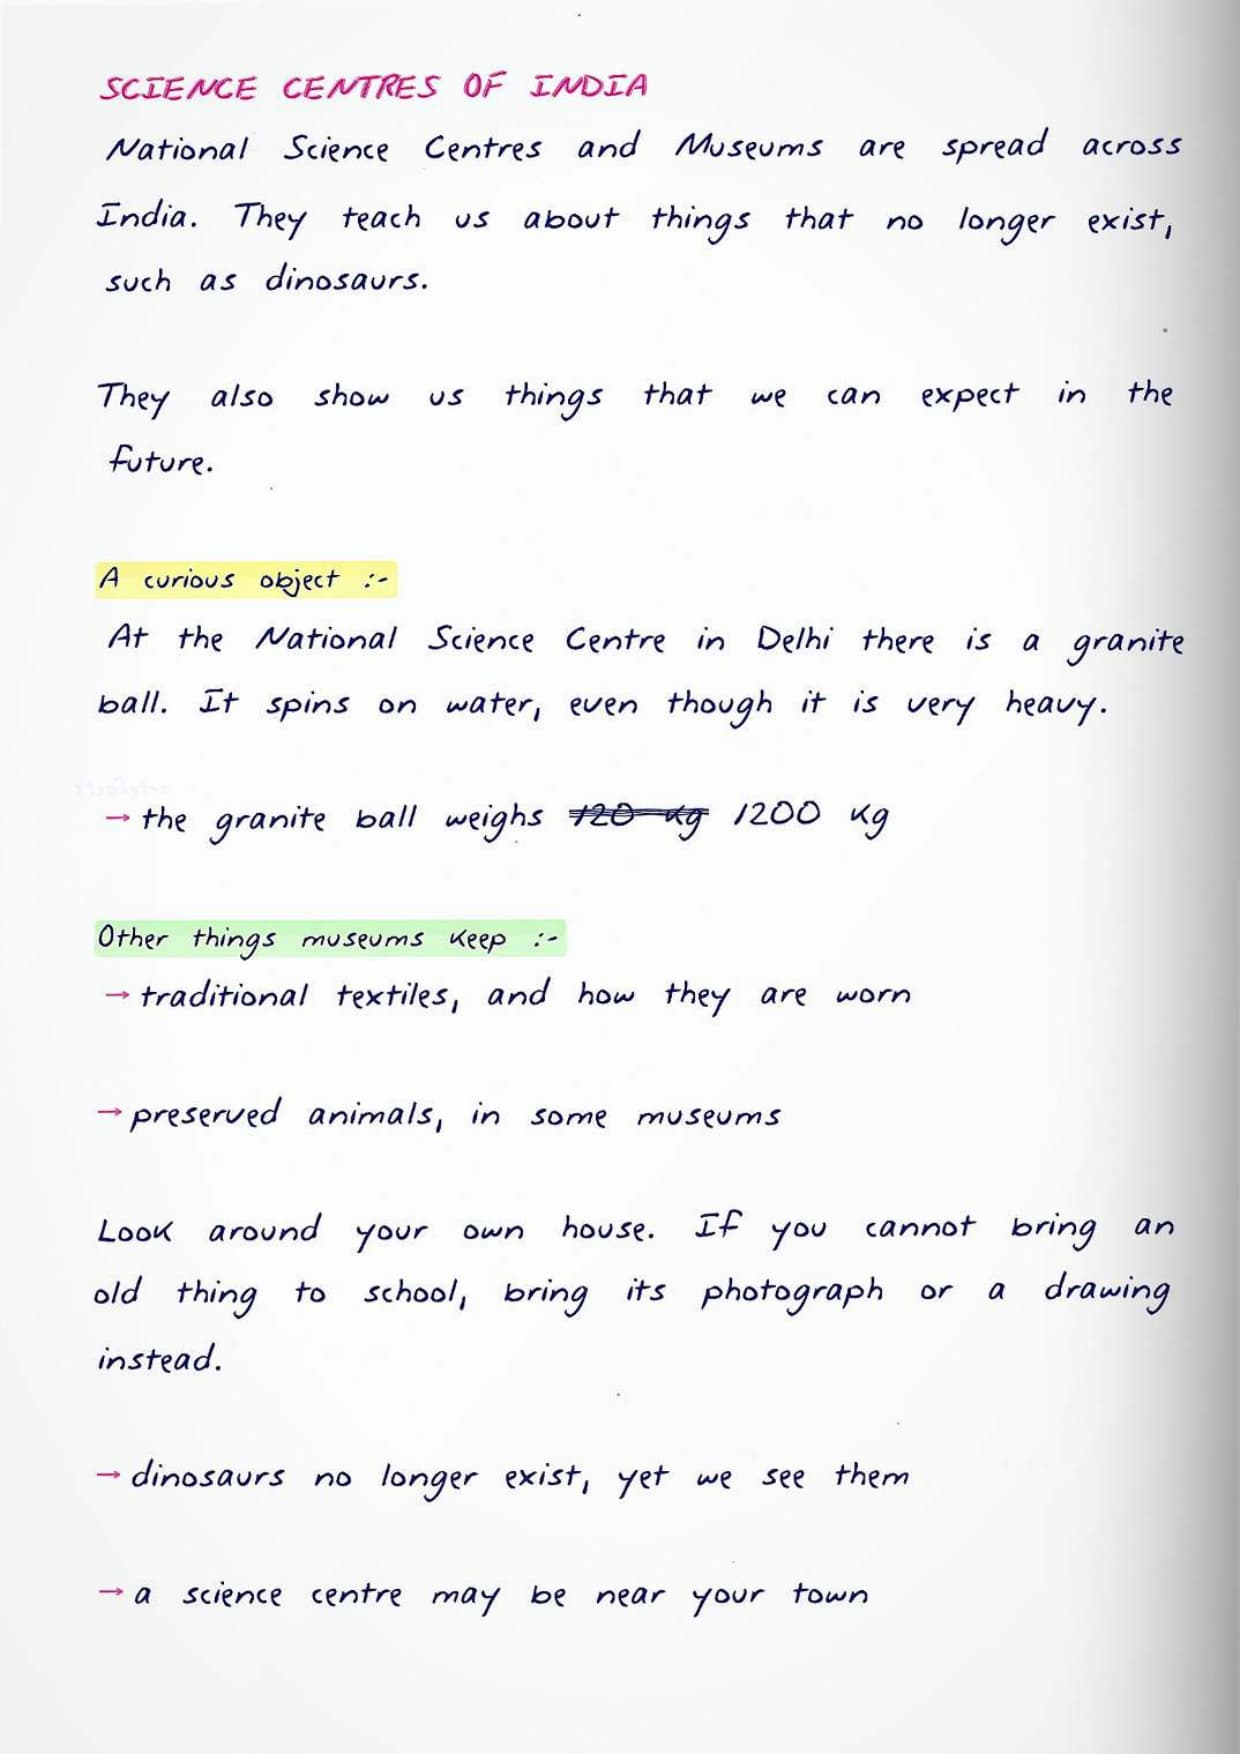
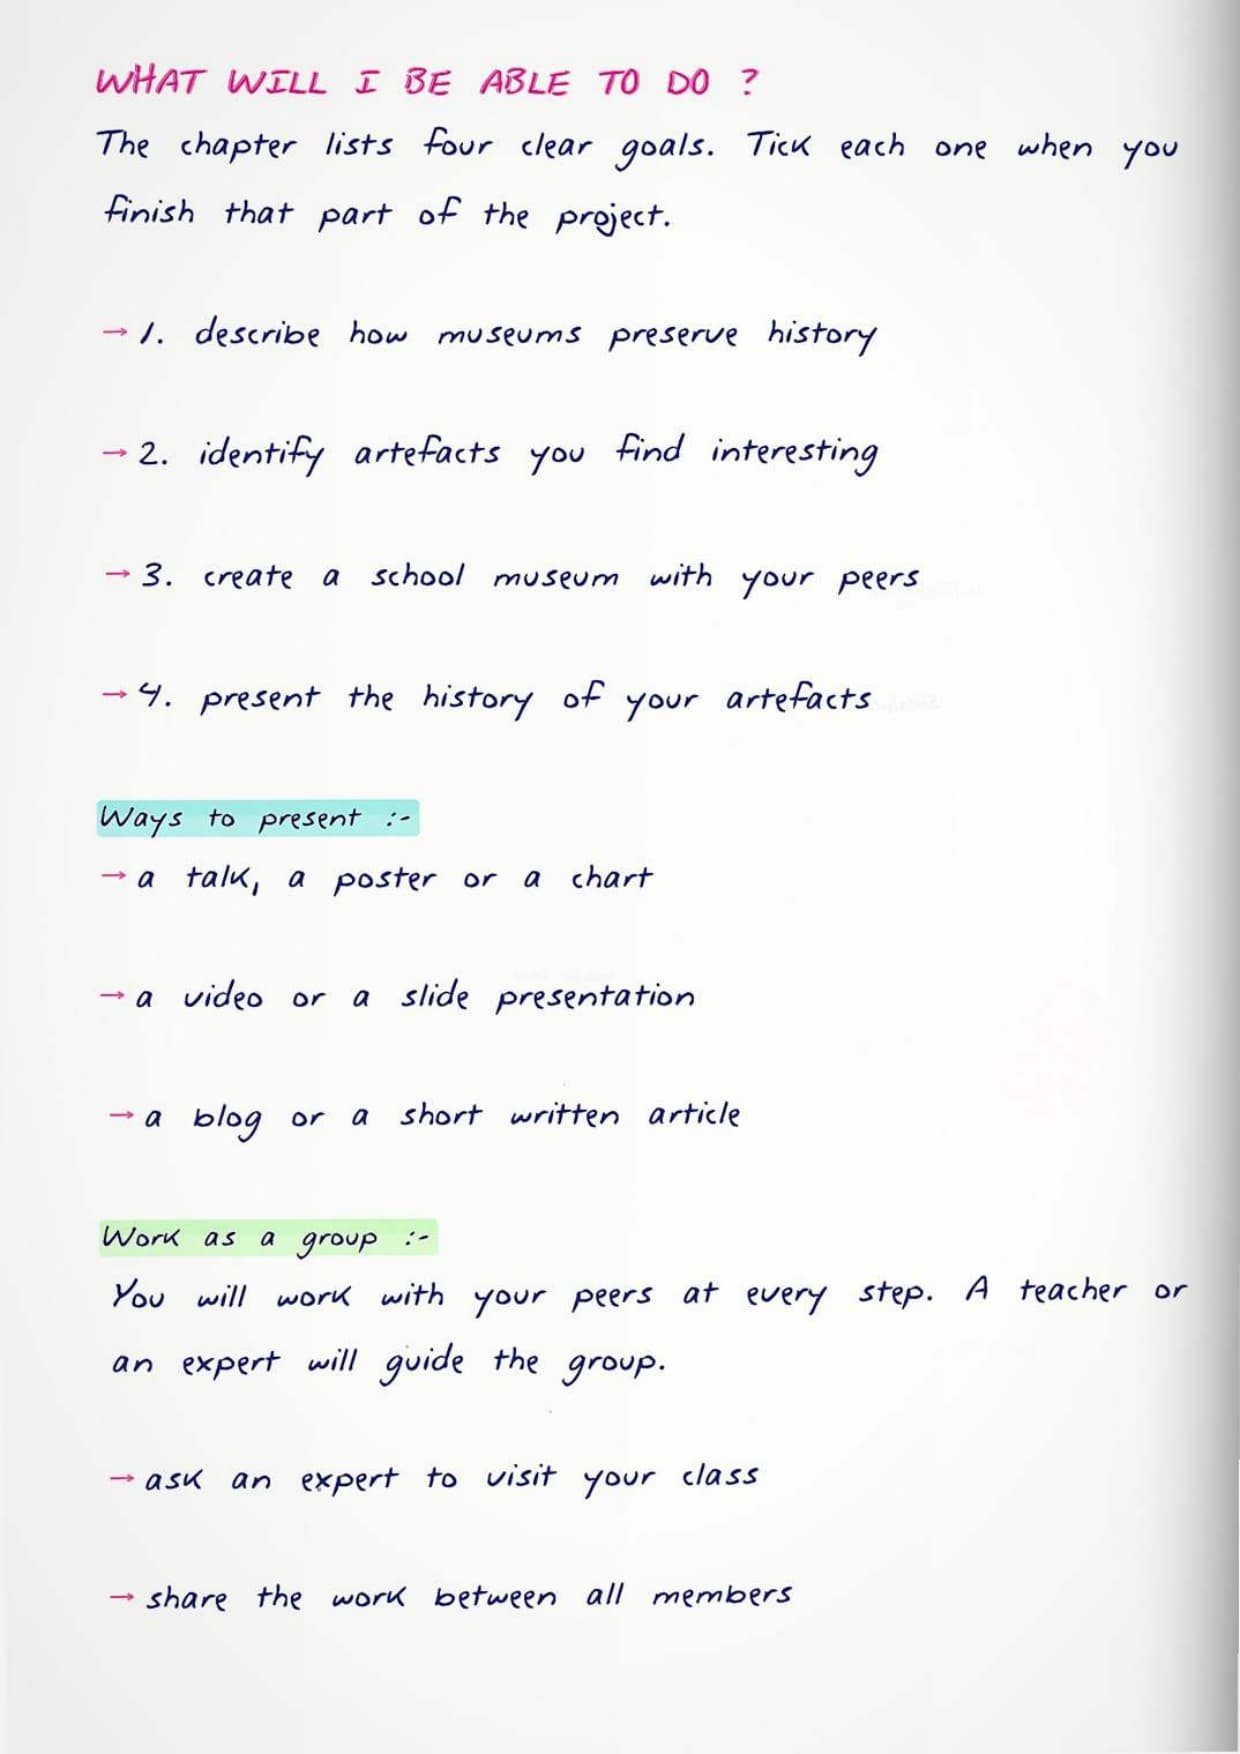
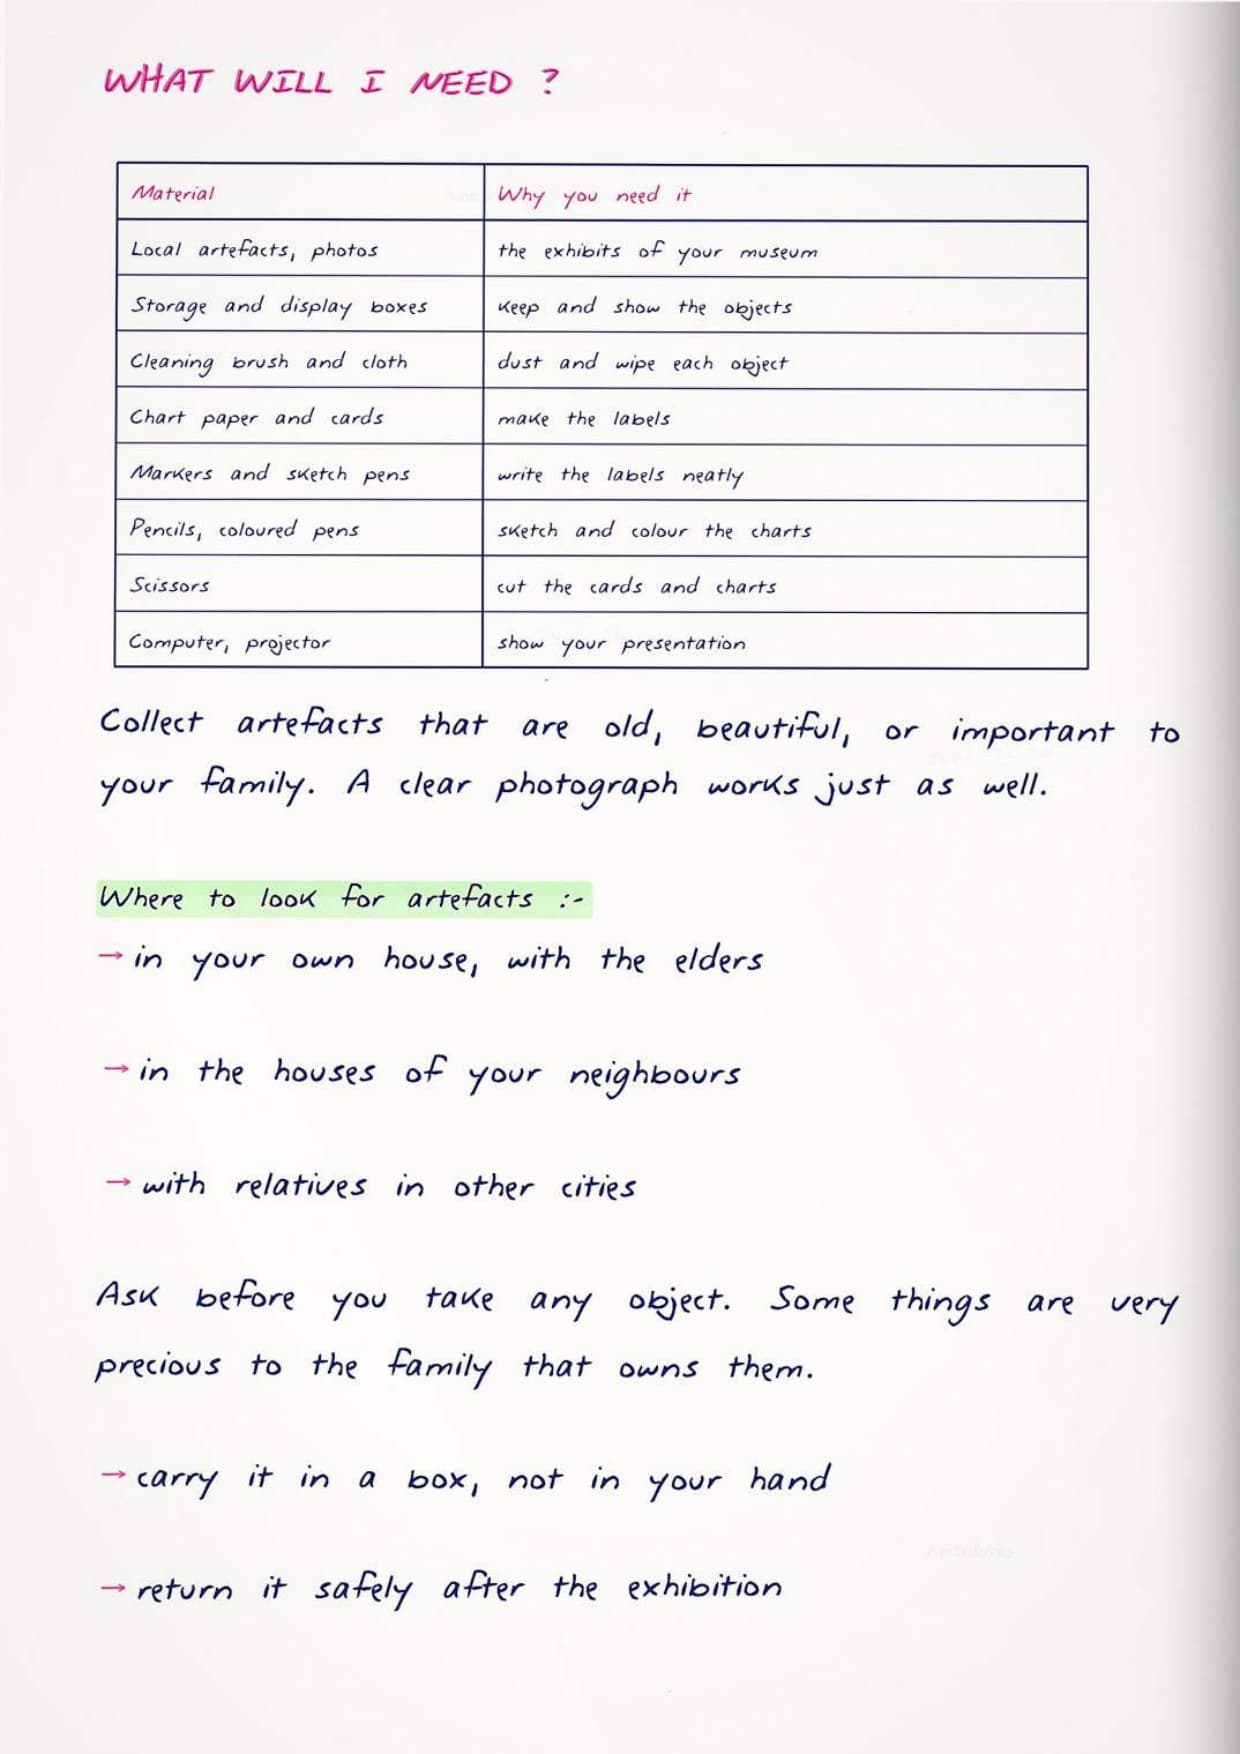
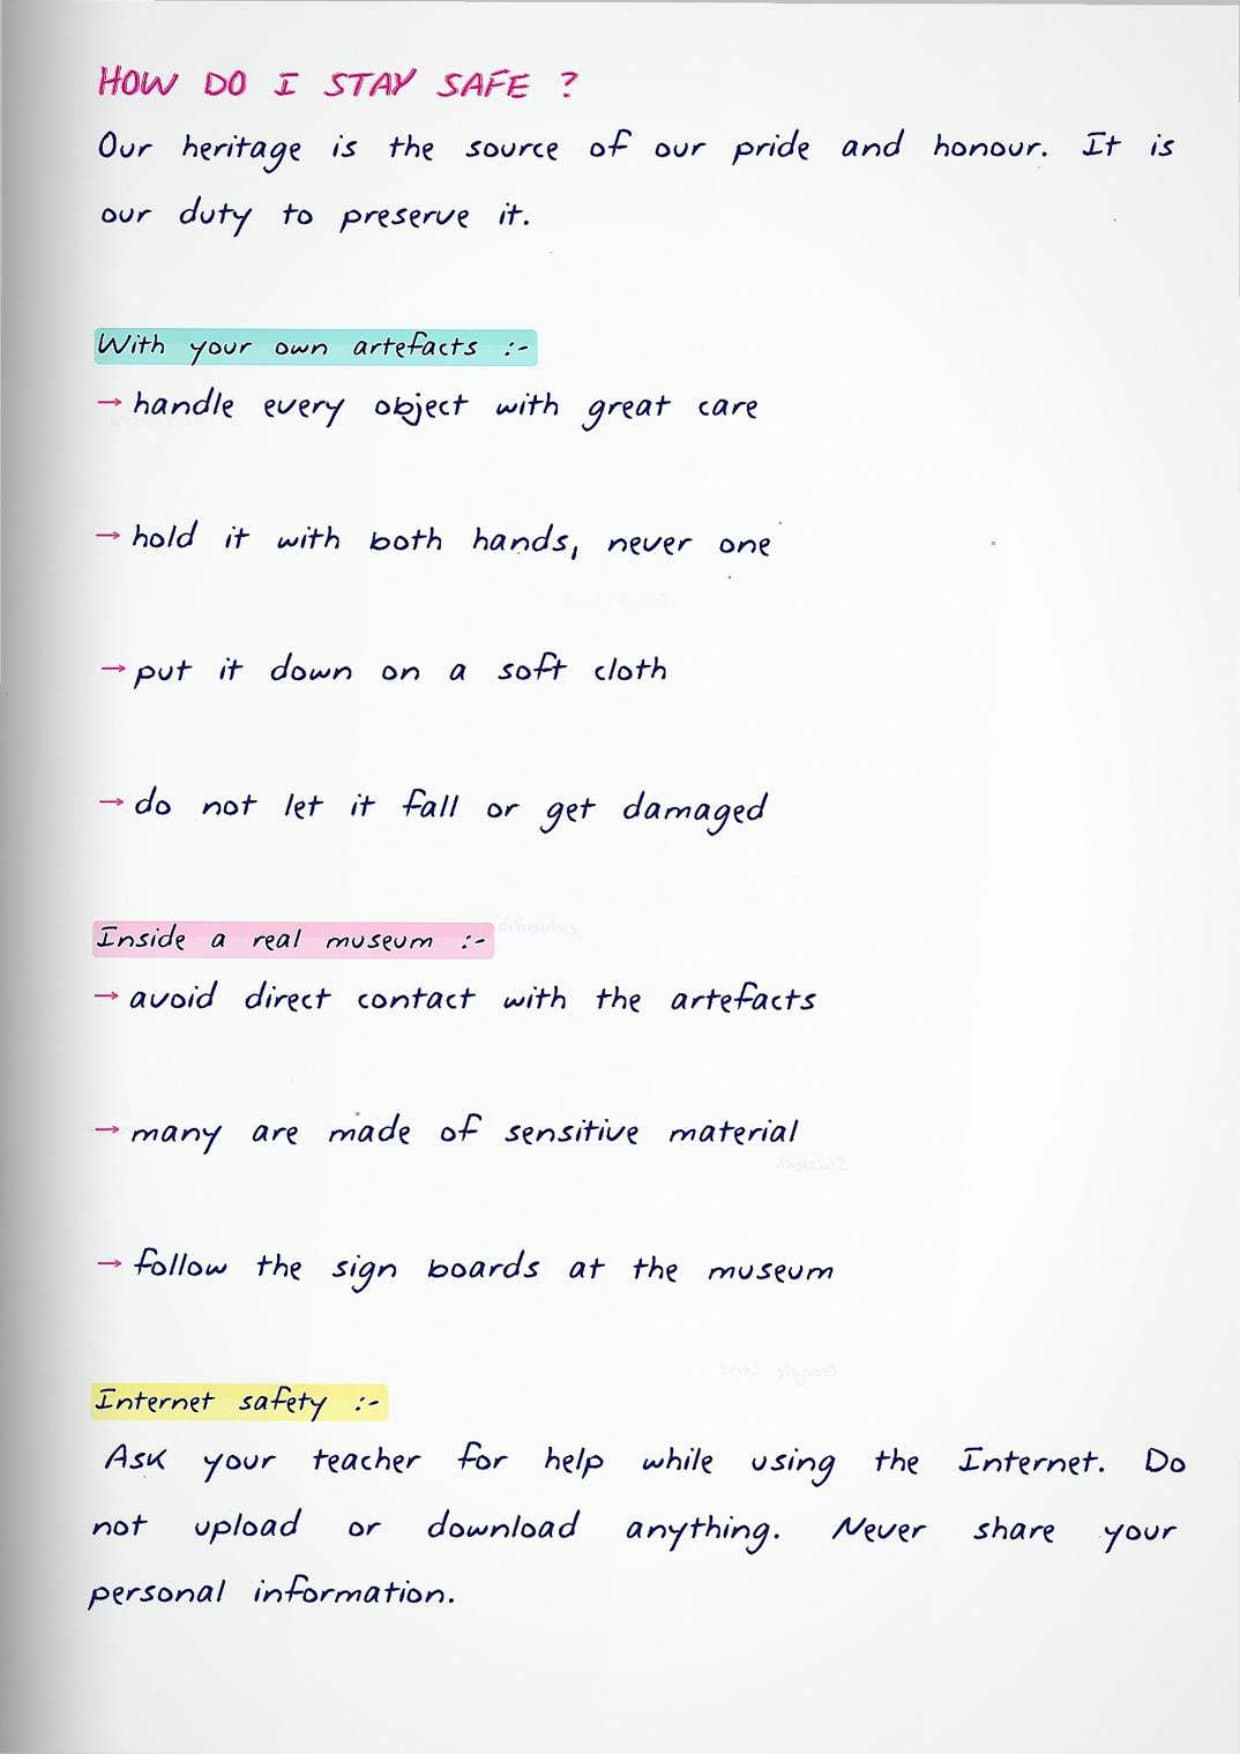
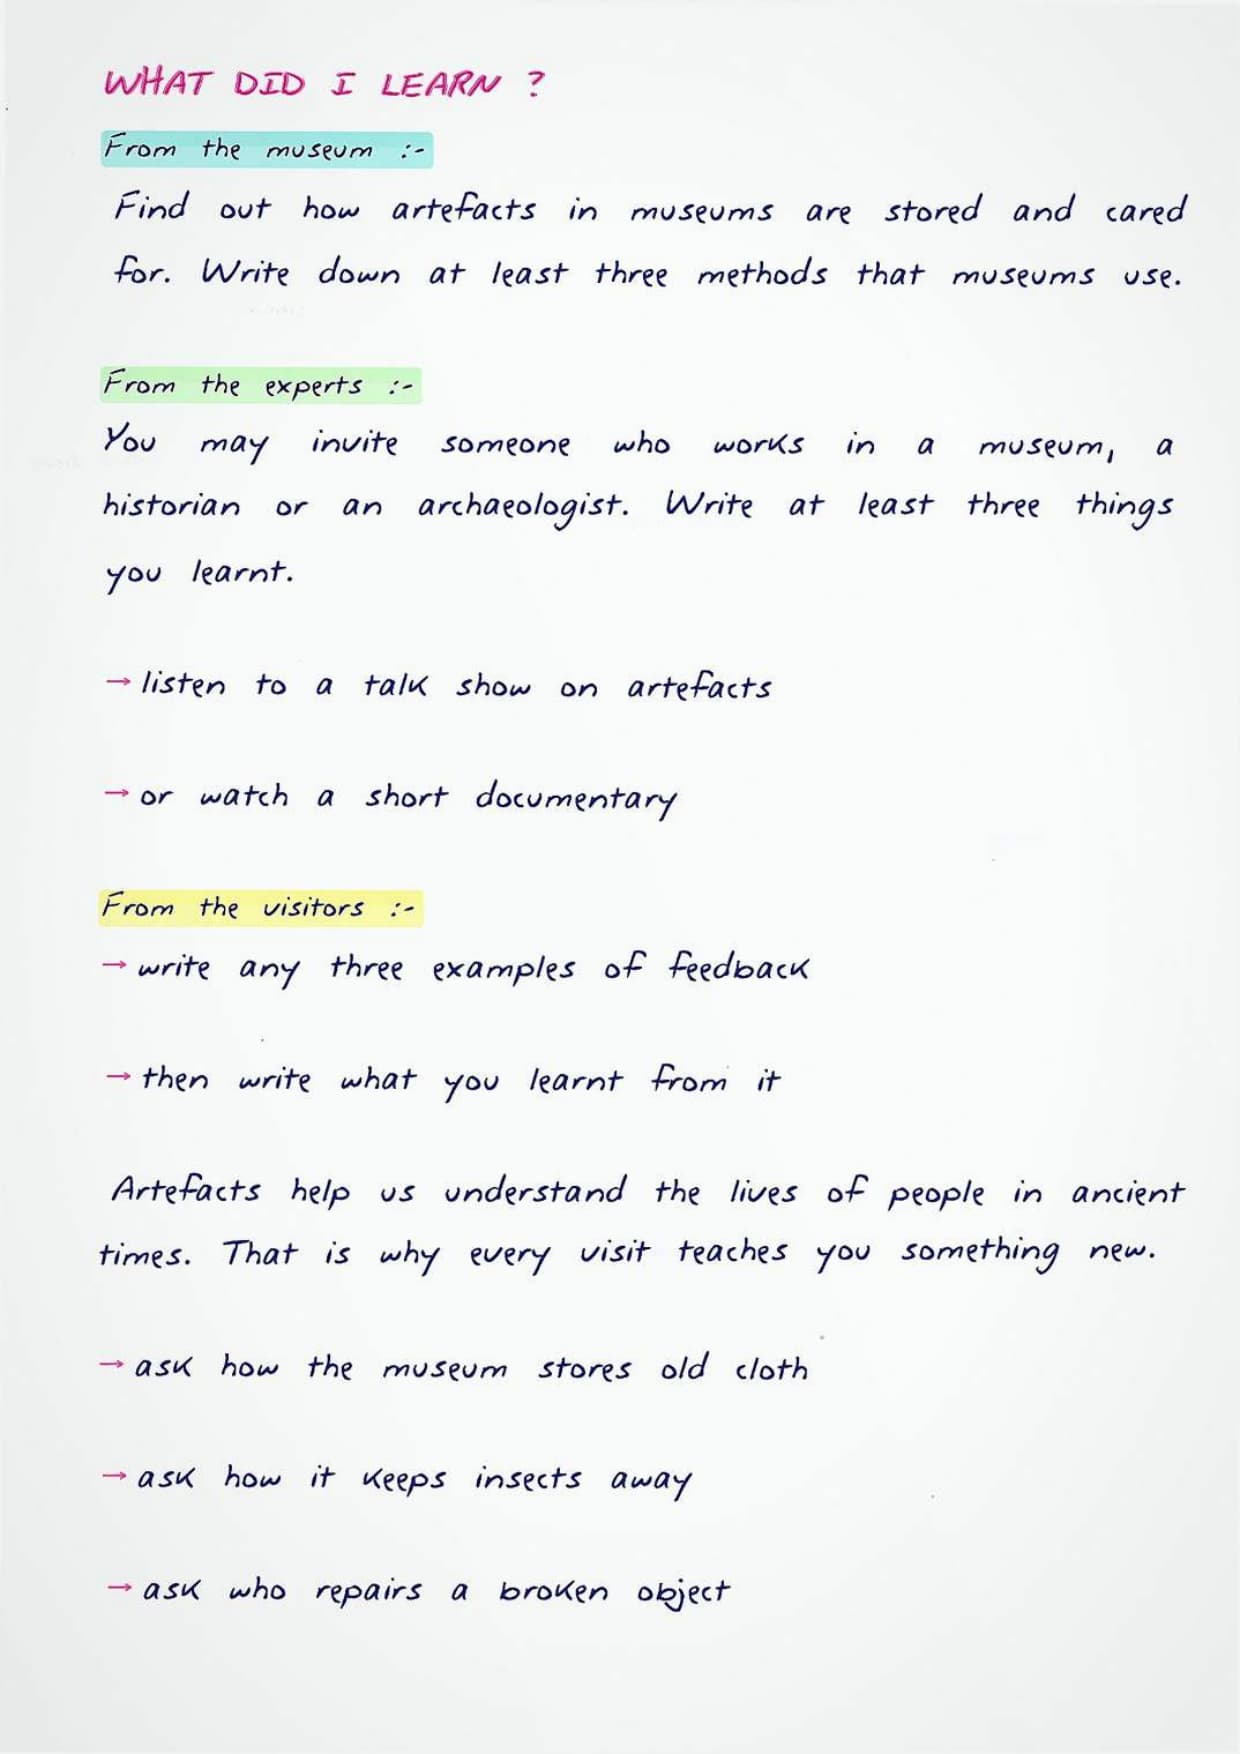
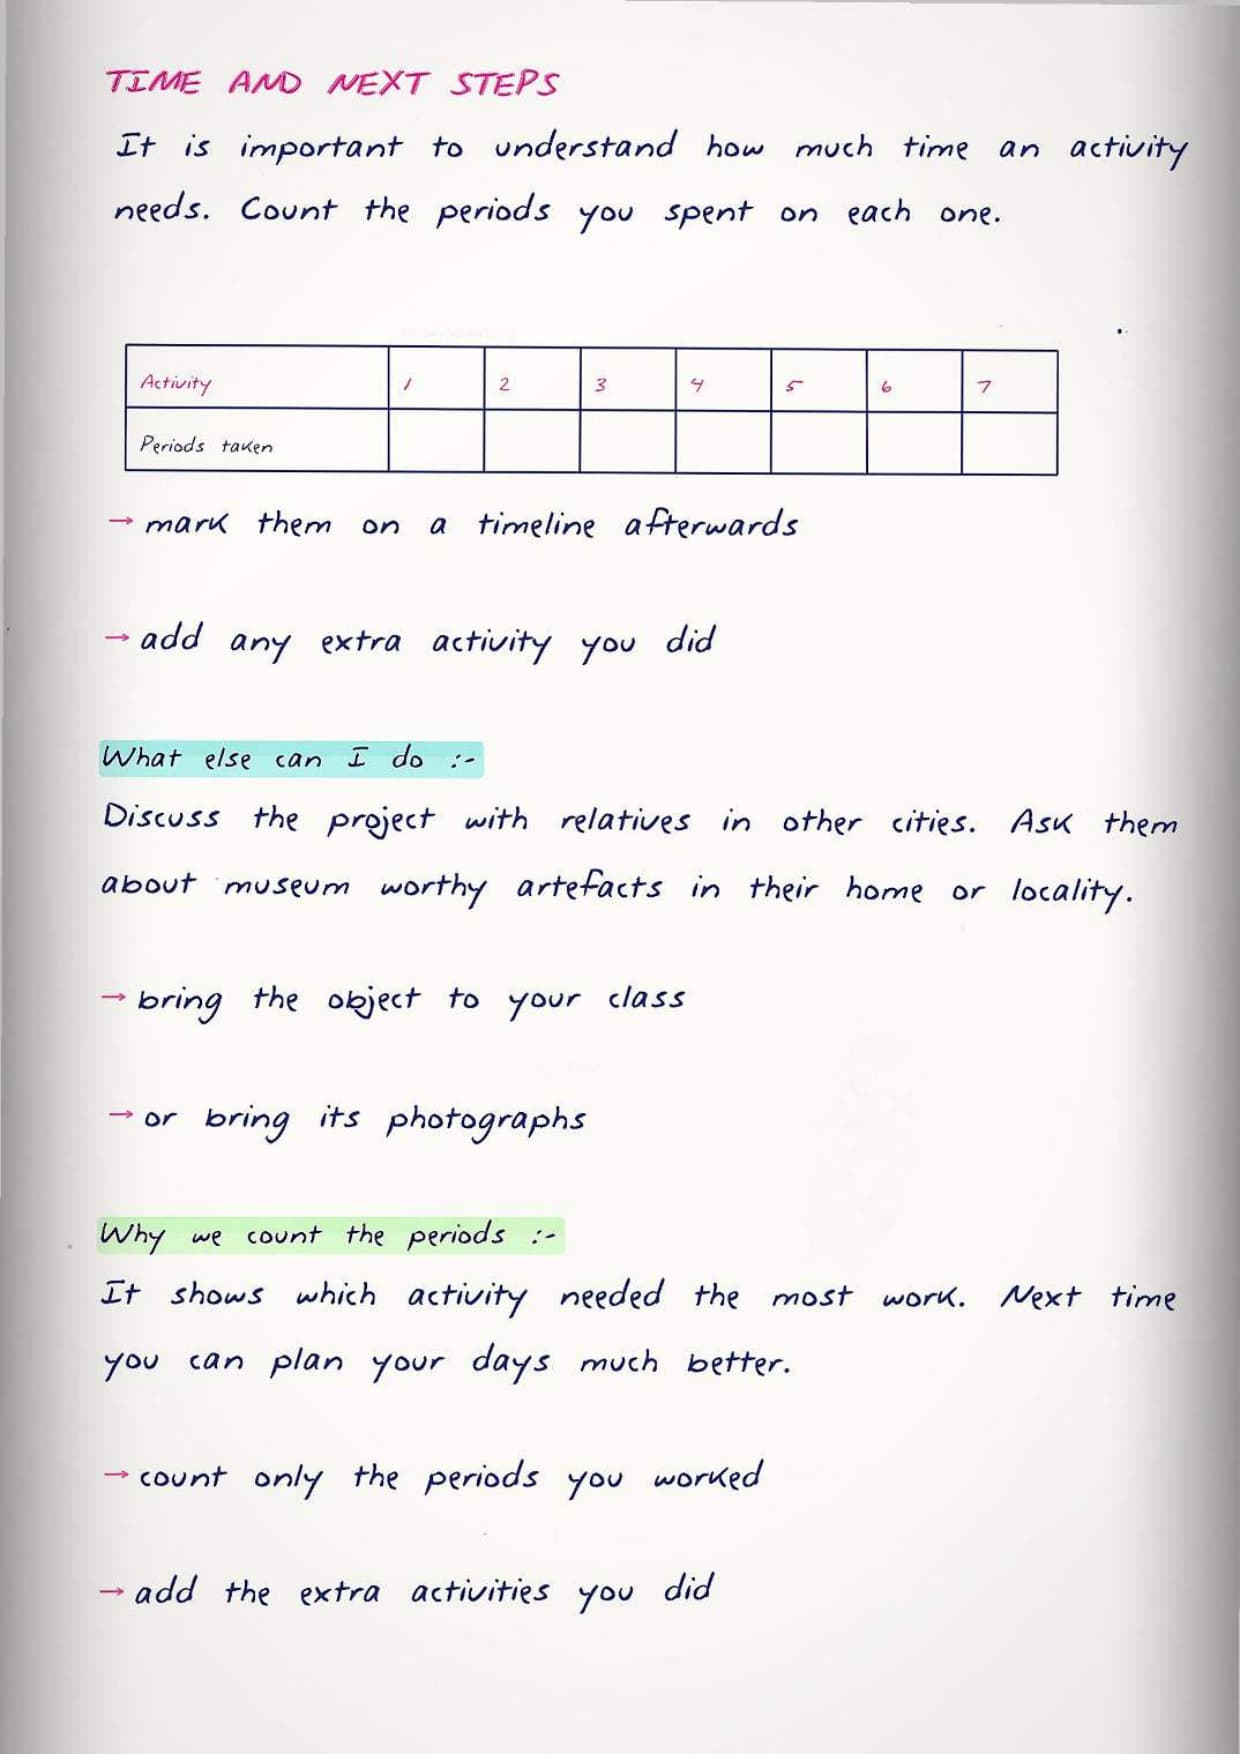
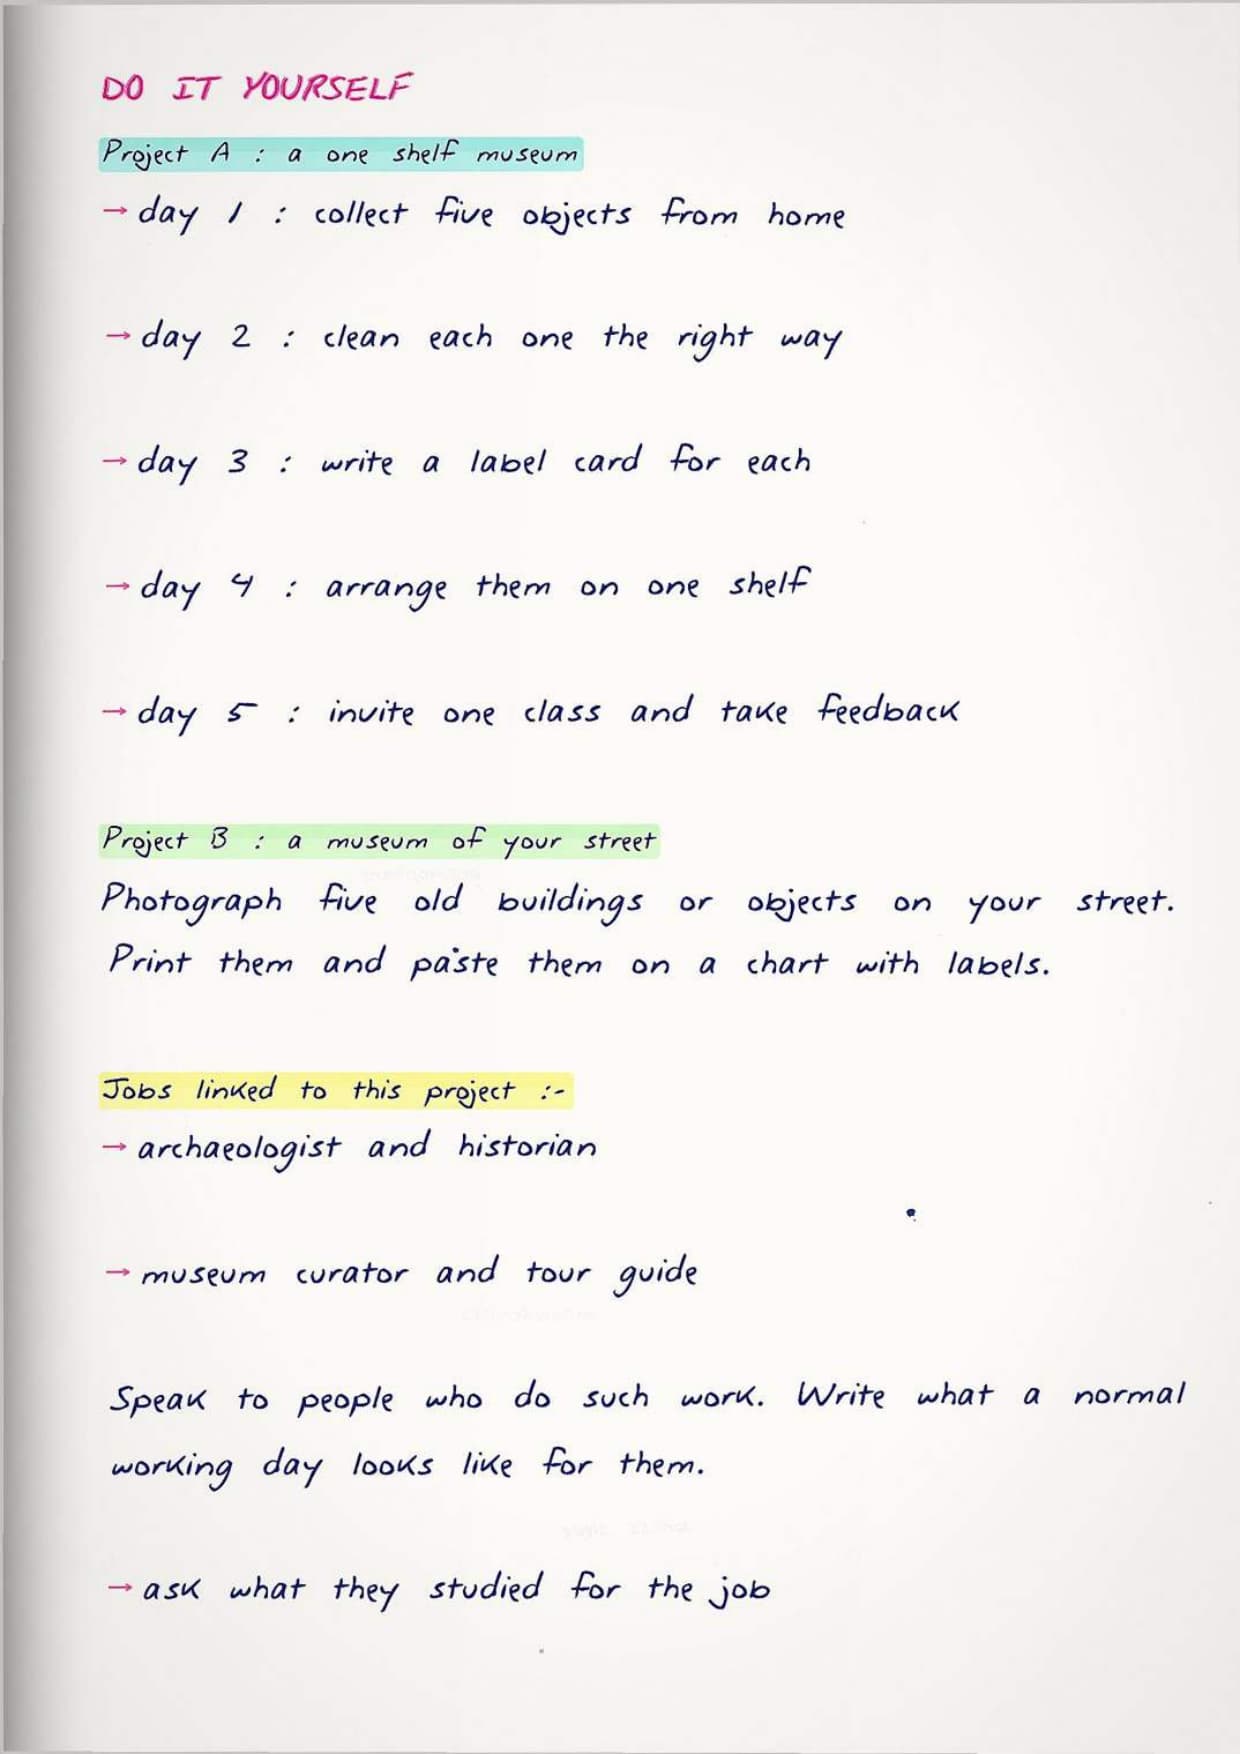
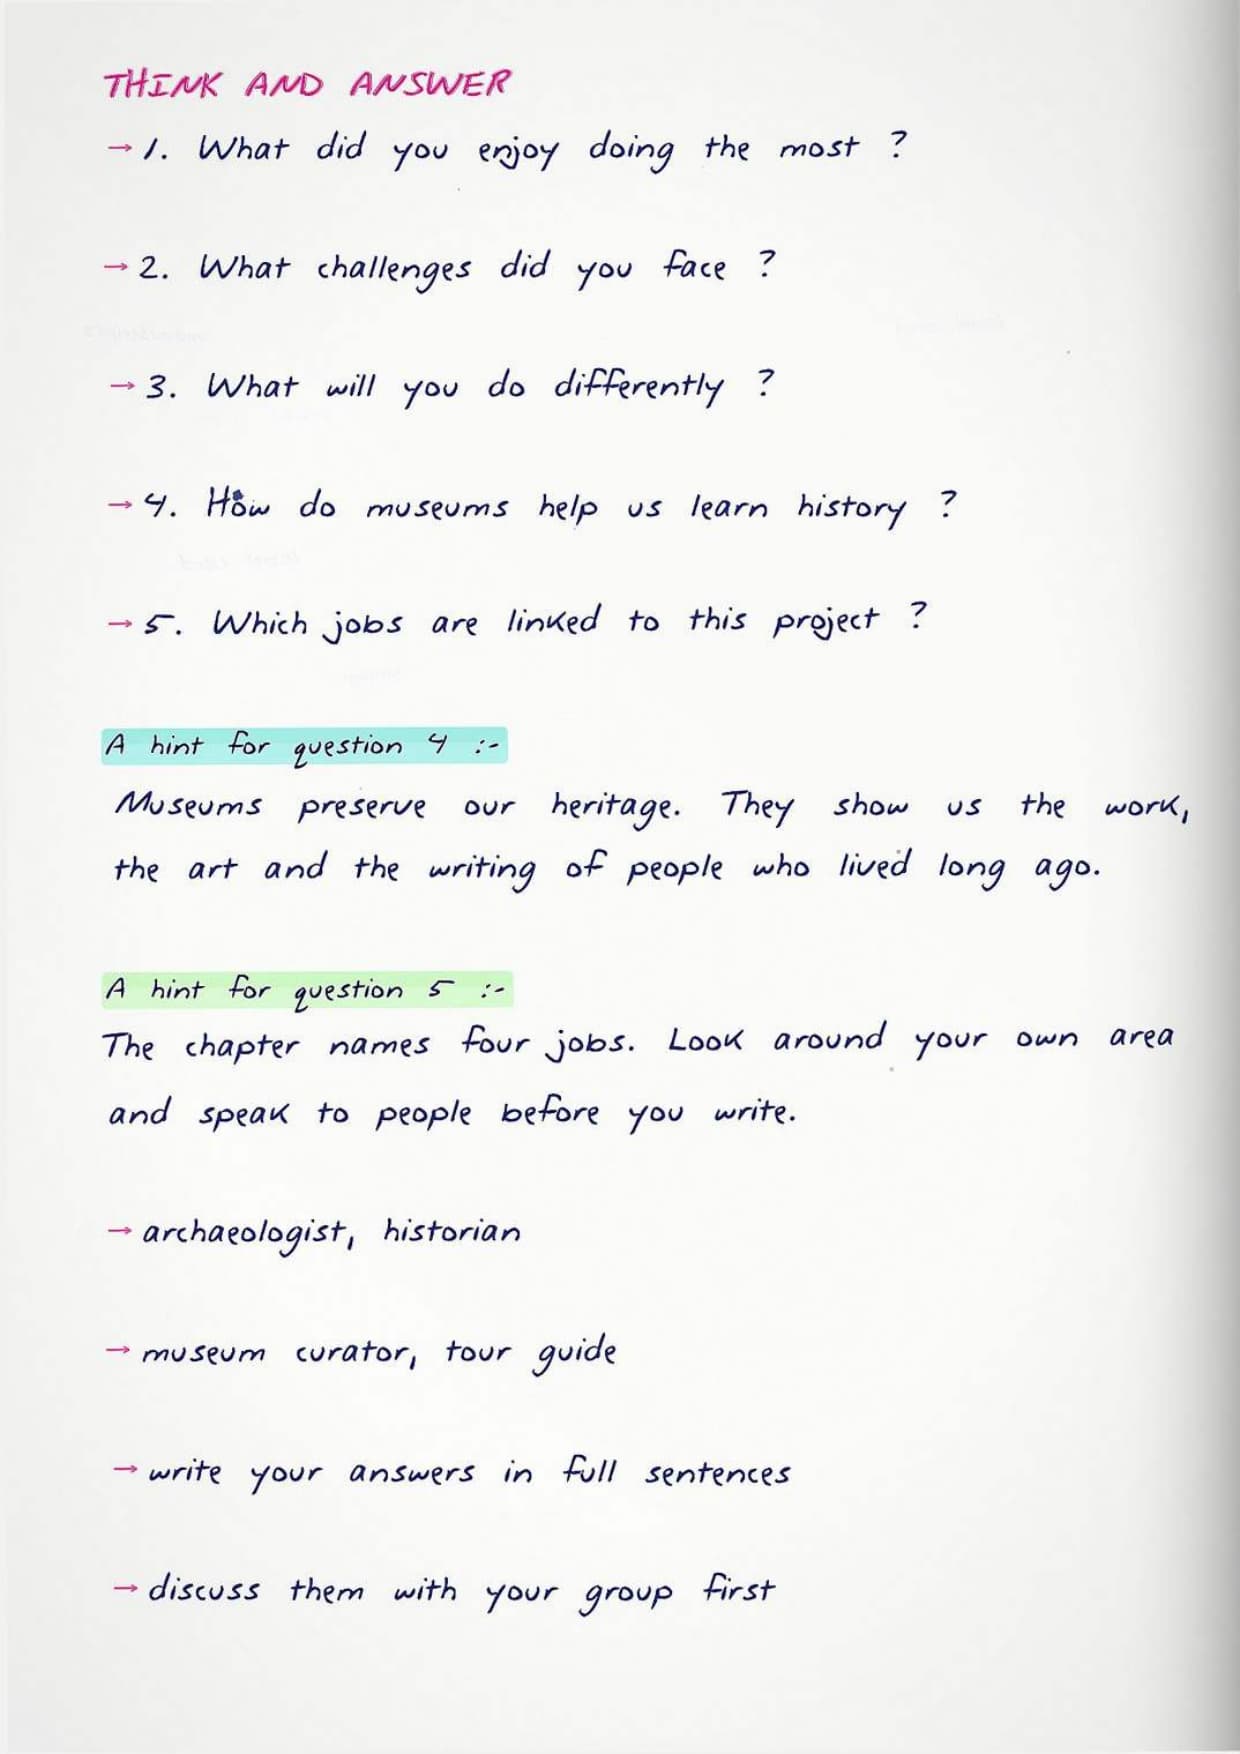
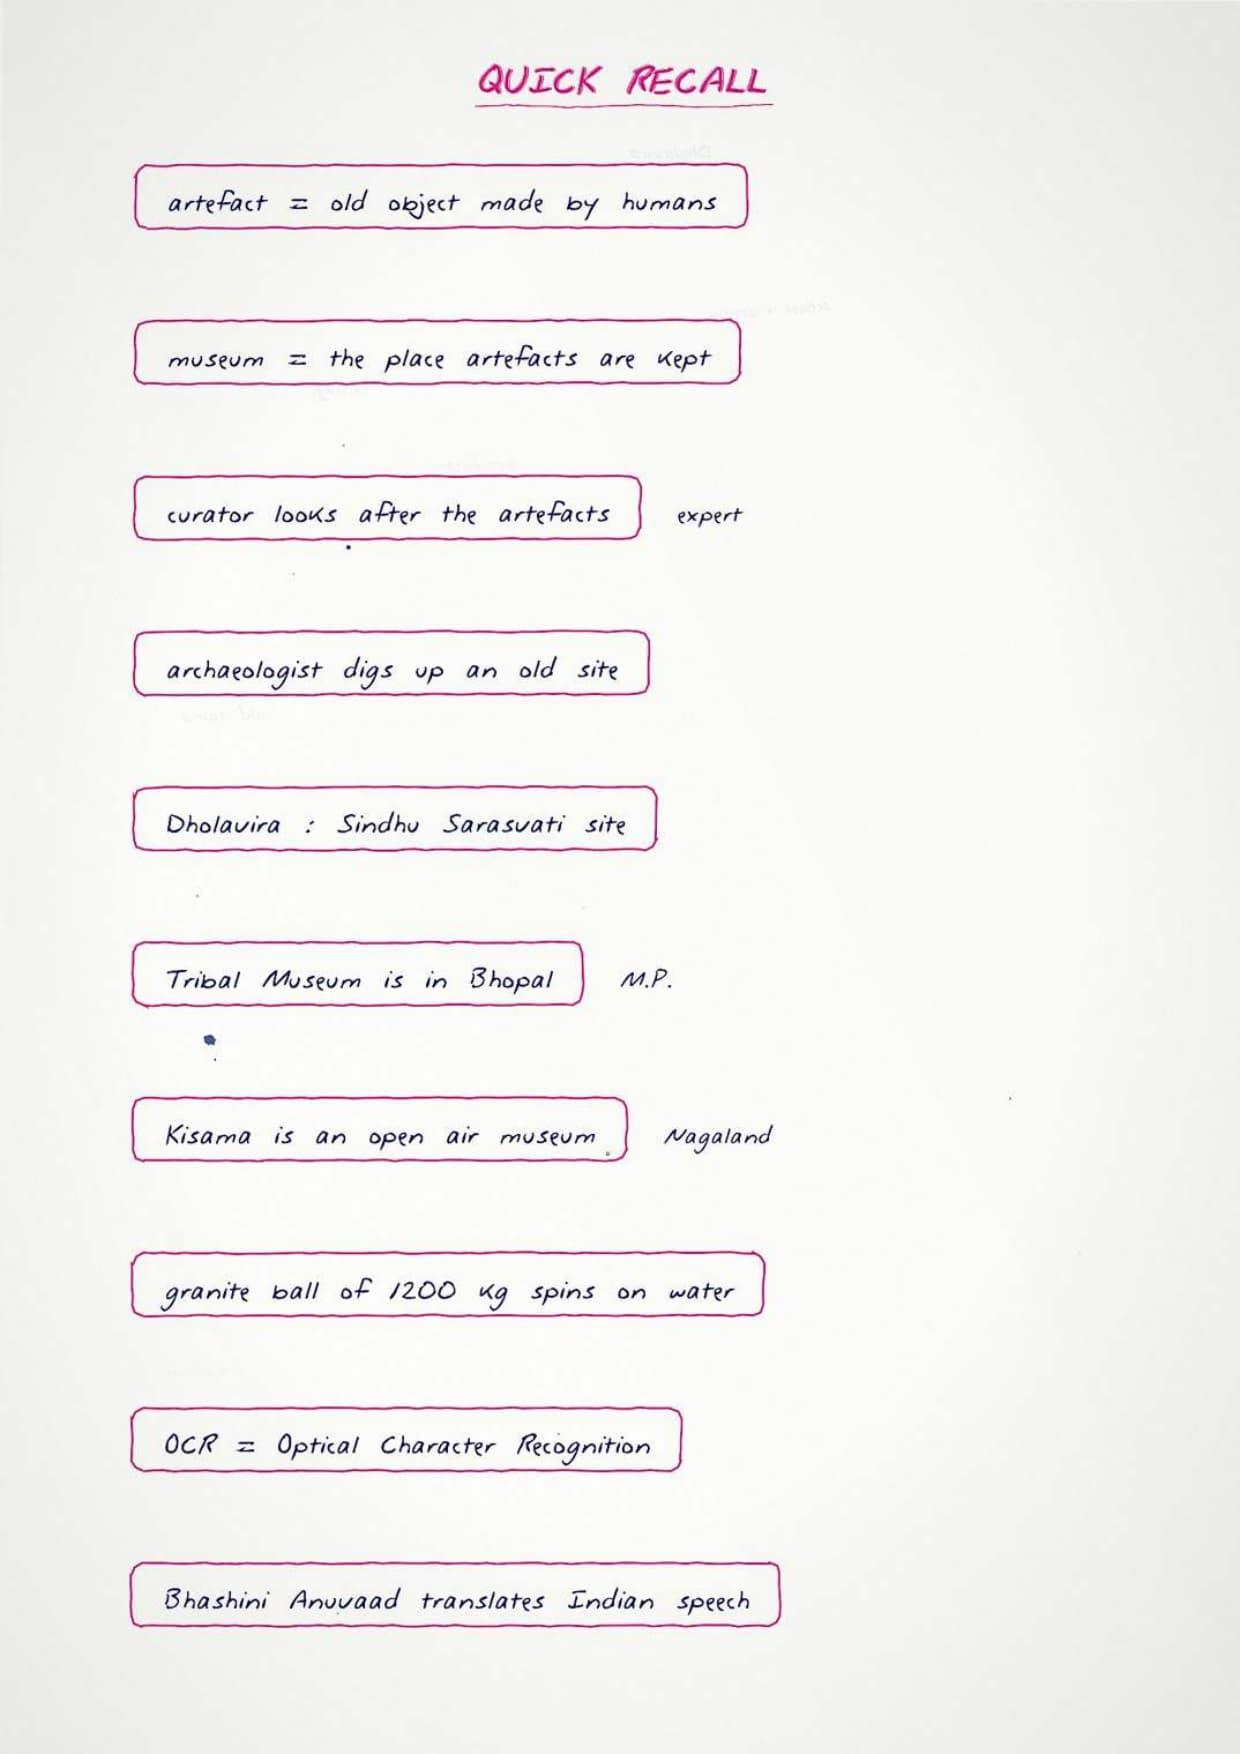
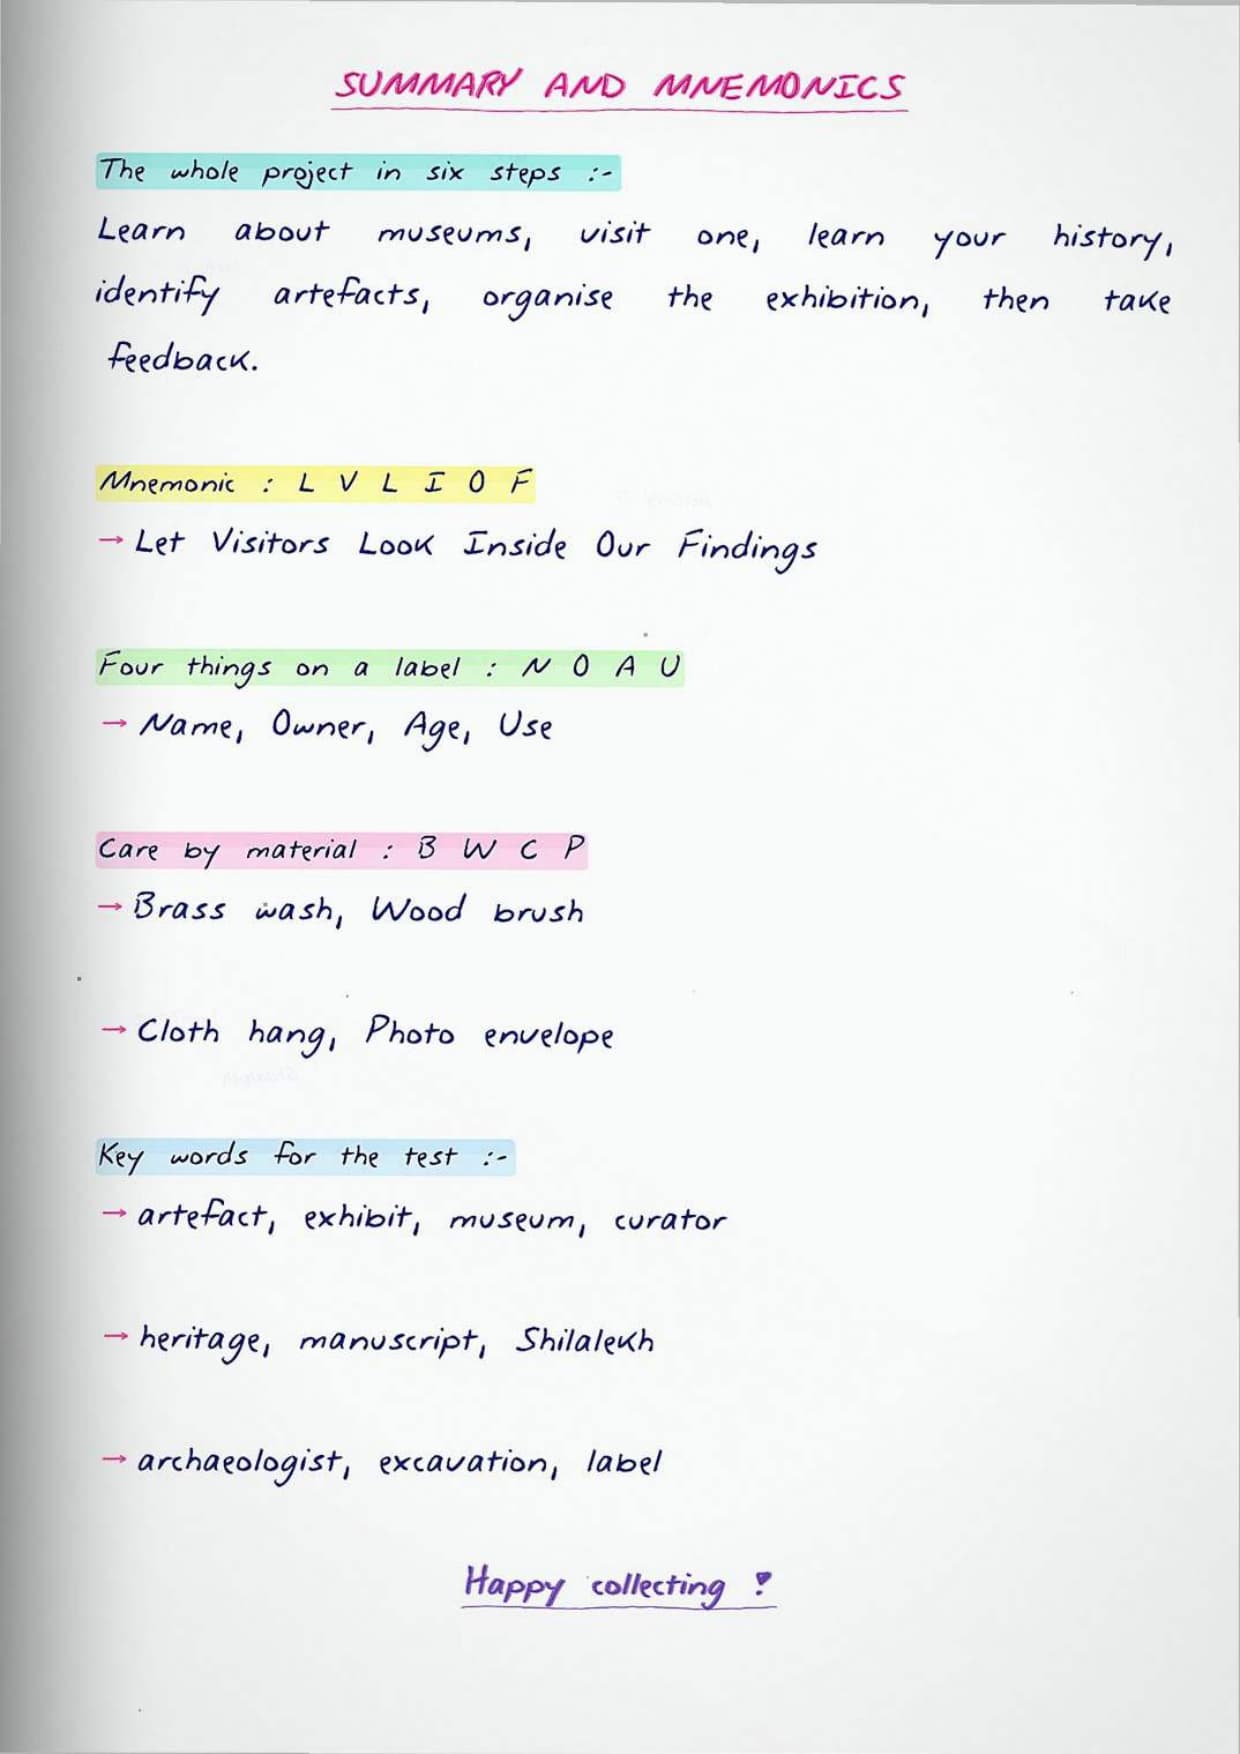
Every page of these School Museum notes is written by hand, checked against the 2026-27 Kaushal Bodh print, and matched to the way a Class 6 project file asks about artefacts, label cards, care of objects and visitor feedback.
Student Feedback: In a Collegedunia survey of 14,260 Class 6 students who finished the School Museum project, 71% of students said writing the short label for each object was the hardest step. Toppers reported a simple fix. Write the label in three lines, then cut it down to one.
Source: 2026-27 Class 6 Vocational Education student survey. Sample of 14,260 students from schools across 19 states.
What the School Museum Project Asks Every Class 6 Student to Do
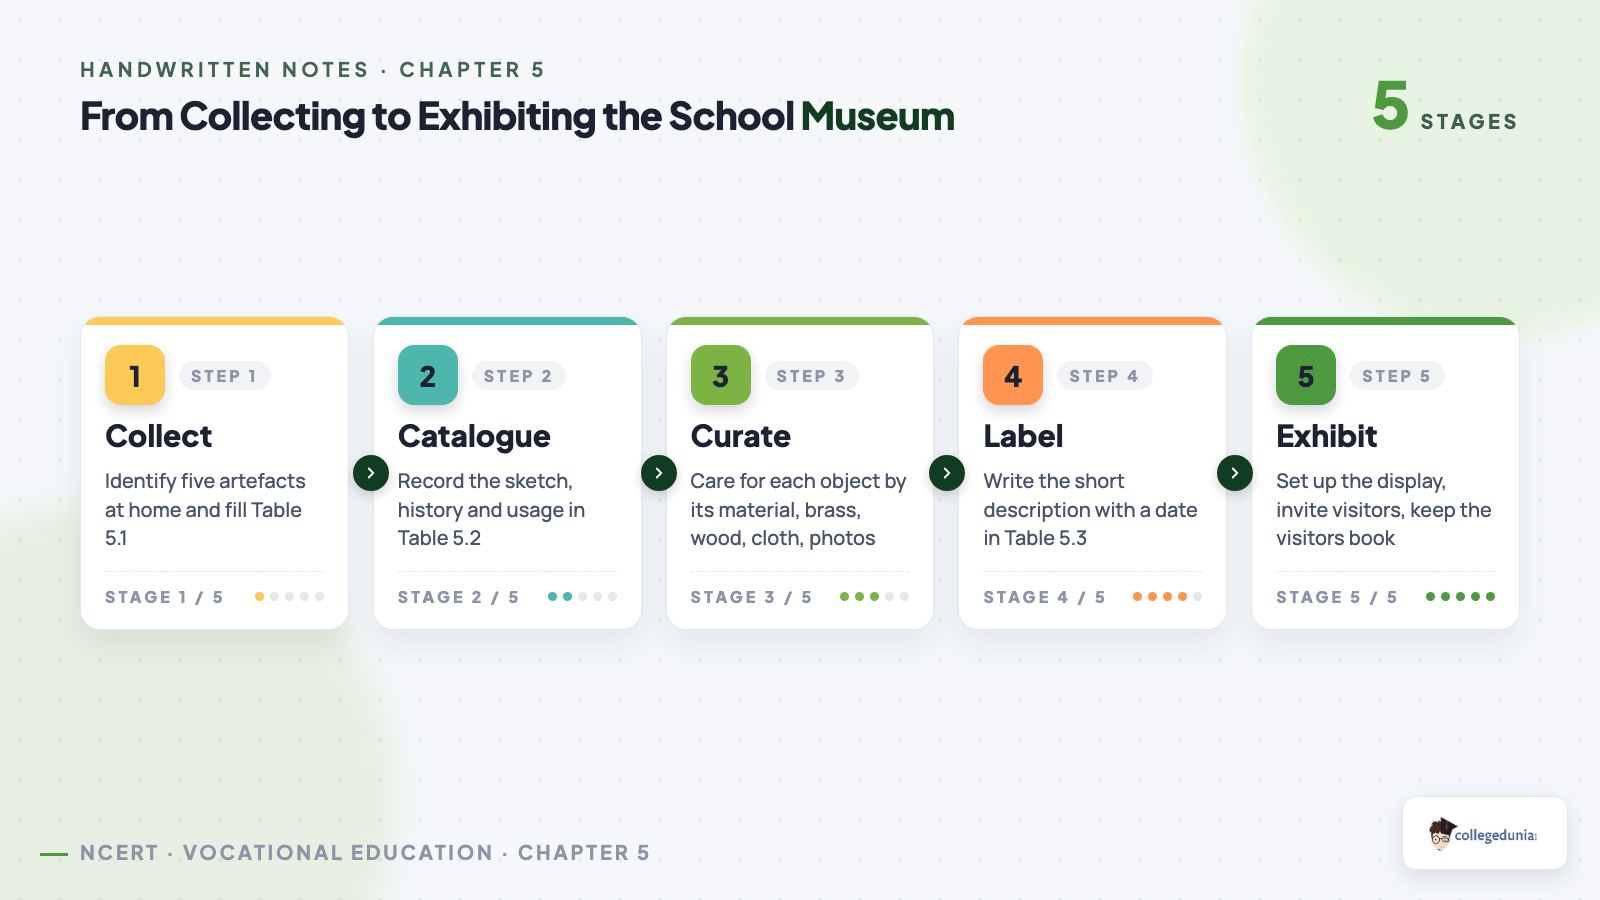
School Museum is Project 5 of the Kaushal Bodh book. It sits in the section called Work in Human Services, where projects are about serving people and working with them. The book says you must take up only one project from this section, so many classes pick this one.
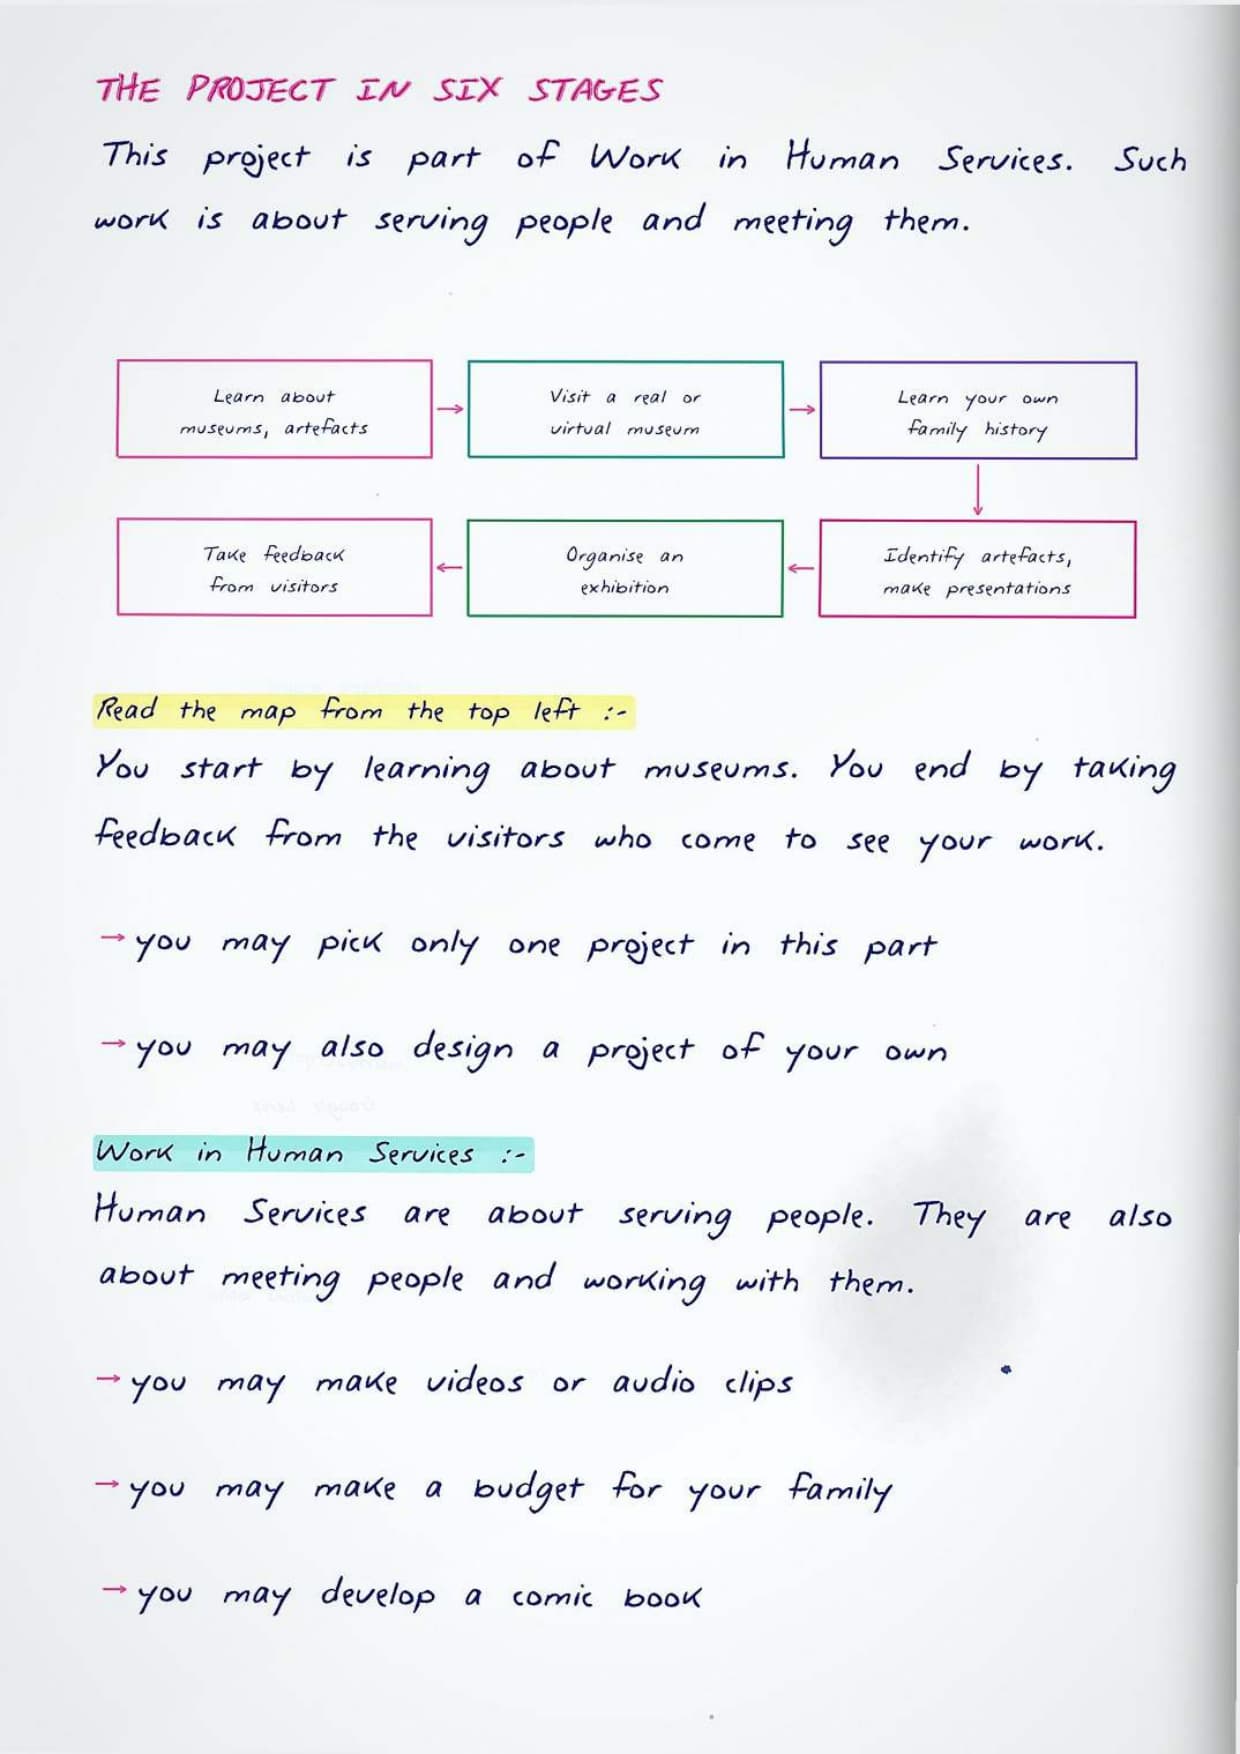
The project has one clear aim. You learn about museums, then you build your own museum by collecting artefacts and describing them. Figure 5.1 shows the six steps of setting up a school museum.
- Learn about museums and artefacts.
- Visit a real museum, or take a tour of a virtual museum.
- Learn your own history, meaning the history of your family and your area.
- Identify artefacts and prepare presentations on them.
- Organise an exhibition of artefacts.
- Take feedback from visitors.
The book also lists four outcomes under "What will I be able to do?". These four lines are the safest answer when a teacher asks what you learnt from the project, so copy them exactly.
- Describe how museums preserve history and traditions.
- Identify artefacts that are of interest to you and your peers.
- Create a school museum with your peers.
- Present the history of artefacts using different forms of presentation.
School Museum Project Read Along from NCERT
Source: NCERT OFFICIAL on YouTube
Artefacts, Museums and the Words the School Museum Chapter Defines
The whole chapter rests on two words. Learn both definitions in the book's own wording, because a one-mark question usually asks for one of them.
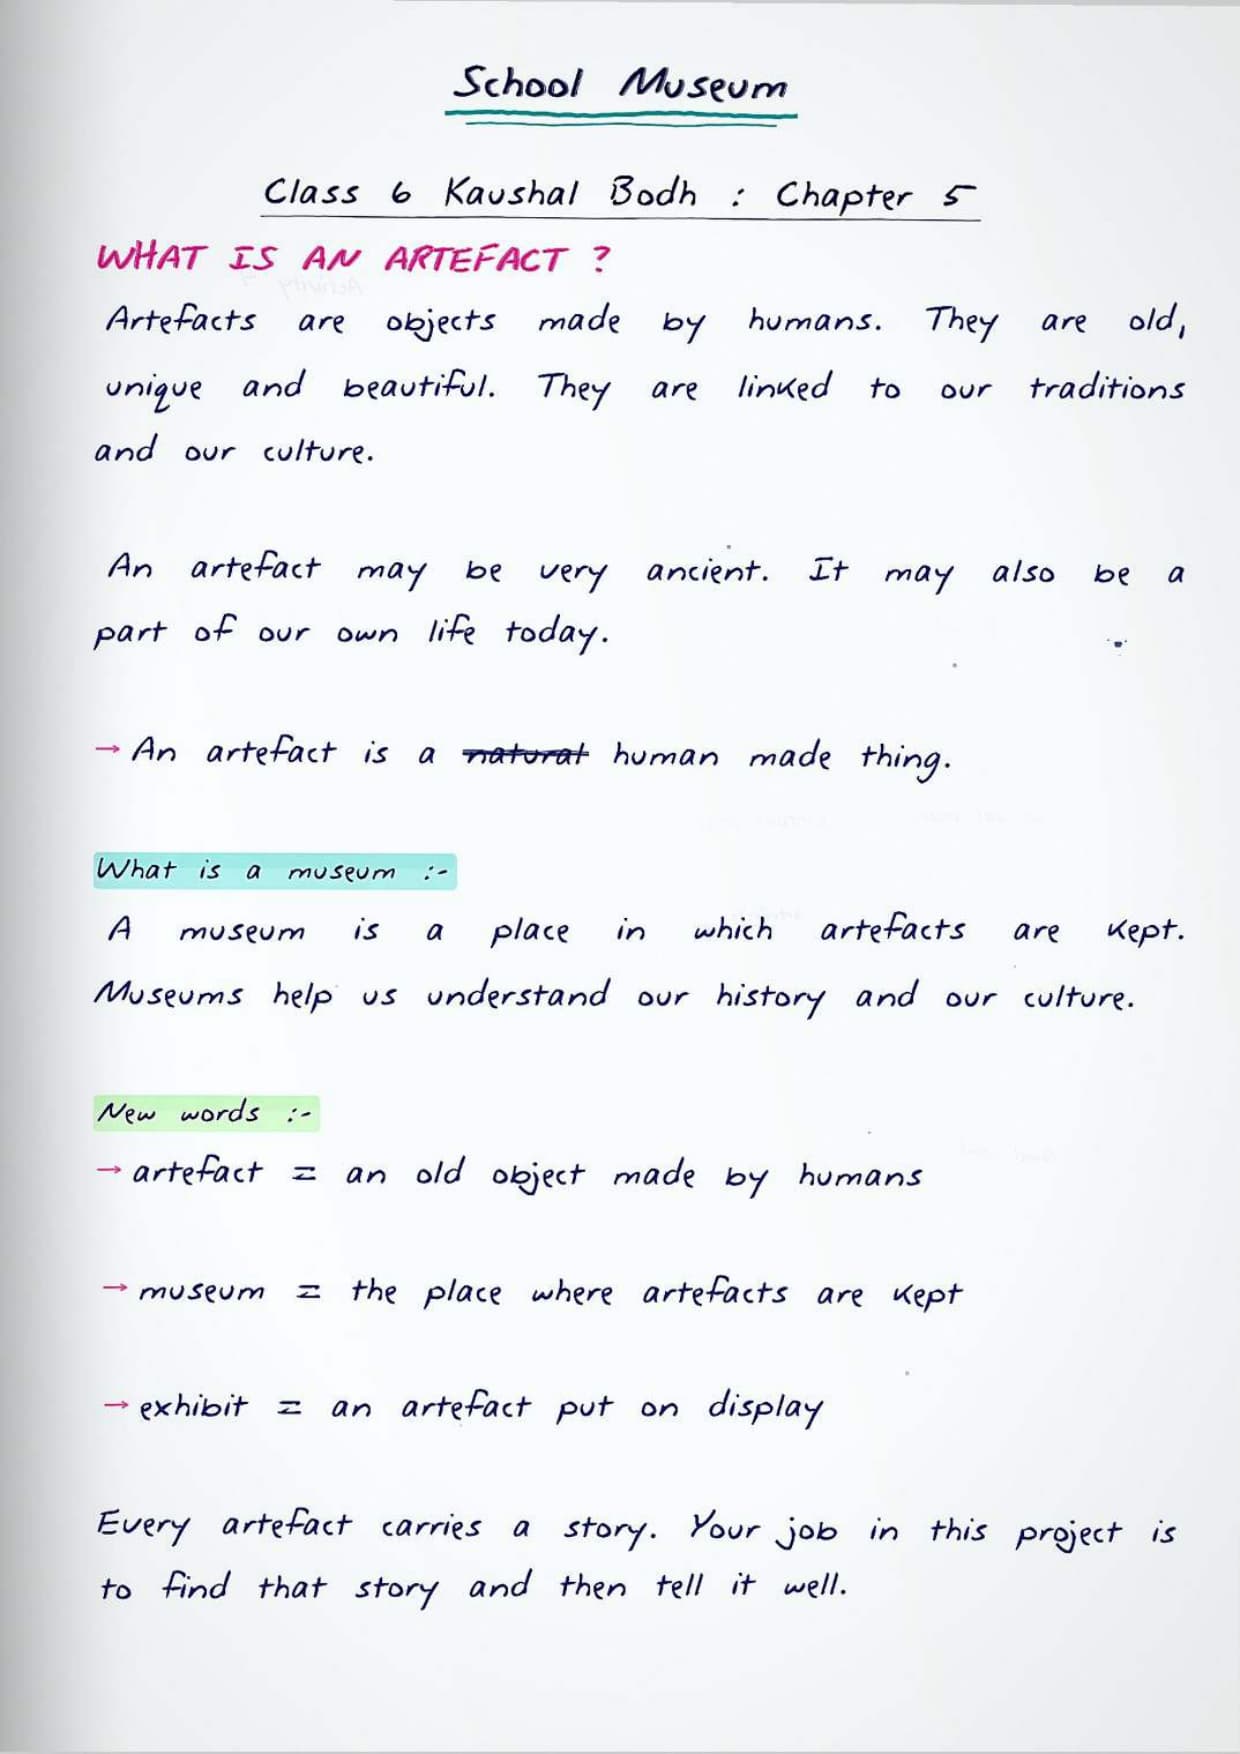
An artefact is an object made by humans that is old, unique and beautiful, and related to our traditions and culture. Artefacts can be ancient, or they can be part of our lives today. A museum is a place in which artefacts are kept.
| Term | What the book says |
|---|---|
| Artefact | An object made by humans that is old, unique and beautiful, and related to our traditions and culture |
| Museum | A place in which artefacts are kept, so we can understand our history and culture |
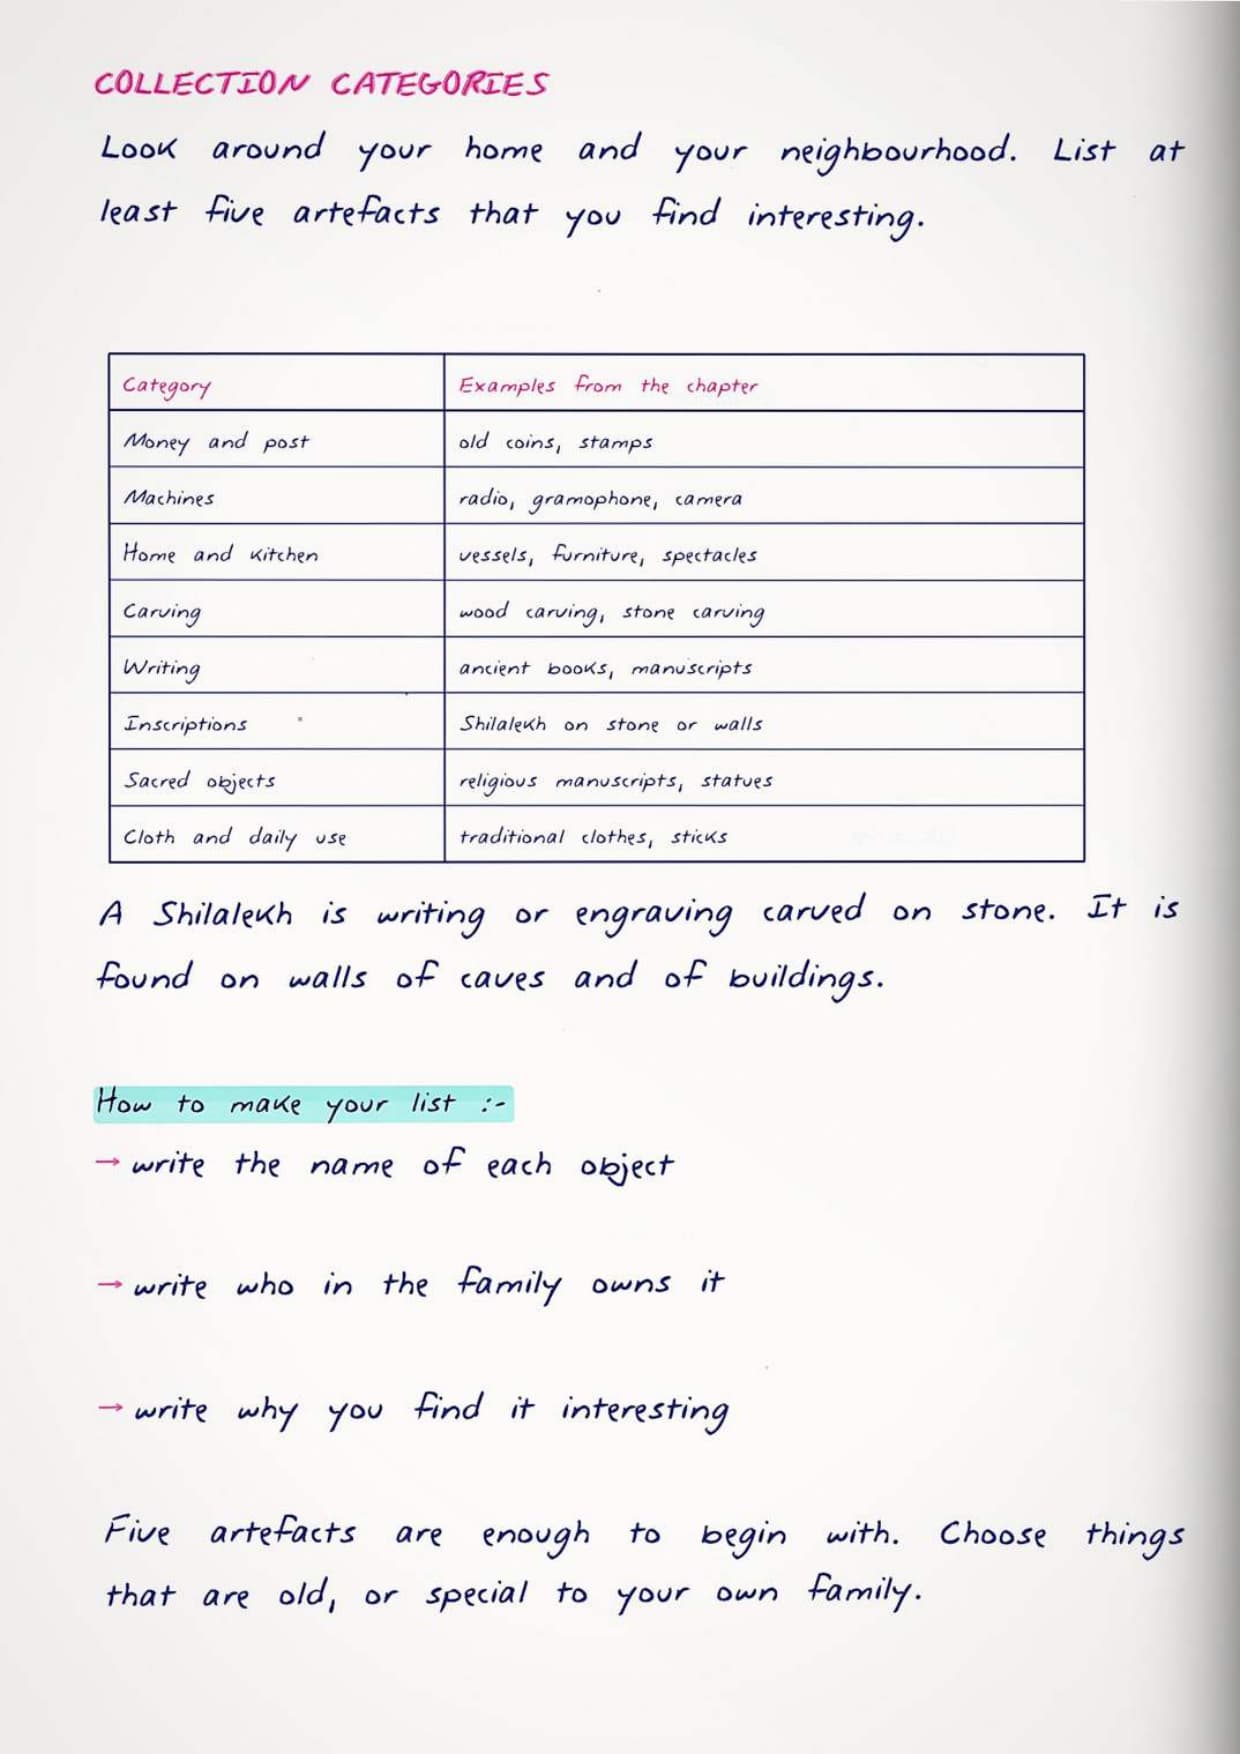
| Shilalekh | Inscriptions, that is writing or engraving, carved on stone or on the walls of caves or buildings |
| Archaeological site | A place where evidence of ancient human societies is preserved, and which archaeologists excavate |
| Curator | The person who selects and looks after the artefacts in a museum |
| Virtual exhibition | A museum display you can see on a website instead of visiting in person |
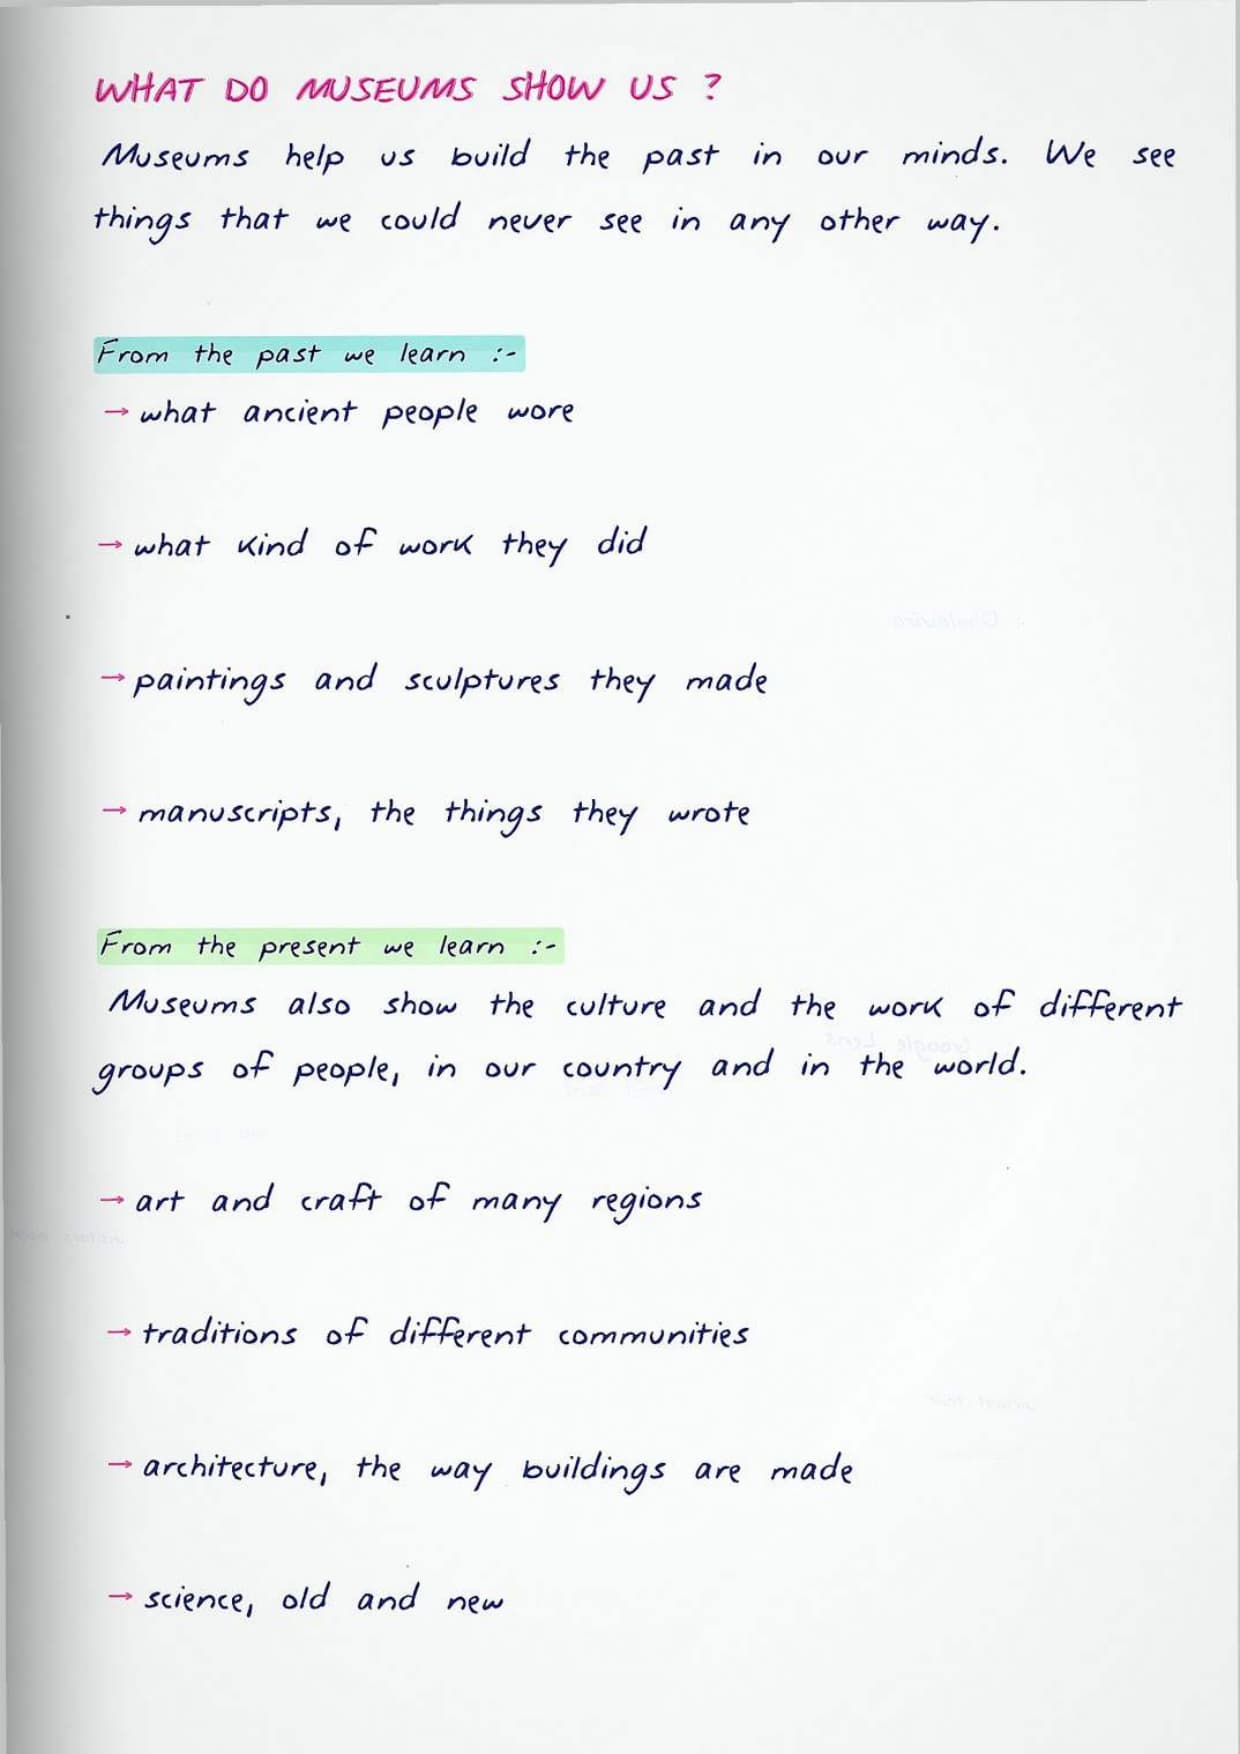
Museums show us what ancient people wore, what work they did, what artwork they created such as paintings and sculptures, and what they wrote in manuscripts. They help us build the past in our minds and see things we may never be able to see otherwise.
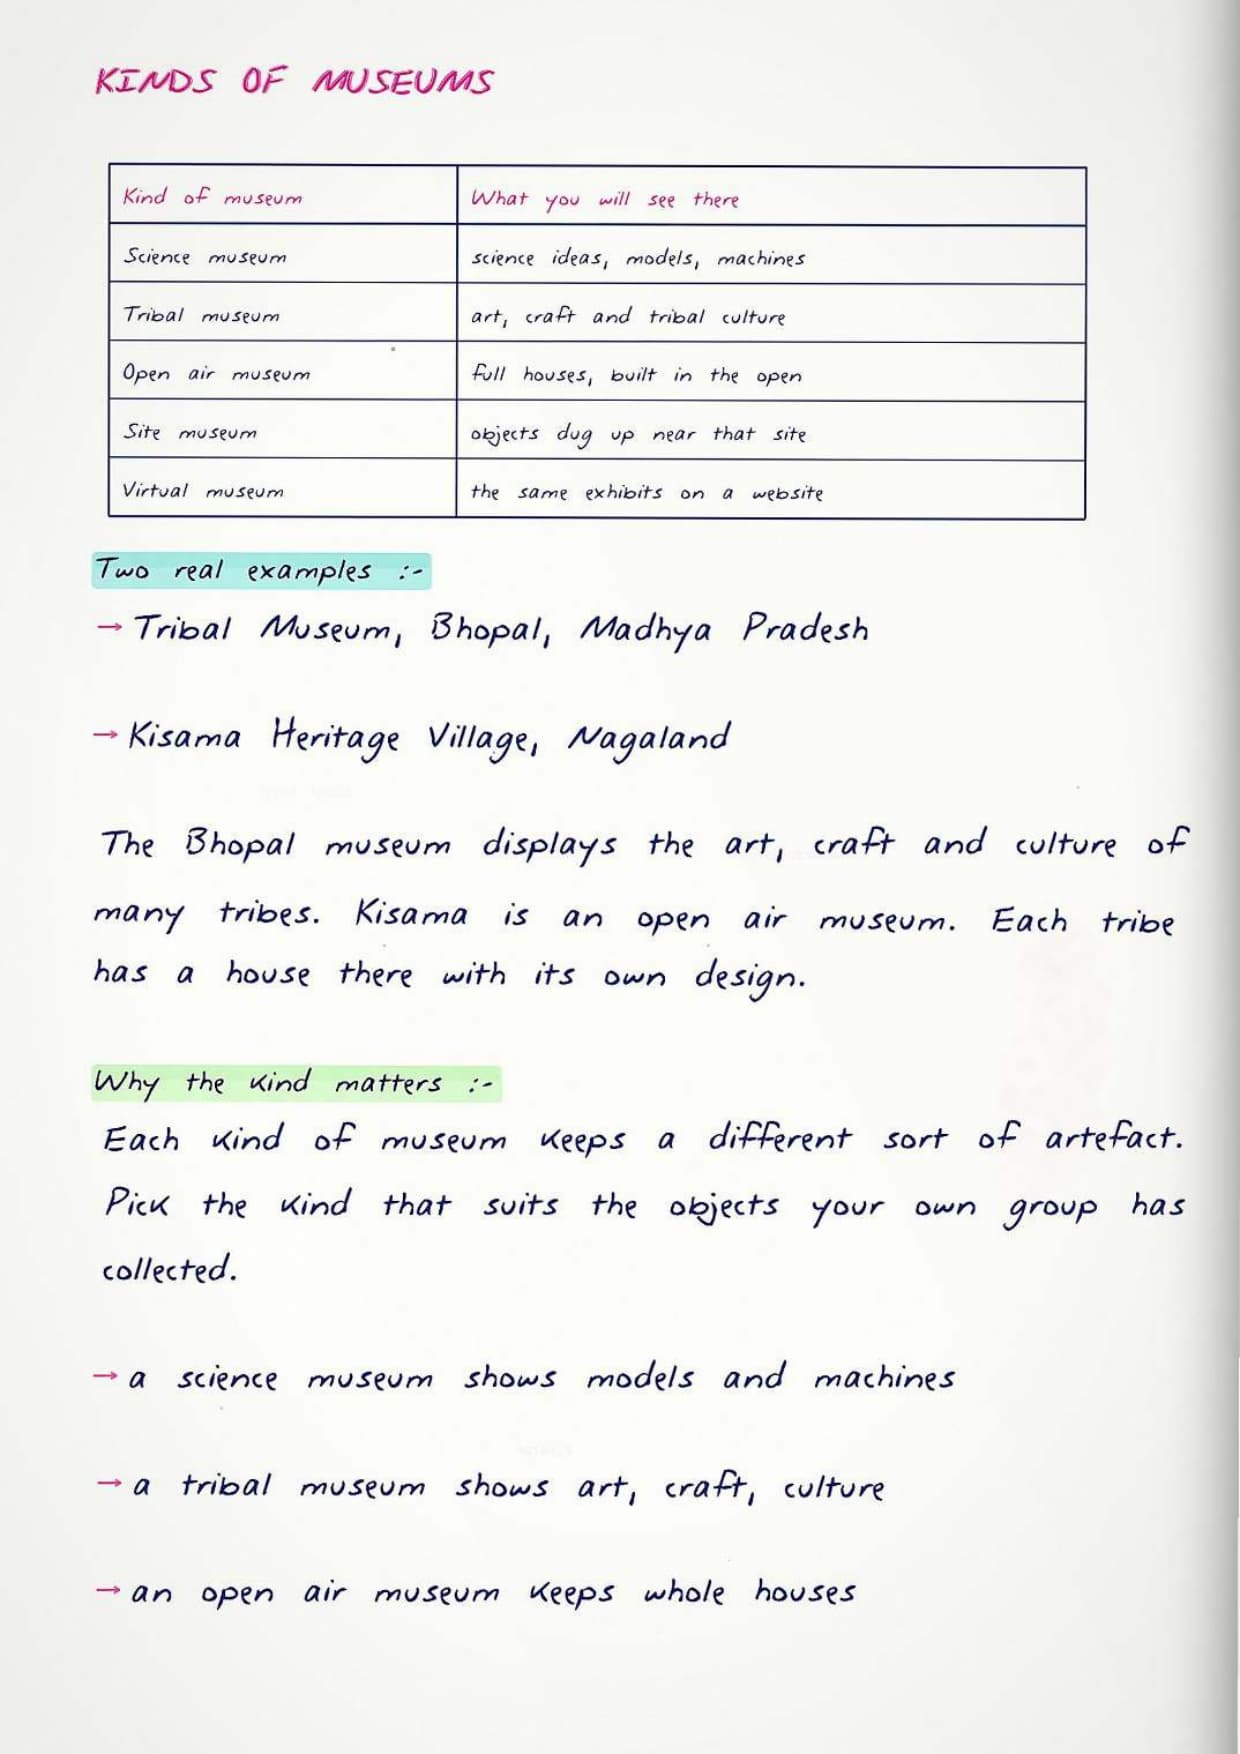
The book names real examples. The Tribal Museum of Madhya Pradesh in Bhopal displays the traditional art, craft and culture of various tribes. The open air museum at Kisama Heritage Village in Nagaland has houses of different tribes, each with its own design.
National Science Centres across India show things that no longer exist, such as dinosaurs, and also things we expect in the future. One curious exhibit is a 1200 kg granite ball that spins on water at the National Science Centre in Delhi. Some museums also preserve and exhibit animals.
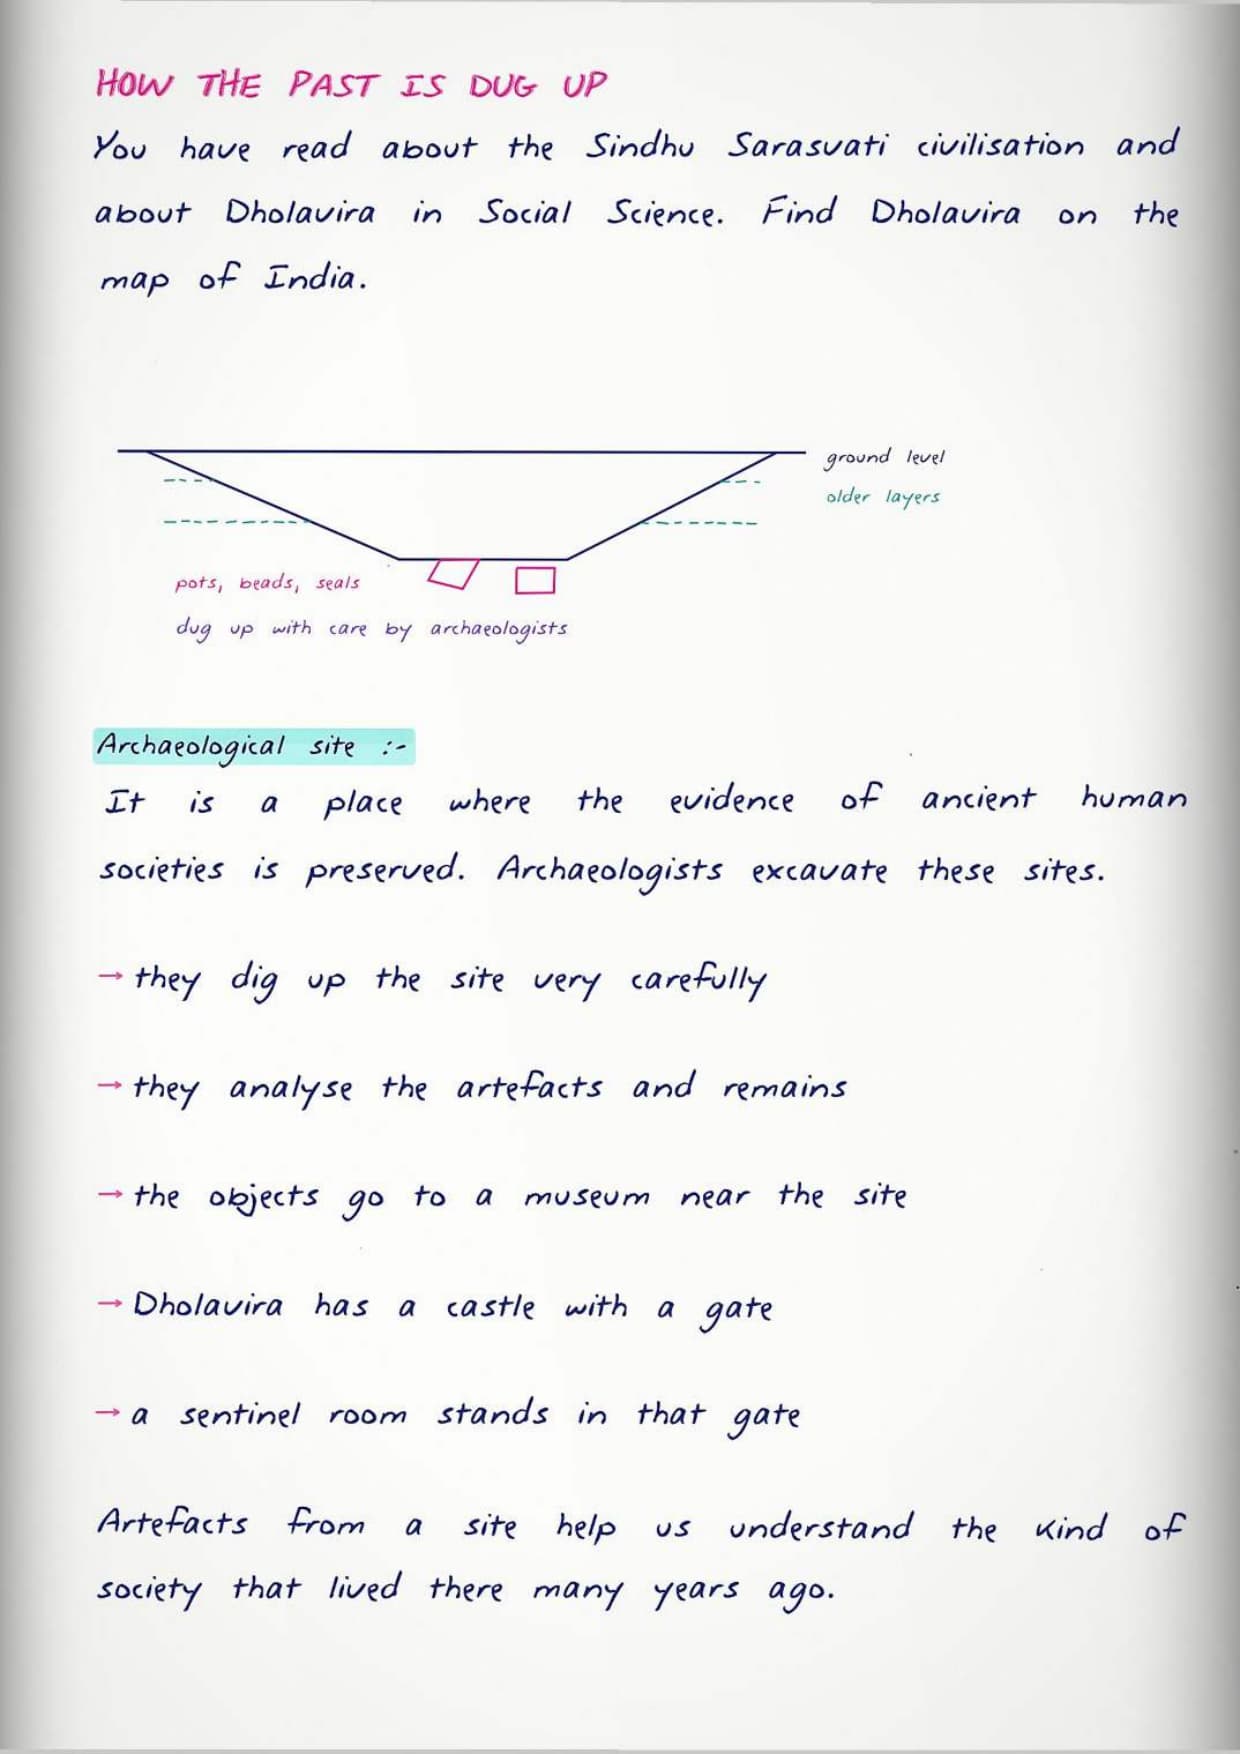
The chapter links back to Social Science through the Sindhu Sarasvati civilisation and Dholavira, which you are asked to locate on the map of India. Archaeologists carefully dig up such sites and study the artefacts and remains they uncover. The objects found during excavation are kept in a museum located near the site.
Materials, Tools and Safety Rules for the School Museum Project
The requirement list is short and easy to score on. Learn it as two groups, one for the objects and one for the display work.
- Locally collected artefacts that are old, beautiful or important to your family, and photographs of these artefacts.
- Storage containers and display boxes for keeping the objects safe.
- A cleaning brush and cloth.
- Chart paper or cards for making labels.
- Markers, sketch pens, drawing pencils, coloured pens and scissors.
- Equipment and materials for presentation, including a computer and a projector.
Safety in this project is about protecting the objects as much as protecting yourself. The book gives two rules and one internet warning.
- Our heritage is the source of our pride and honour, and it is our duty to preserve it. Handle artefacts with care so they are not damaged.
- During a museum visit, avoid direct contact with the artefacts, because they may be made of sensitive material. Follow all instructions on the sign boards.
The internet safety note has three parts. Ask your teacher for help while using the internet, do not upload or download anything, and never share personal information anywhere.
Activity 1: Visiting a Museum and Taking a Virtual Museum Tour
Activity 1 is the starting point of the project. A museum visit shows you how a real display is planned, and that makes your own school museum easier to set up. If you cannot visit one, the book gives you two other ways.
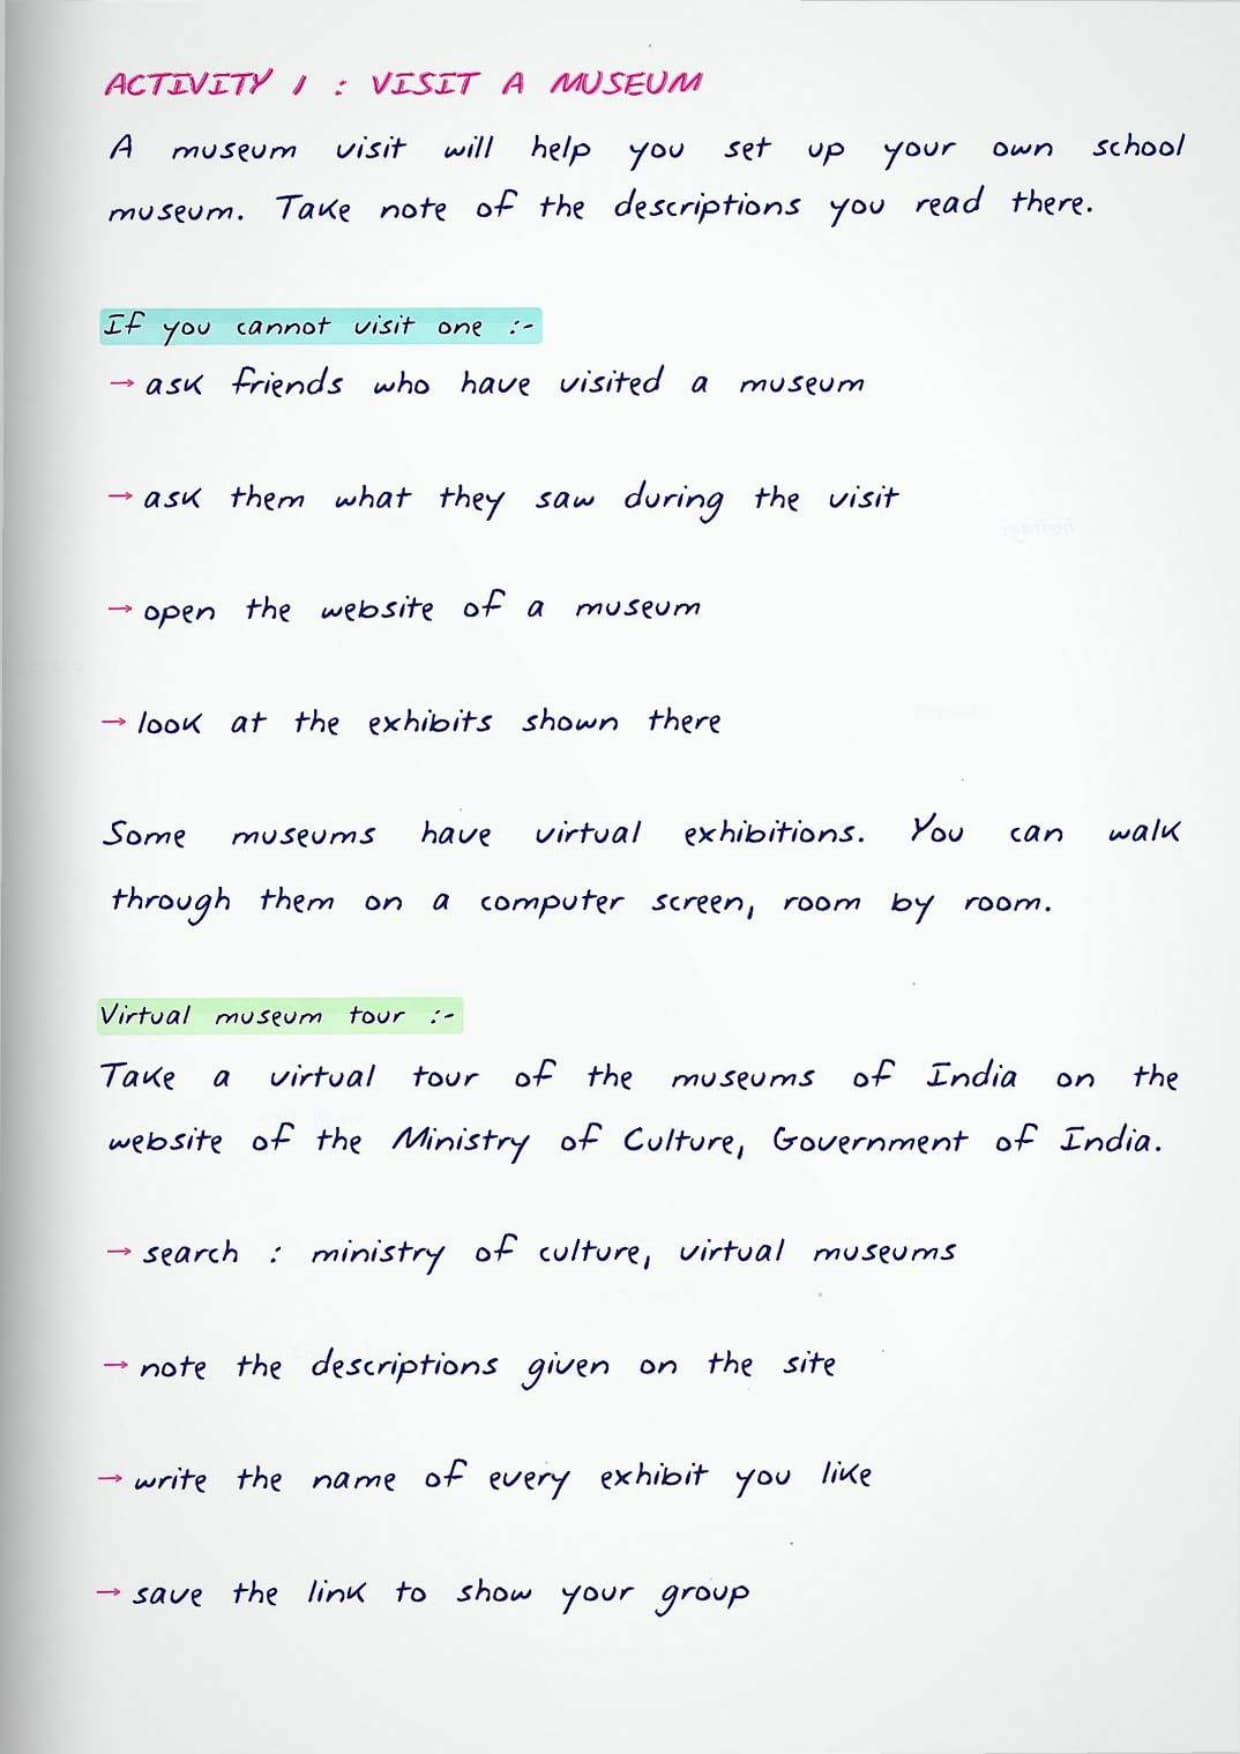
- Ask friends and others who have visited a museum what they saw, and note down their descriptions.
- Visit the website of a museum and look at the exhibits there. Some museums have virtual exhibitions.
- Take a virtual tour of museums in India on the website of the Ministry of Culture, Government of India. The book suggests the search keywords "ministry of culture" plus "virtual museums".
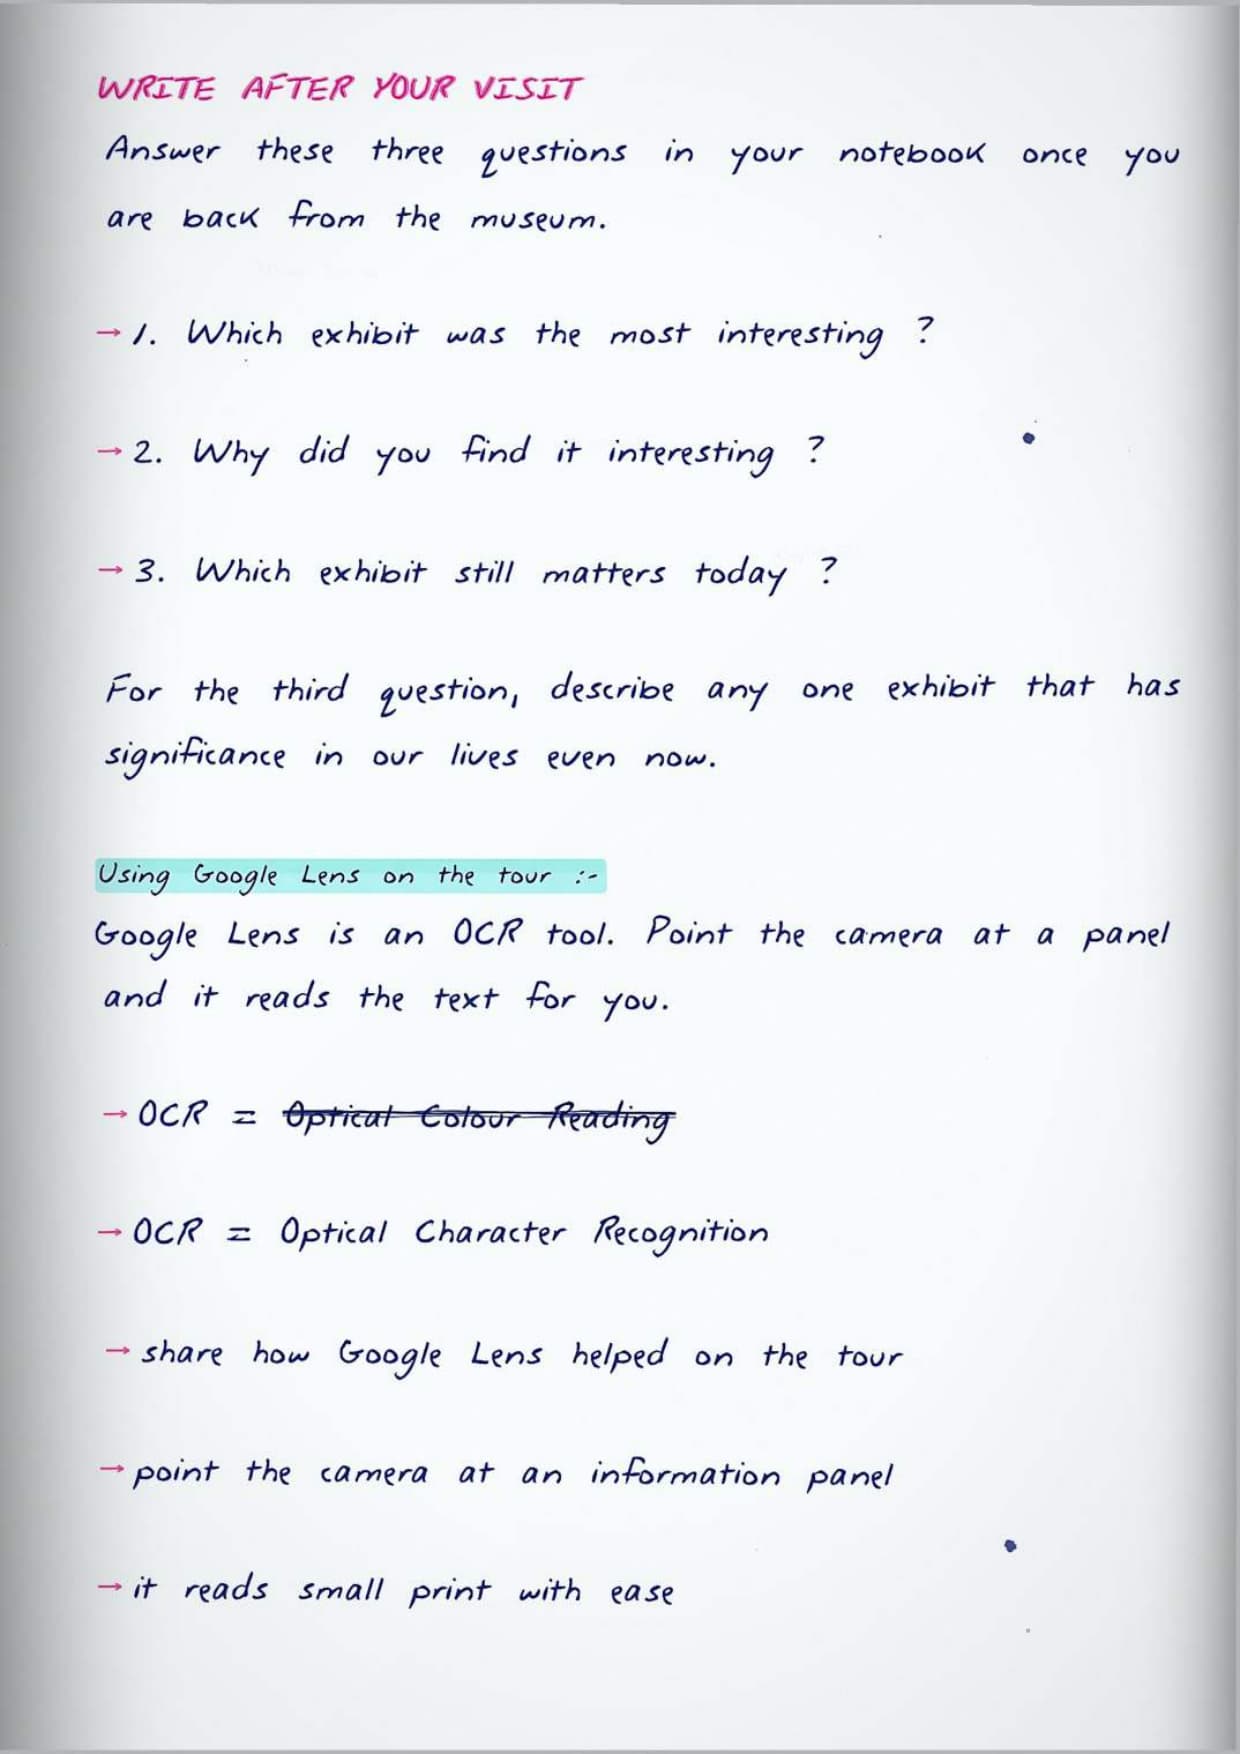
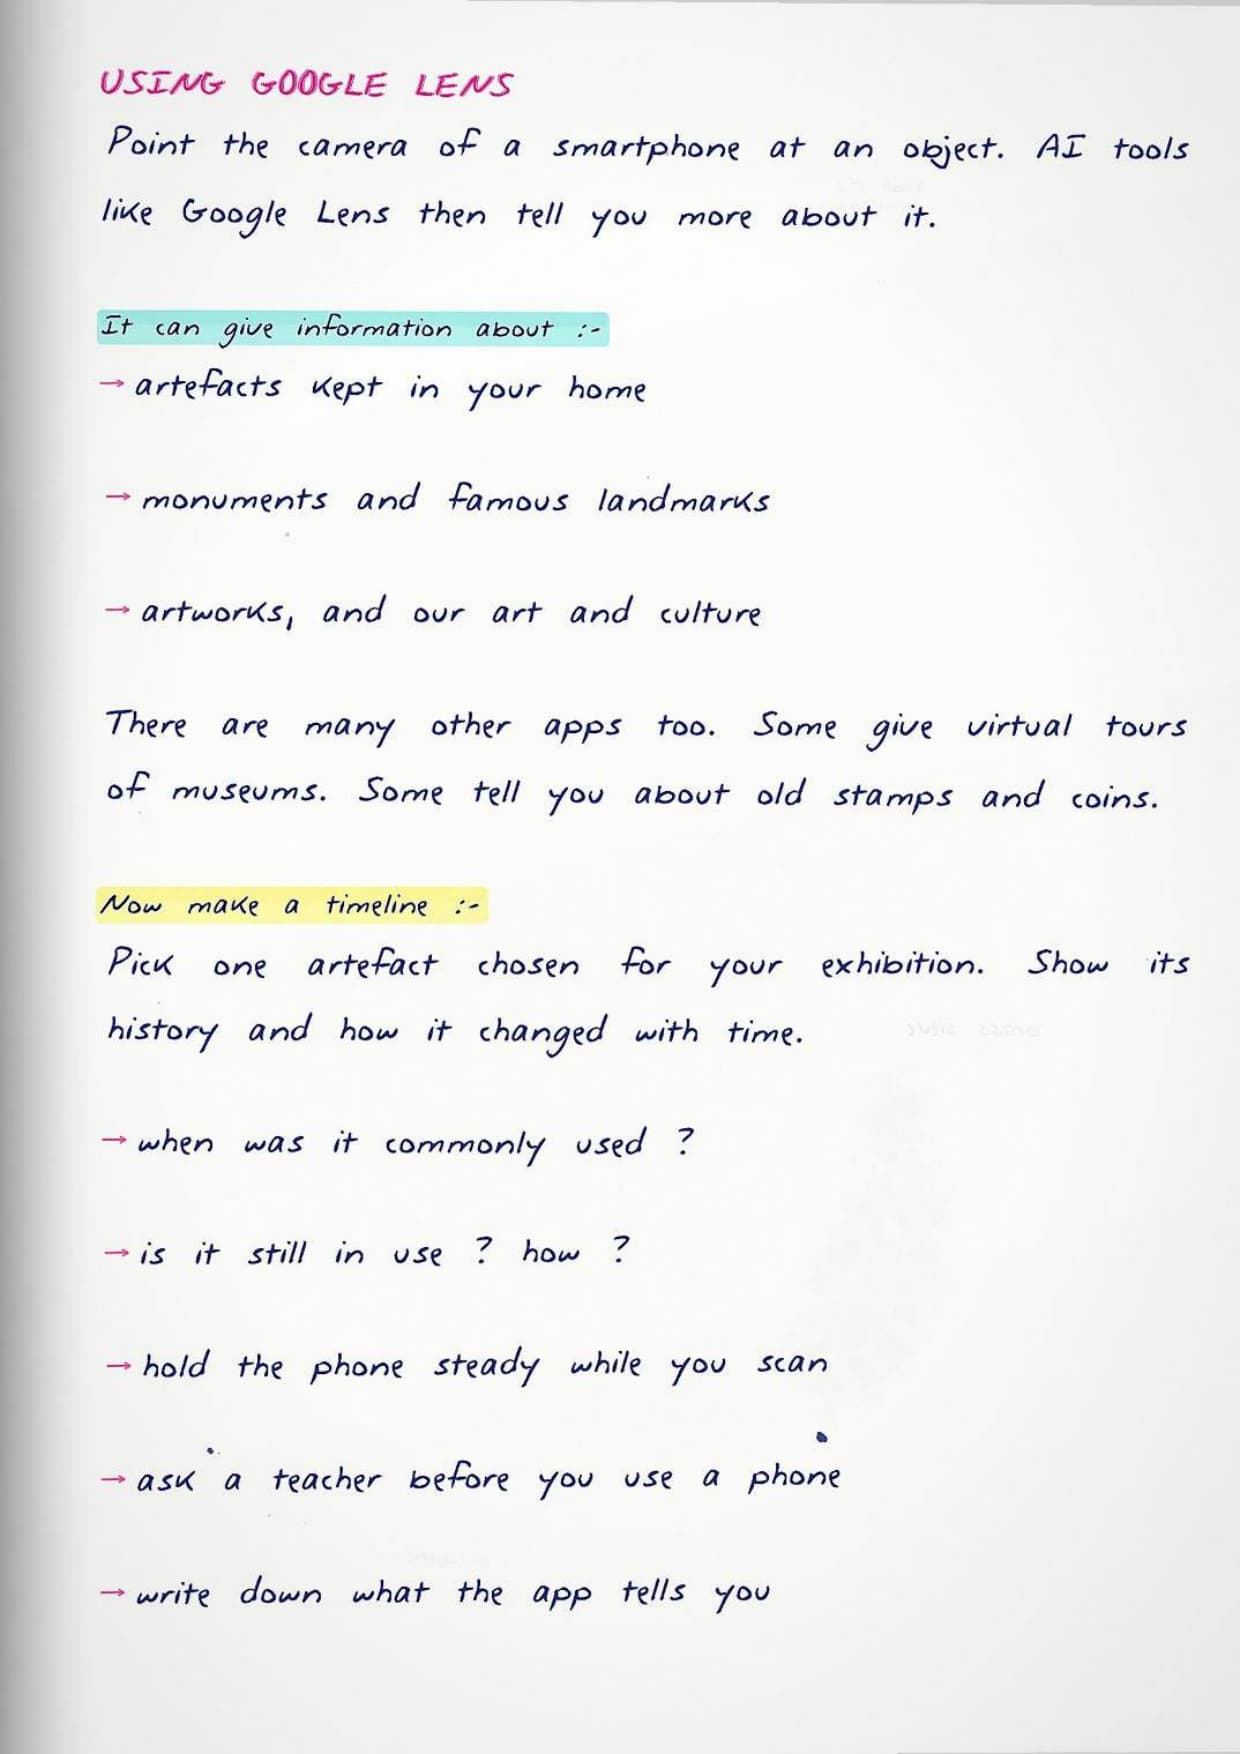
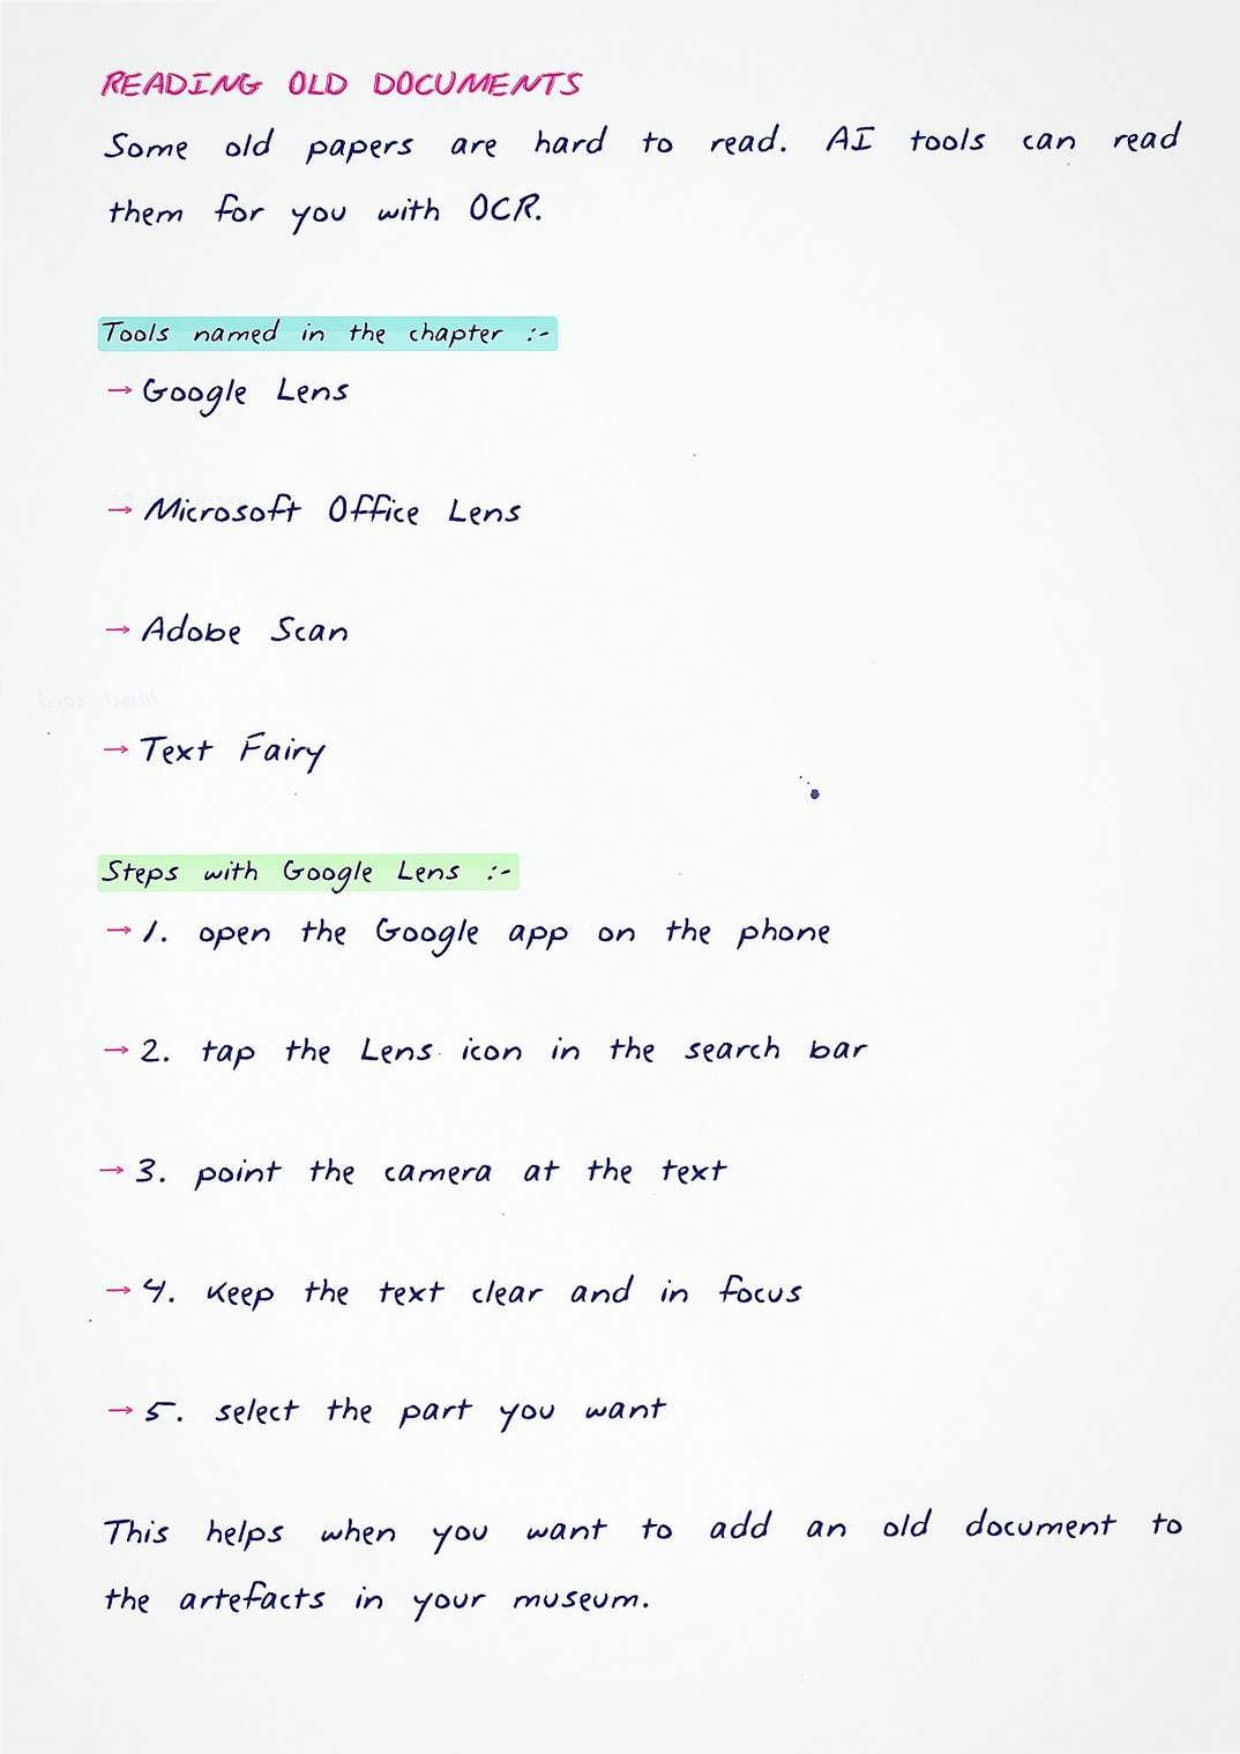
- Use Google Lens or a similar Optical Character Recognition tool to find more about the museum collection, then share how the tool helped you.
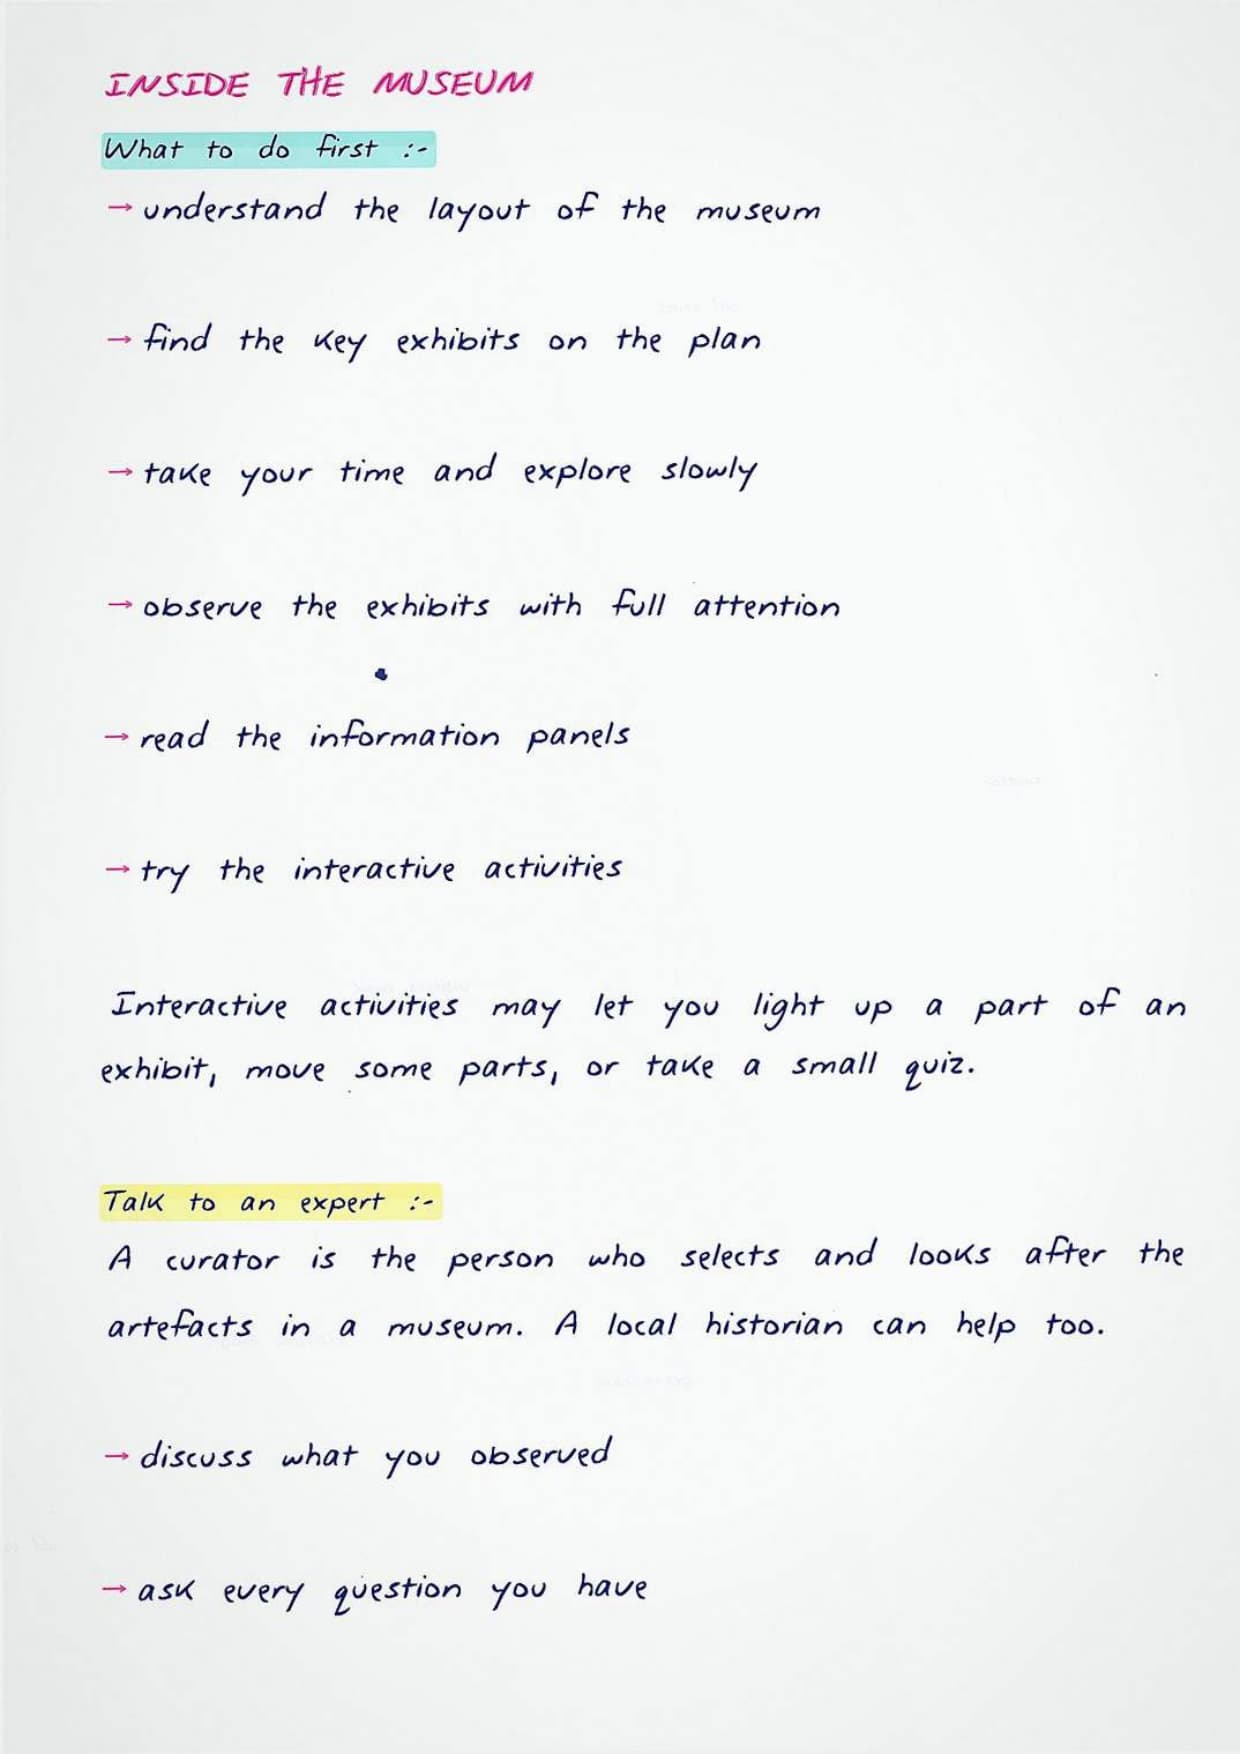
While you are inside the museum, the book asks you to work like a small researcher. Understand the layout of the museum and the key exhibits. Observe carefully, read the information panels, and check whether there are interactive activities such as lighting up parts of an exhibit, moving some parts, or taking a quiz.
Tip: if you can, talk to an expert. That may be the curator, the person who selects and looks after the artefacts, or a local historian. Three questions follow the visit, and all three appear in project files.
- What was the most interesting exhibit you saw in the museum?
- Why did you find it interesting?
- Describe any one exhibit that has significance in our lives even today.
Activity 2: Learning the History of Your Family and Your Area
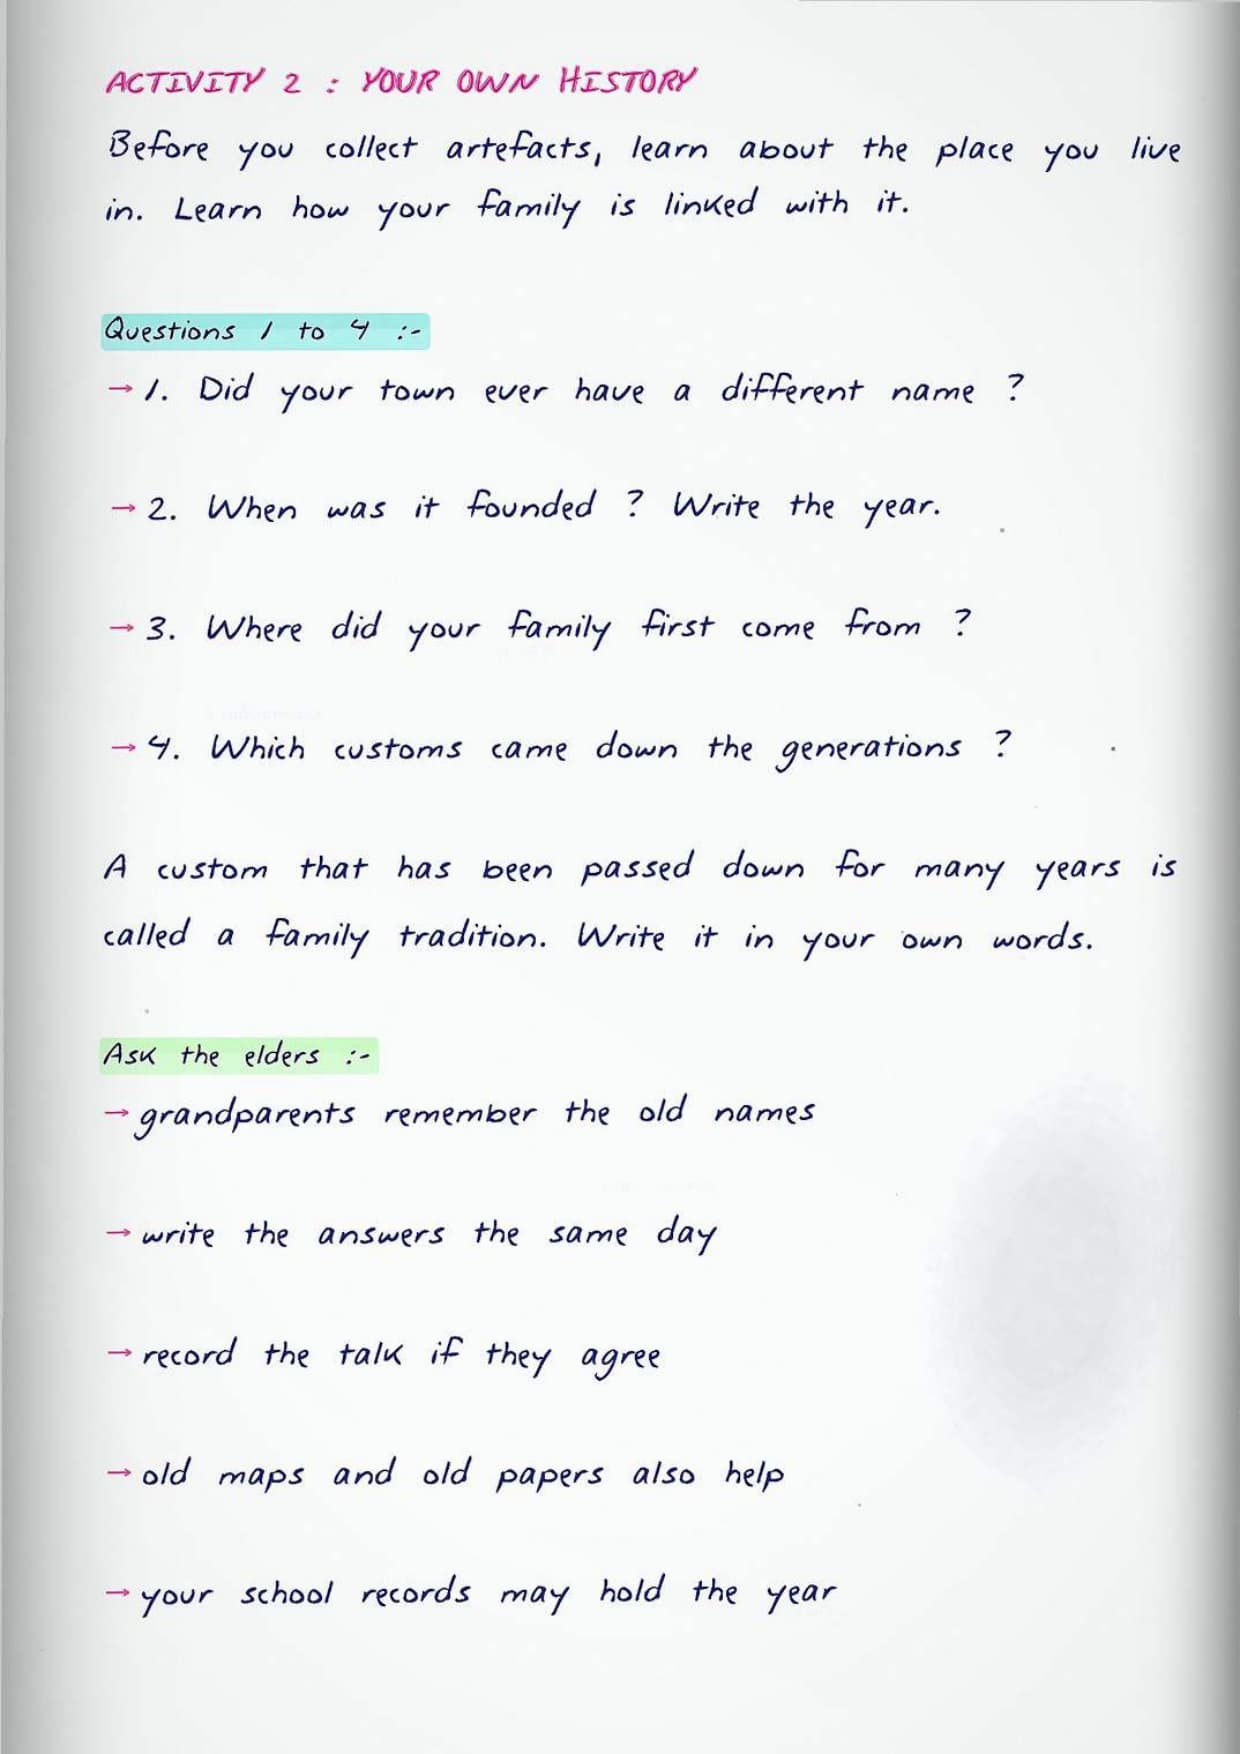
Before you collect objects, the book asks you to collect stories. Activity 2 gives eight questions about your family and your town. Answer them by talking to your grandparents and older neighbours, not by searching online.
- Did your village, town or city ever have a different name?
- Do you know when it was founded or established?
- Where did your family originally come from?
- Do you have any family traditions or customs passed down through generations?
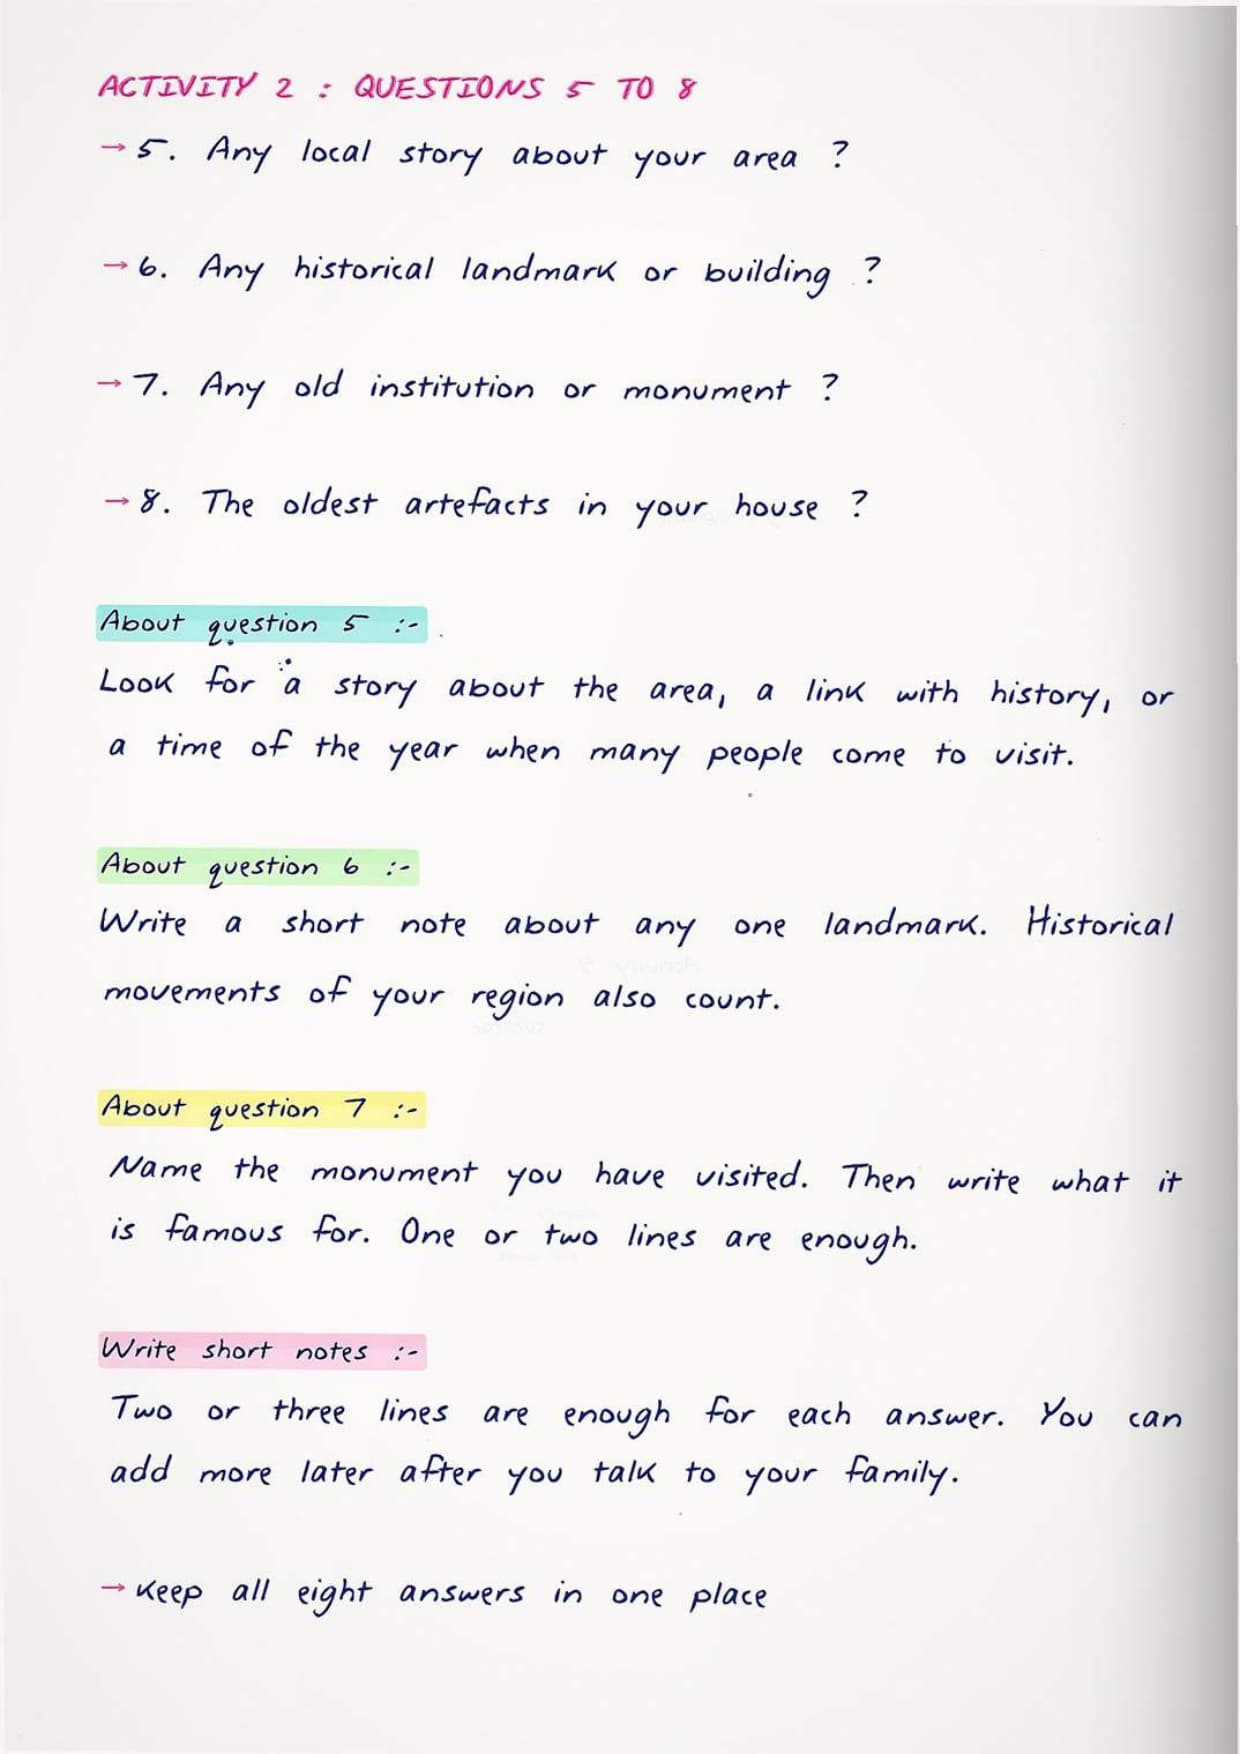
- Are there local stories or traditions tied to your area, such as a season when many people visit?
- Are there historical movements or landmarks in your area? Write a short note on one.
- Is there any old institution or monument you have visited, and what is it famous for?
- What are the oldest artefacts in your house?
The last question is the bridge into Activity 3. The book gives a long example list to help you notice things you walk past every day.
Old coins, telephones, vessels, stamps, wood carving, furniture, stone carving, Shilalekh, ancient and religious manuscripts, statues, radio, gramophone, camera, spectacles, sticks, ancient books and traditional clothes. Pick at least five that are old or special to your family.
Activity 3 and Table 5.1: Identifying Five Artefacts at Home
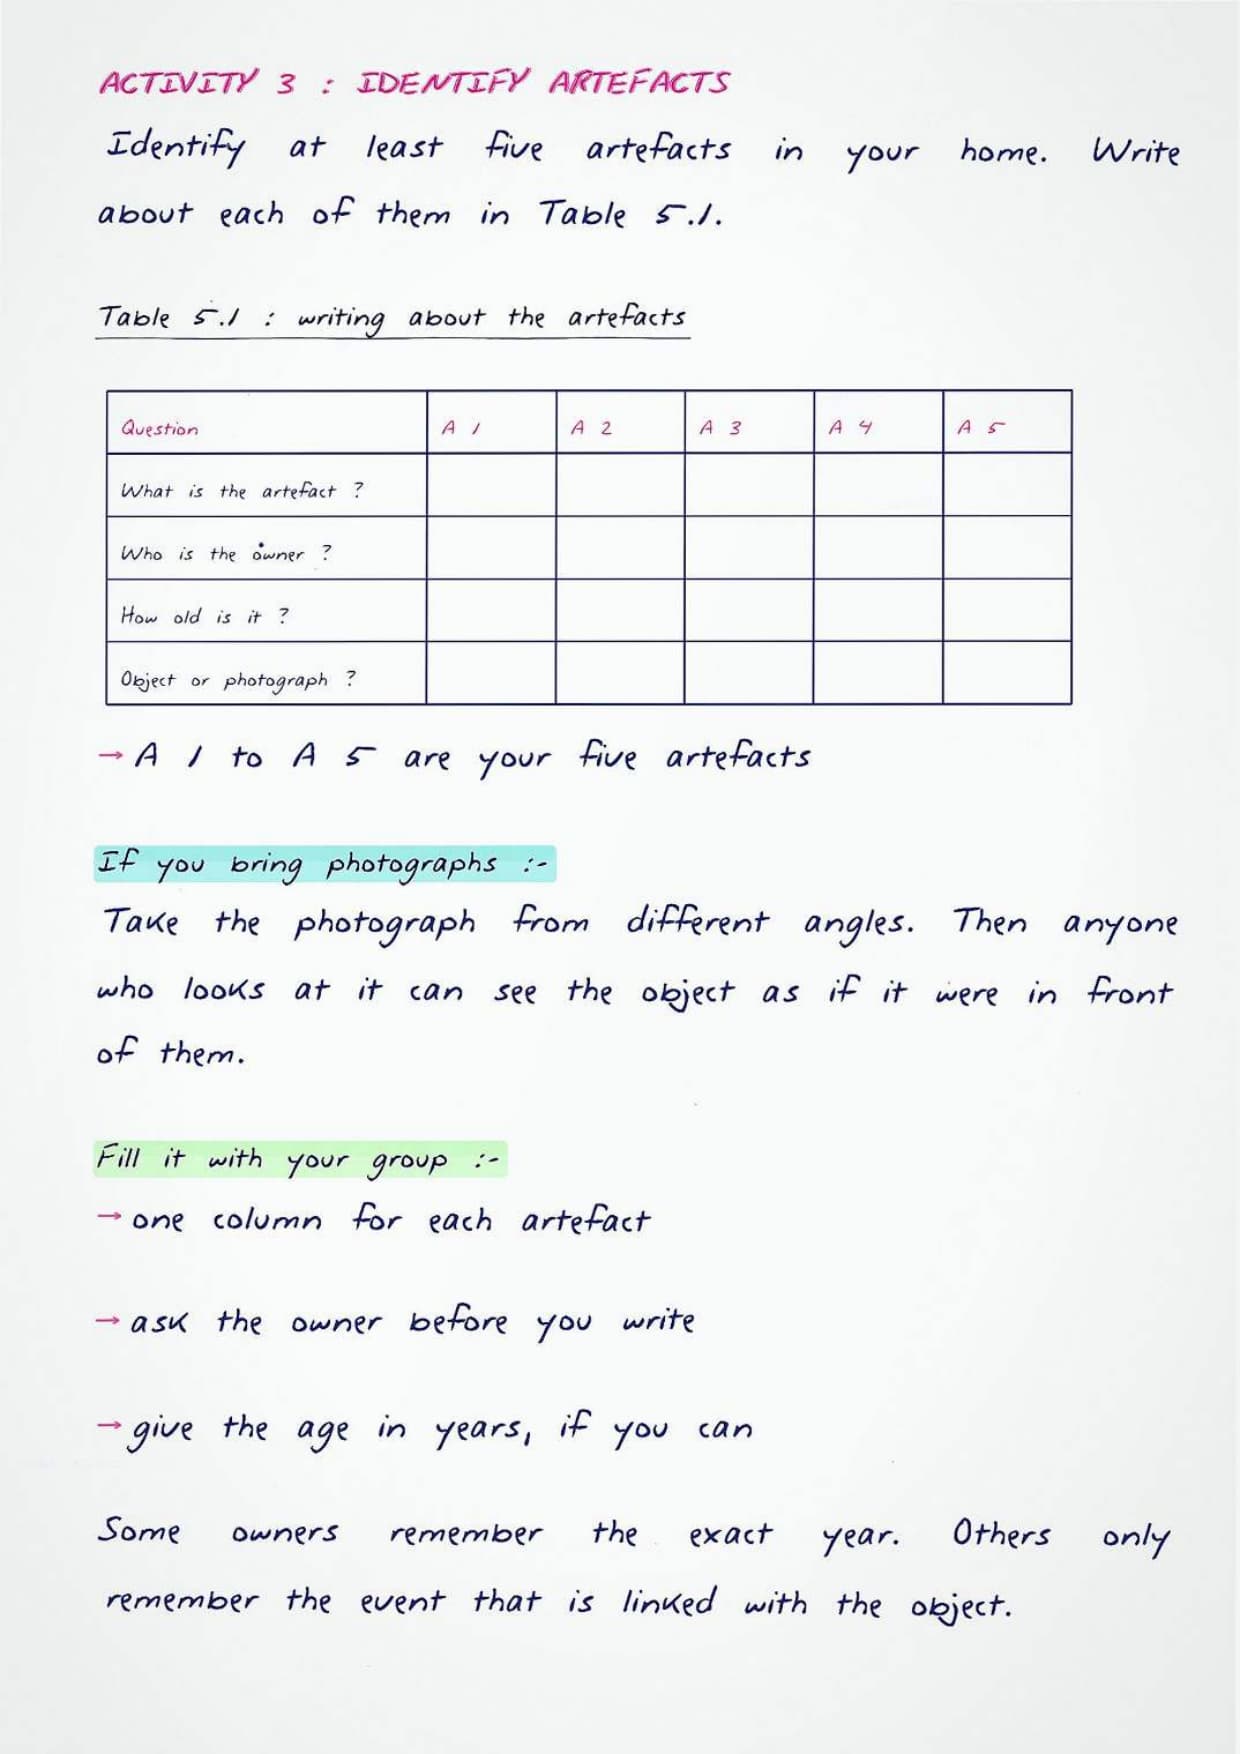
Activity 3 asks you to identify at least five artefacts in your home and write about them in Table 5.1. The table has four questions down the side and five artefact columns across the top.
| Question in Table 5.1 | What you write |
|---|---|
| What is the artefact? | The name of the object, such as a brass lamp, an old radio or a hand fan |
| Who is the owner? | The family member the object belongs to |
| How old is it? | The age in years, or the generation it came from if nobody remembers the exact year |
| Will you bring it to class, or bring a photograph? | Your decision for each object, which depends on how heavy or how fragile it is |
Tip: if you plan to bring photographs instead of objects, take them from different angles. The book says this is so that anyone looking at the photograph can see the artefact as if it were in front of them.
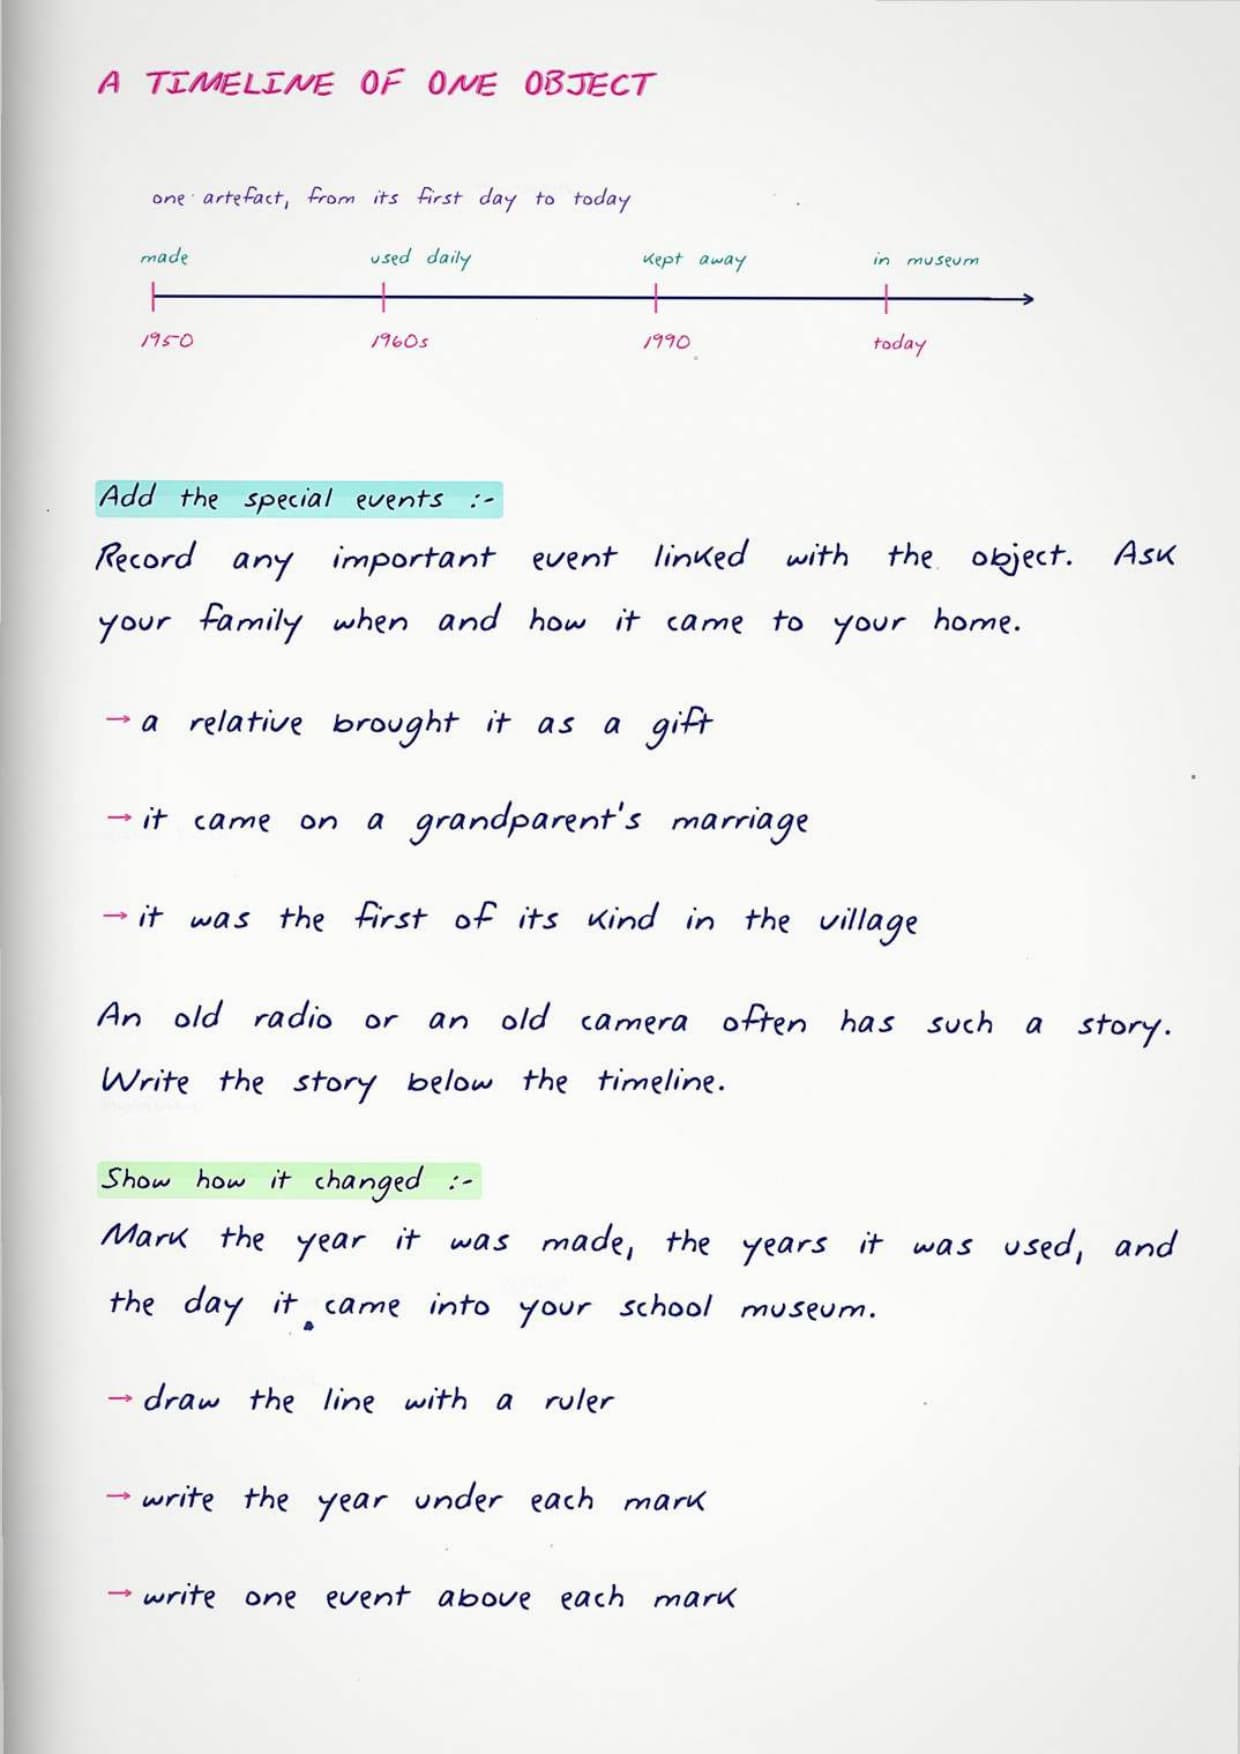
The chapter then asks you to build a timeline for one artefact. Show its history and how it changed, when it was commonly used, and how it is used now if it is still in use. Add any important event linked to it, such as an old radio brought as a wedding gift that was the first of its kind in the village.
Activity 4 and Table 5.2: Selecting the Five Artefacts for the Exhibition
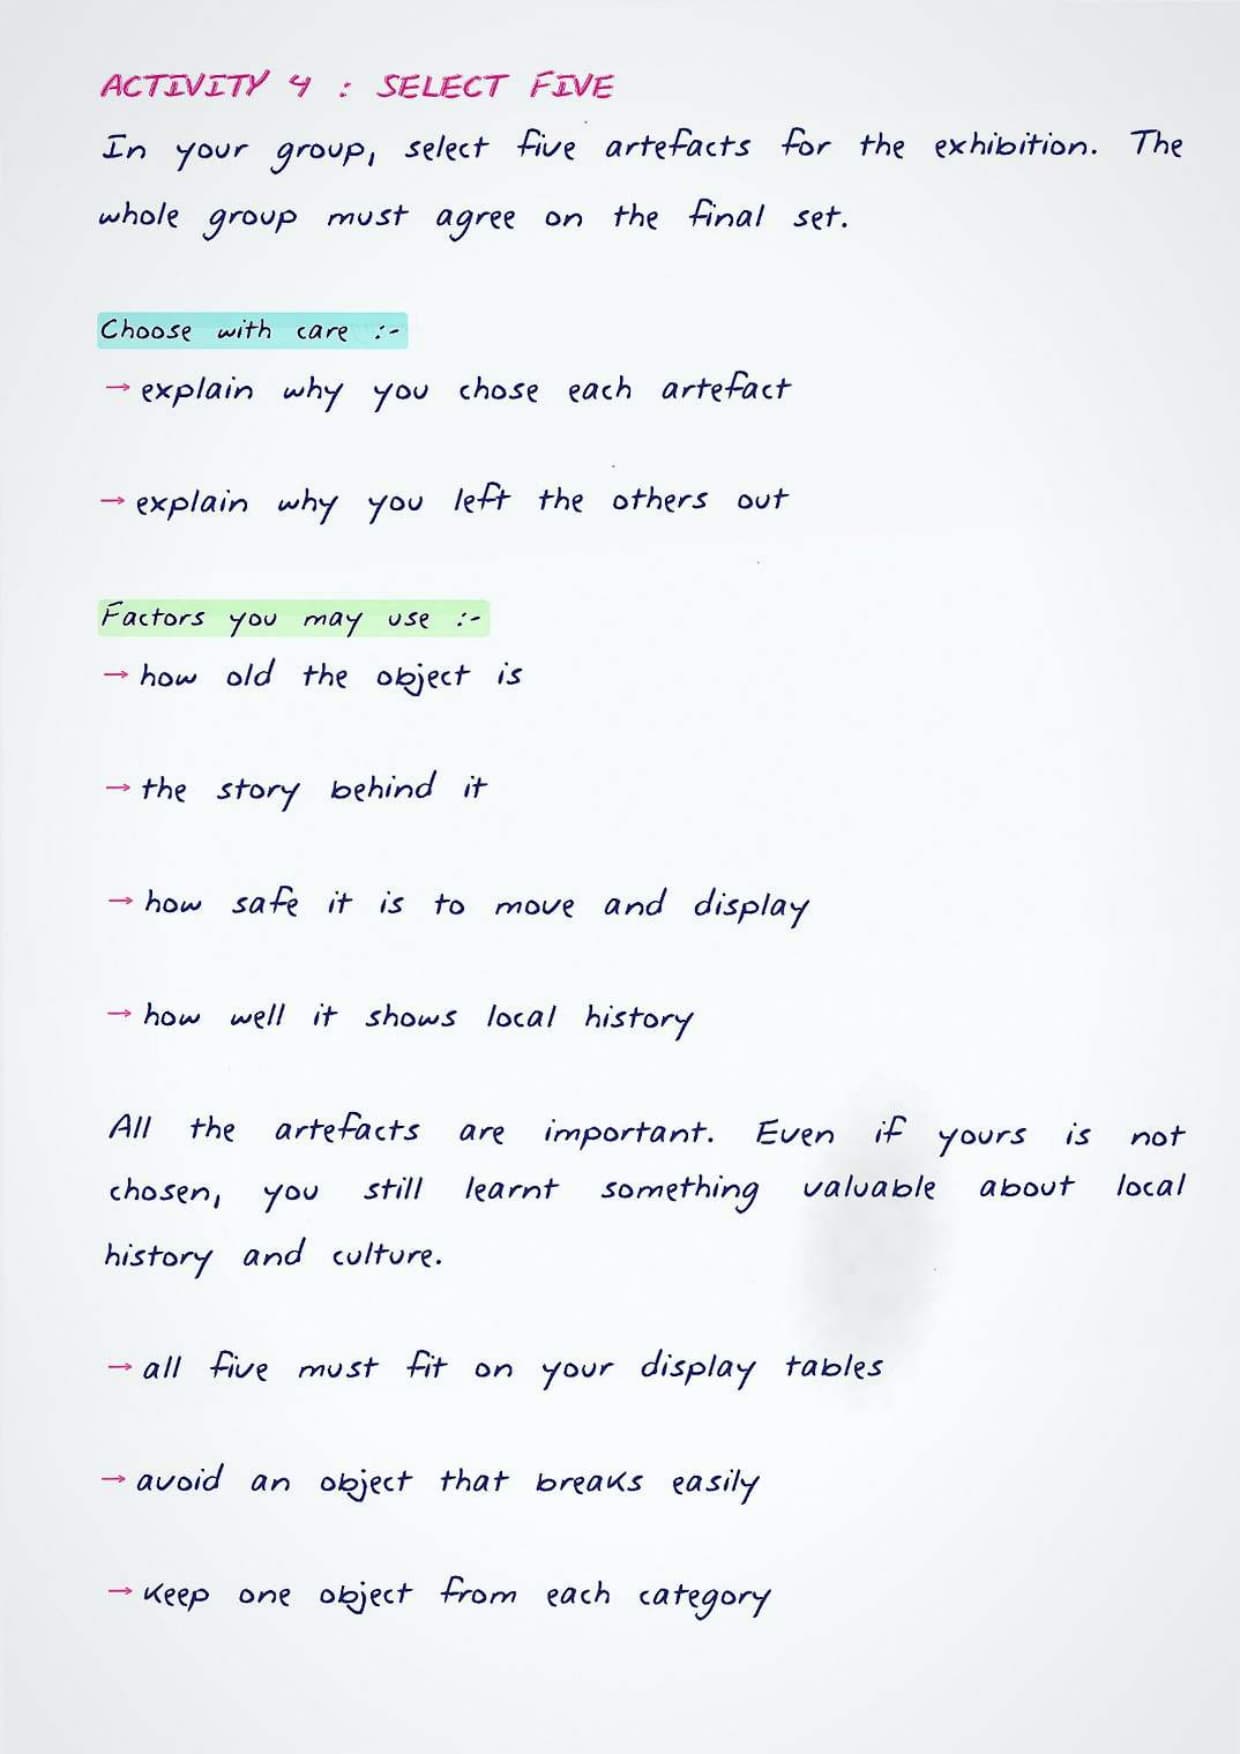
Activity 4 is a group decision. Within your group you select five artefacts that should be part of the exhibition, and the final set is agreed with all your peers. You must also explain why you chose those five and not the others.
The book adds one kind line here. All the artefacts are important, and even if your object is not chosen, you still learnt something valuable about local history and culture. The objects shown in the chapter figures give you a good idea of what counts.
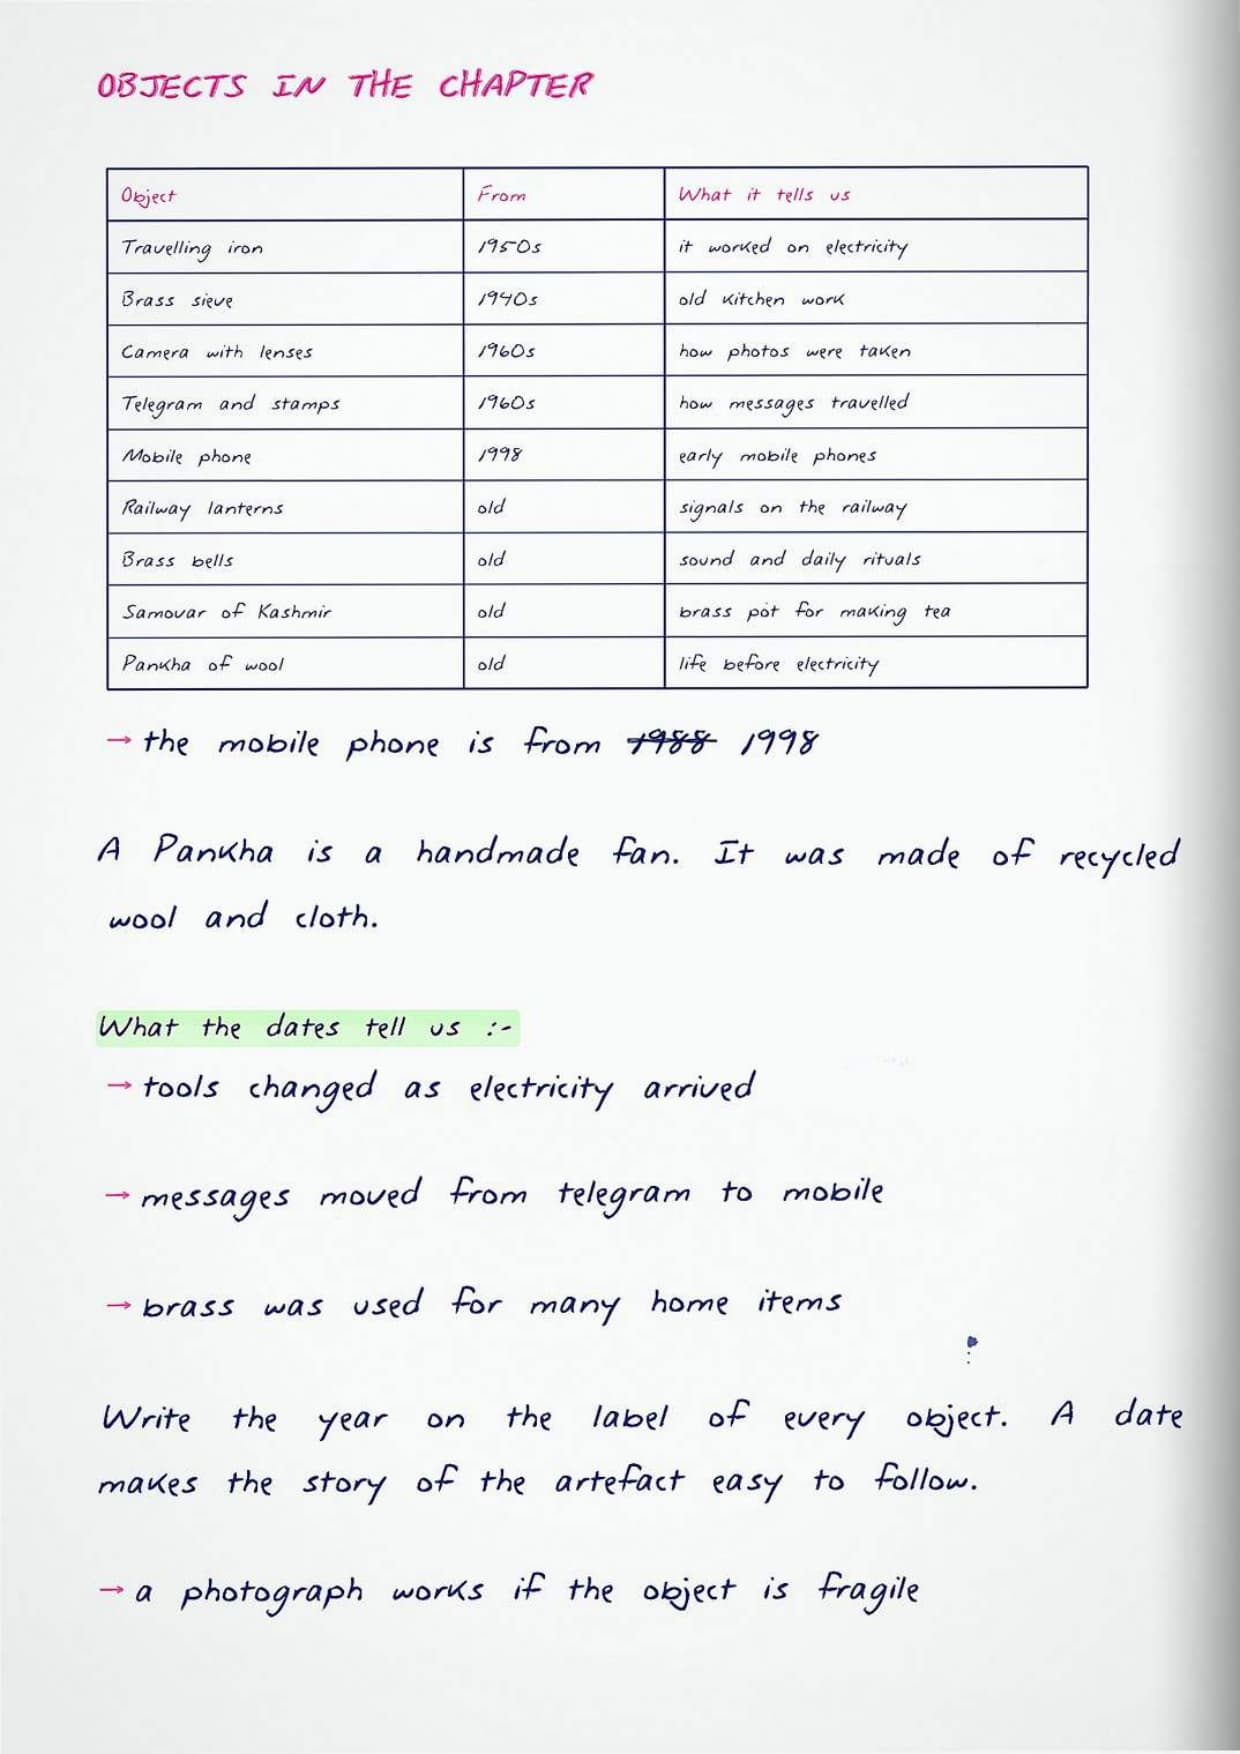
- An old travelling iron from the 1950s that worked on electricity, and old railway lanterns.
- A mobile phone from the year 1998, and a camera with flash and lenses from the early 1960s.
- A brass sieve from the 1940s, old brass bells, and a brass pot for making tea, the Samovar from Kashmir.
- A telegram with stamps from the 1960s, and a handmade Pankha made of recycled wool and cloth, used before electricity reached all homes.
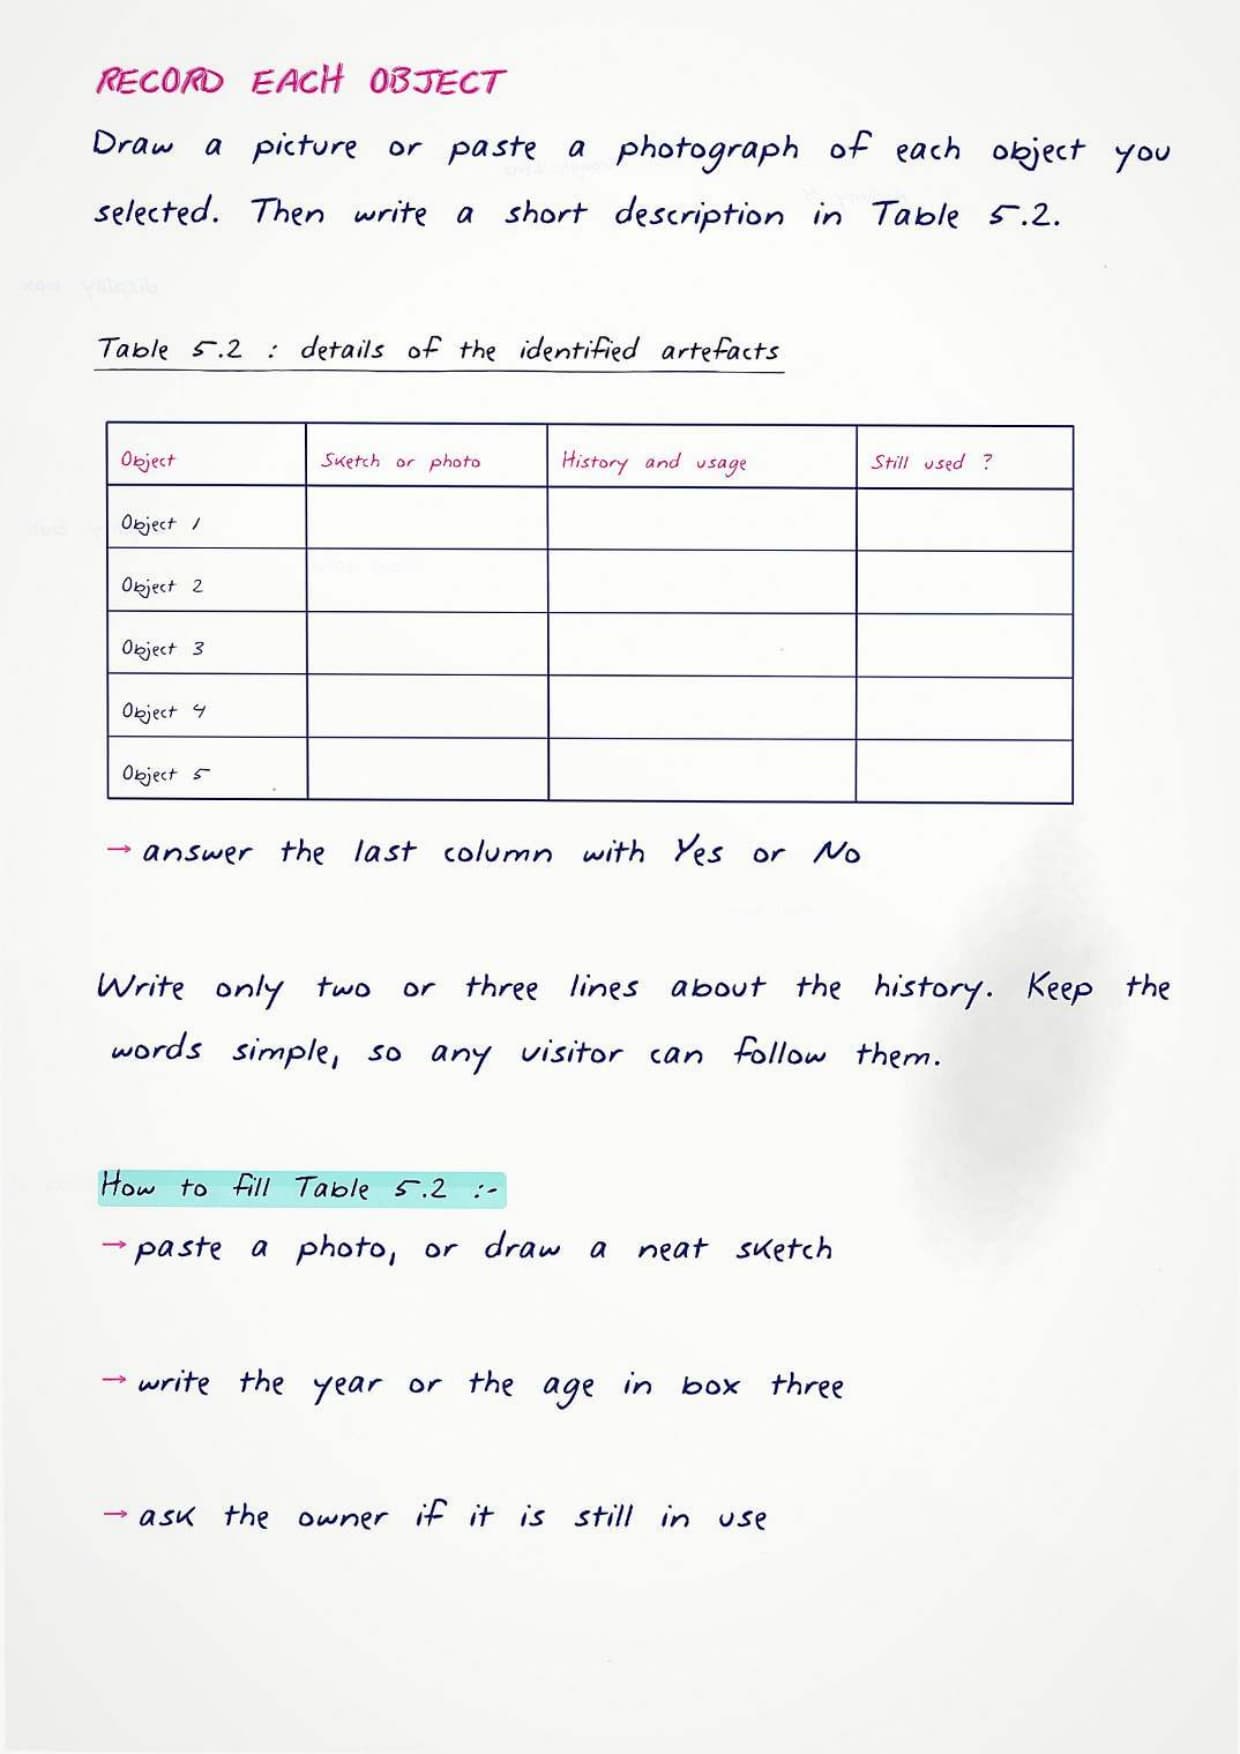
Once the five are fixed, you record them in Table 5.2. For each object you draw a picture or paste a photograph, then write a short description.
| Column in Table 5.2 | What goes in it |
|---|---|
| Object | The name of the object, listed as Object 1 to Object 5 |
| Sketch or photograph | A hand drawing of the object, or a pasted photograph |
| History and usage | Where it came from and what it was used for |
| Is it still being used? | A simple Yes or No entry |
Activity 5: Keeping the Artefacts Safe, Material by Material
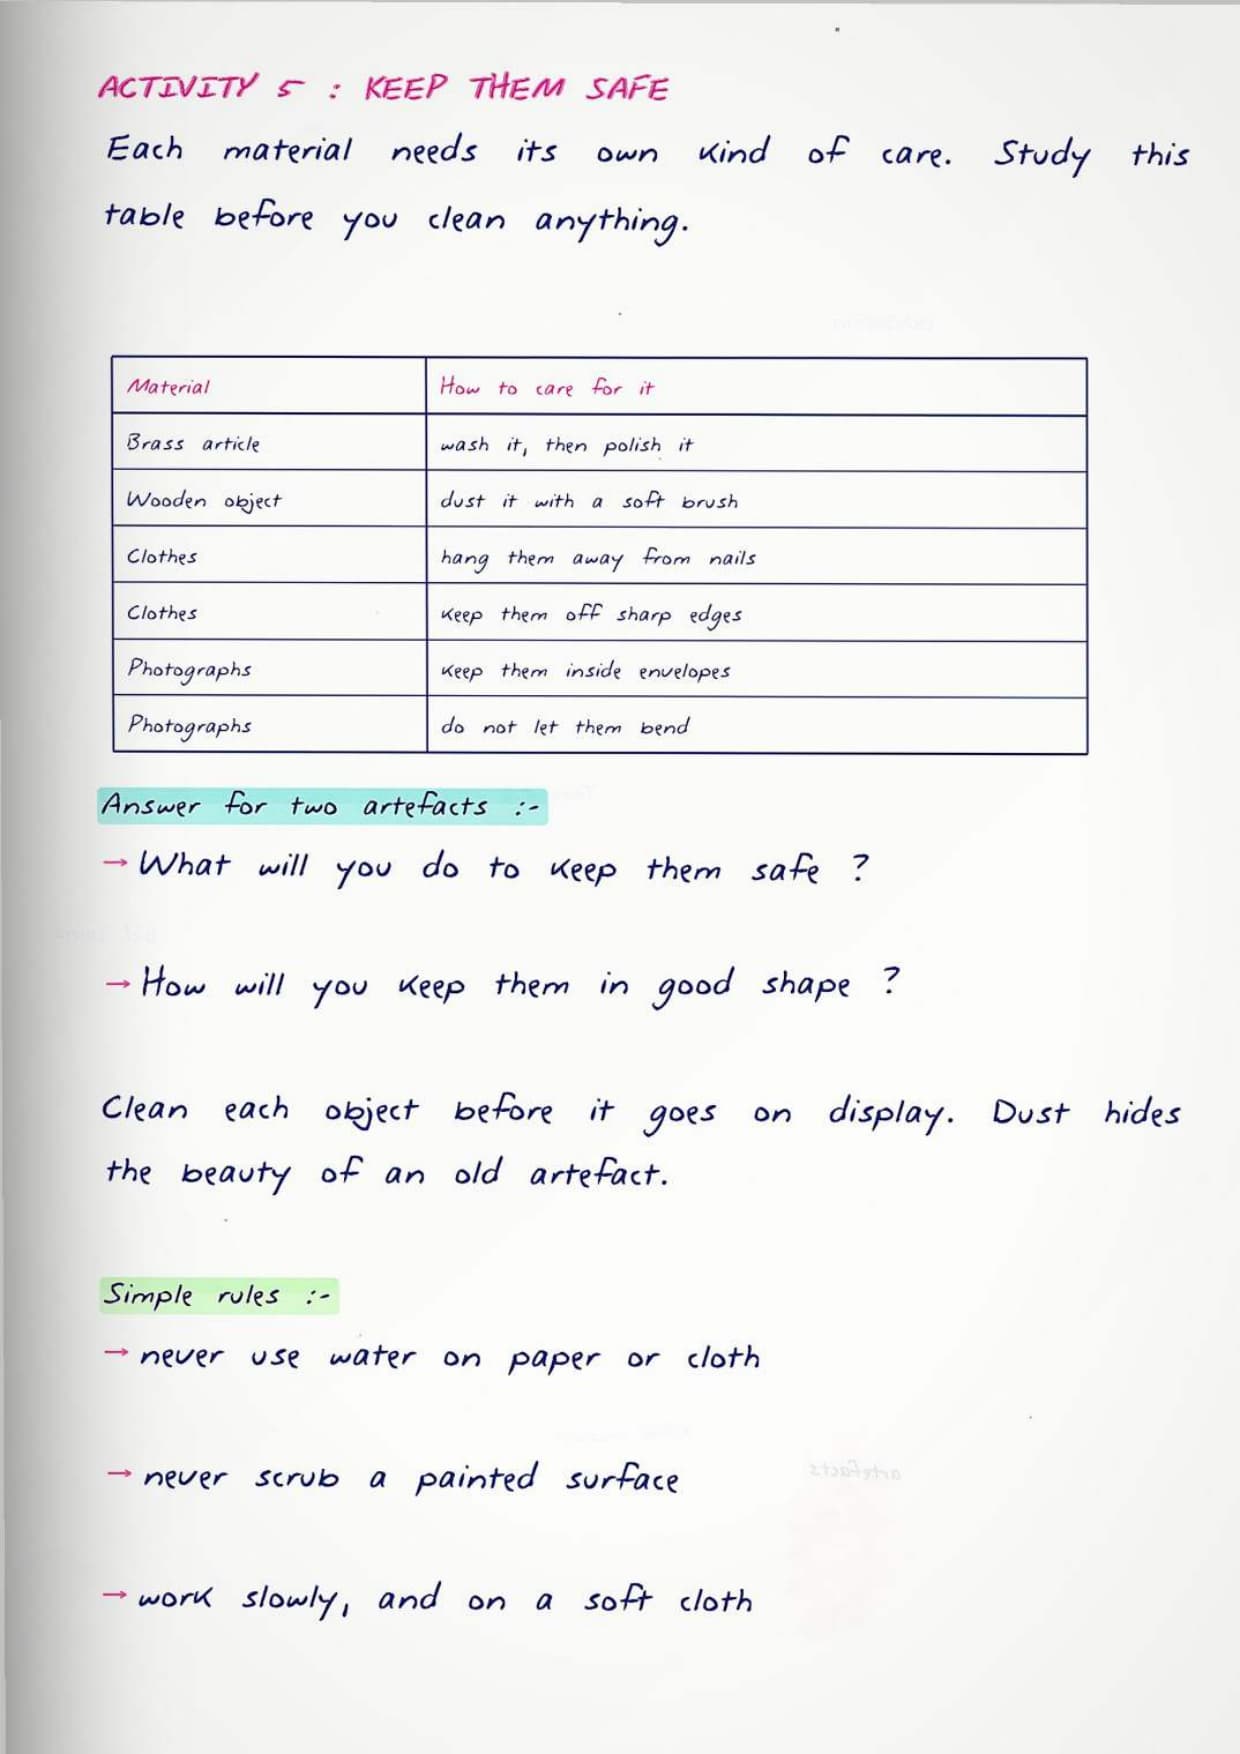
Activity 5 is the care step, and it is the one students answer wrongly most often. The rule is simple. Each material needs a different kind of care, so learn the object and its treatment as a pair.
| Material | How the book says you should care for it |
|---|---|
| Brass article | Wash it and polish it |
| Wooden object | Dust it with a soft brush |
| Clothes | Hang them carefully, away from any nail or sharp edge |
| Photographs | Keep them in envelopes, so they do not get bent or out of shape |
The activity then asks you to select any two artefacts and write what you will do to keep them safe and in good condition. Use the table above and name the material first, then the treatment.
Tip: the closing section of the chapter asks the same idea in another form. If you visited a museum, find out how artefacts there are stored and cared for, and write down at least three methods that museums use to preserve them.
Activity 6: Preparing a Presentation on Each Artefact
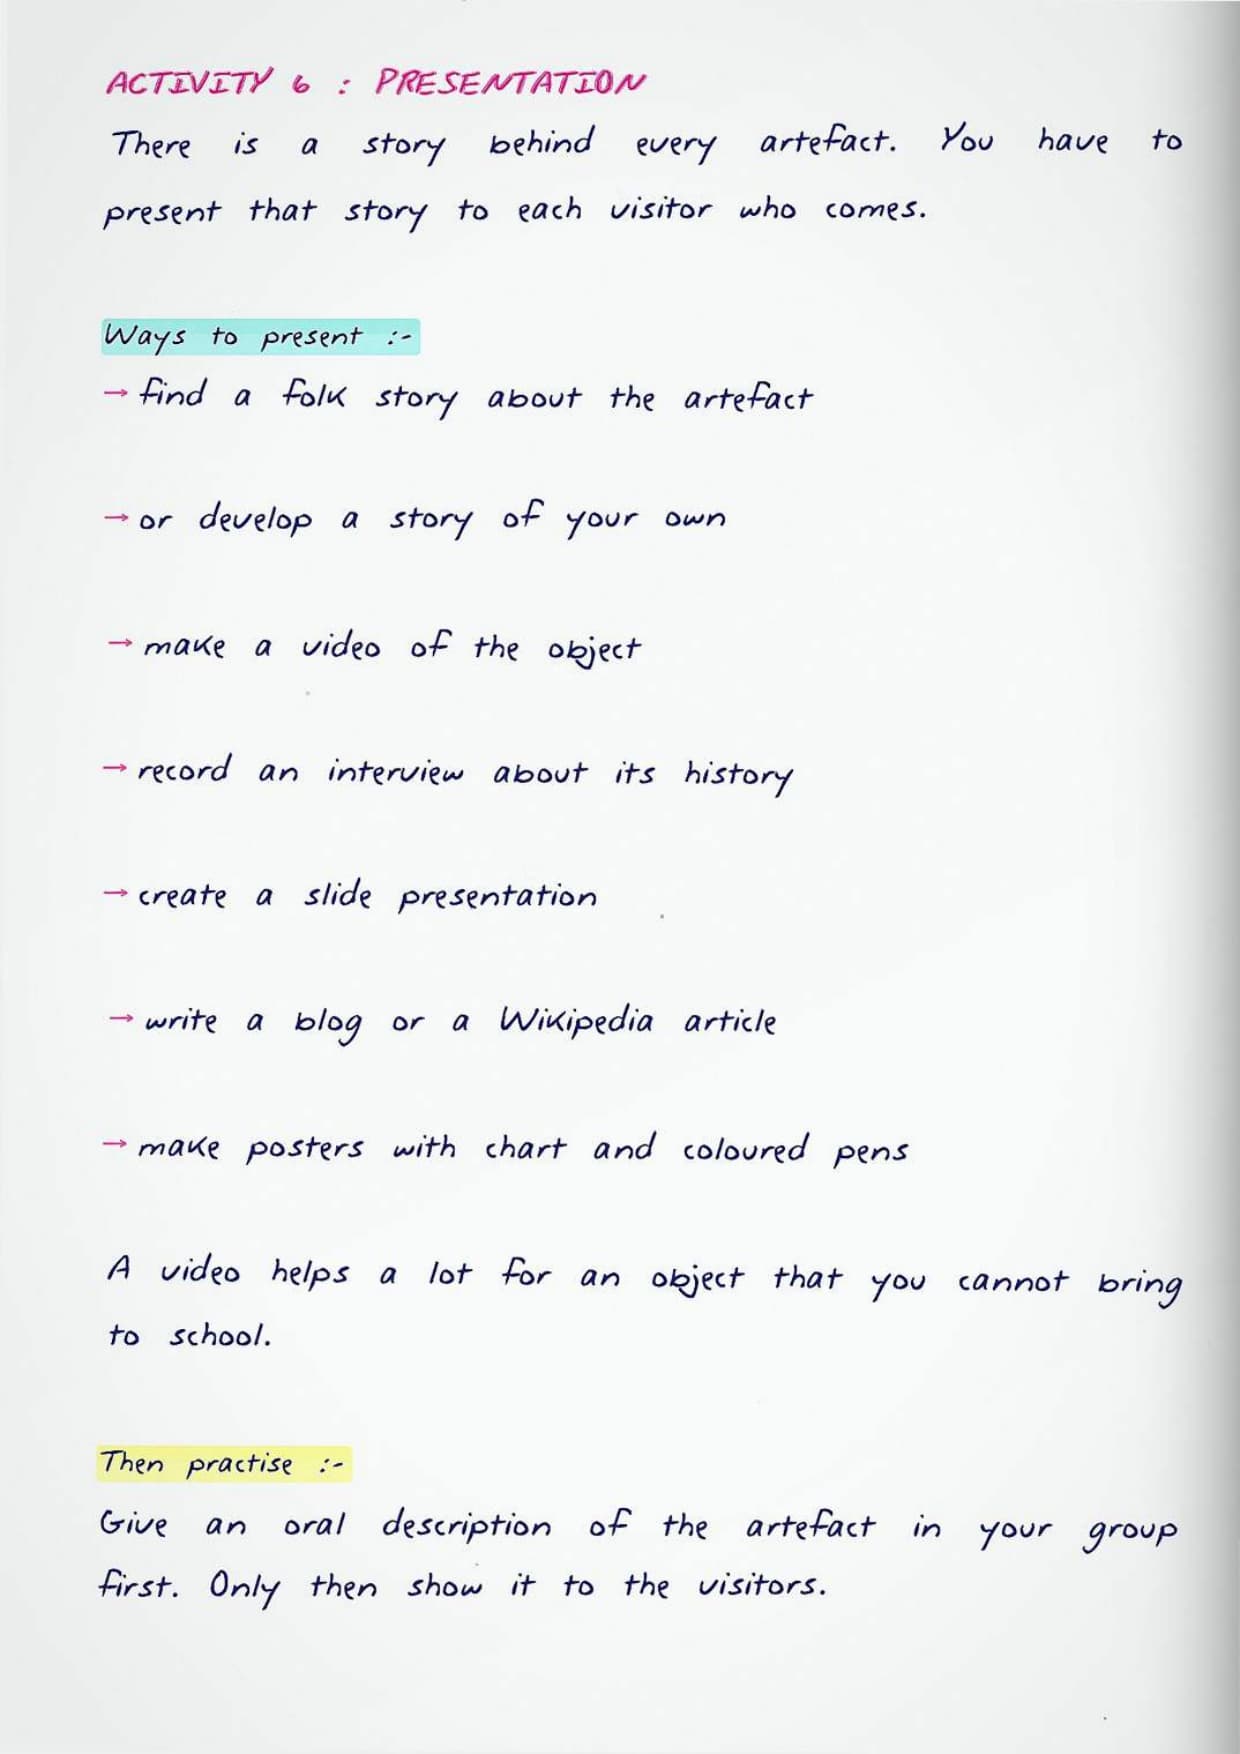
There is a story behind every artefact, and Activity 6 asks you to tell it to each visitor. You can find a folk story about the object, or you can develop your own story around it. The book lists five ways to present.
- Make a video, which works best for objects you cannot bring to school.
- Record an interview with someone who knows the history of the object.
- Create a slide presentation on a computer.
- Write a blog or a Wikipedia style article.
- Make posters using a chart and coloured pens.
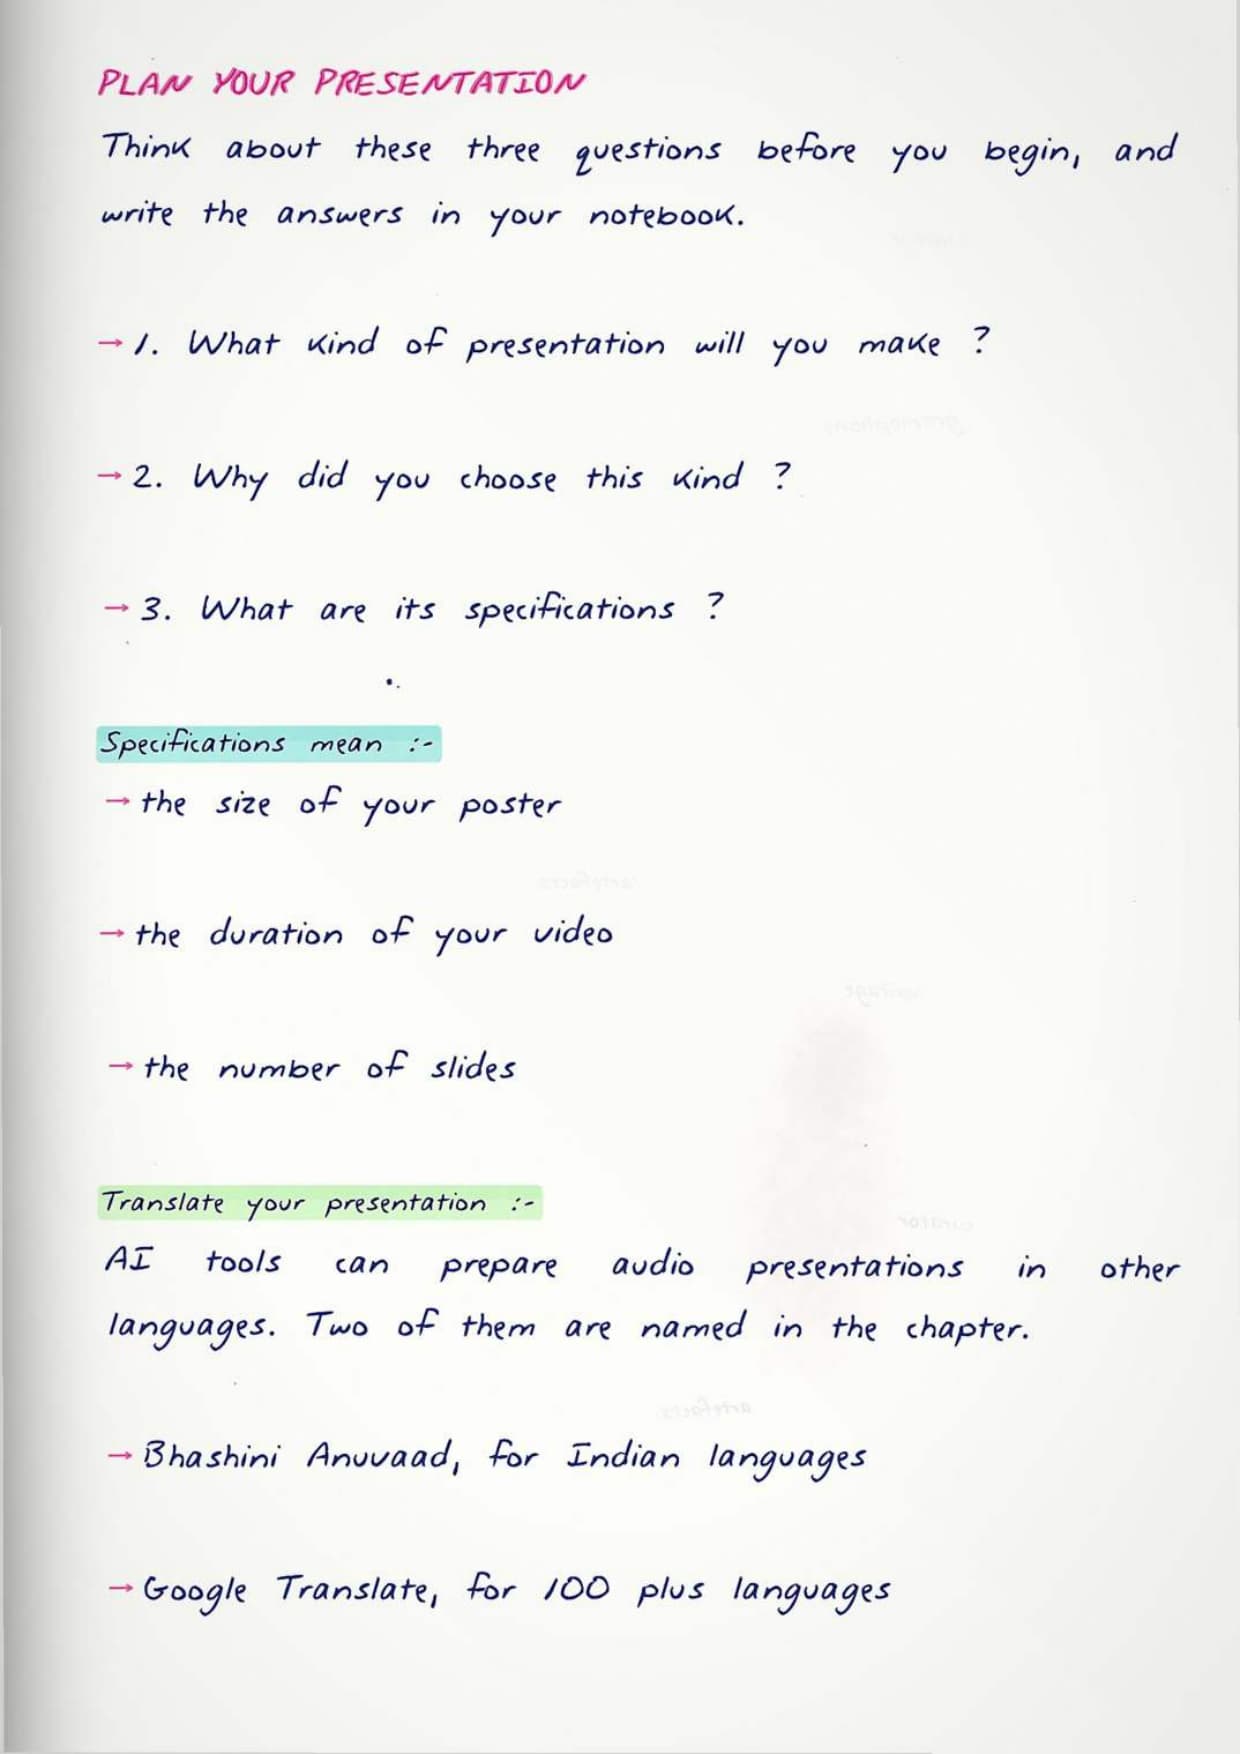
Three questions follow, and all three go into your project file. What kind of presentation will you make, why did you choose it, and what are its specifications such as the size of the poster or the duration of the video.
Practise giving an oral description of the artefact in your group before you show it to visitors. A school museum display on the history of educational toys is the example the book shows for this step.
Activity 7 and Table 5.3: Organising the Exhibition and the Visitors Book
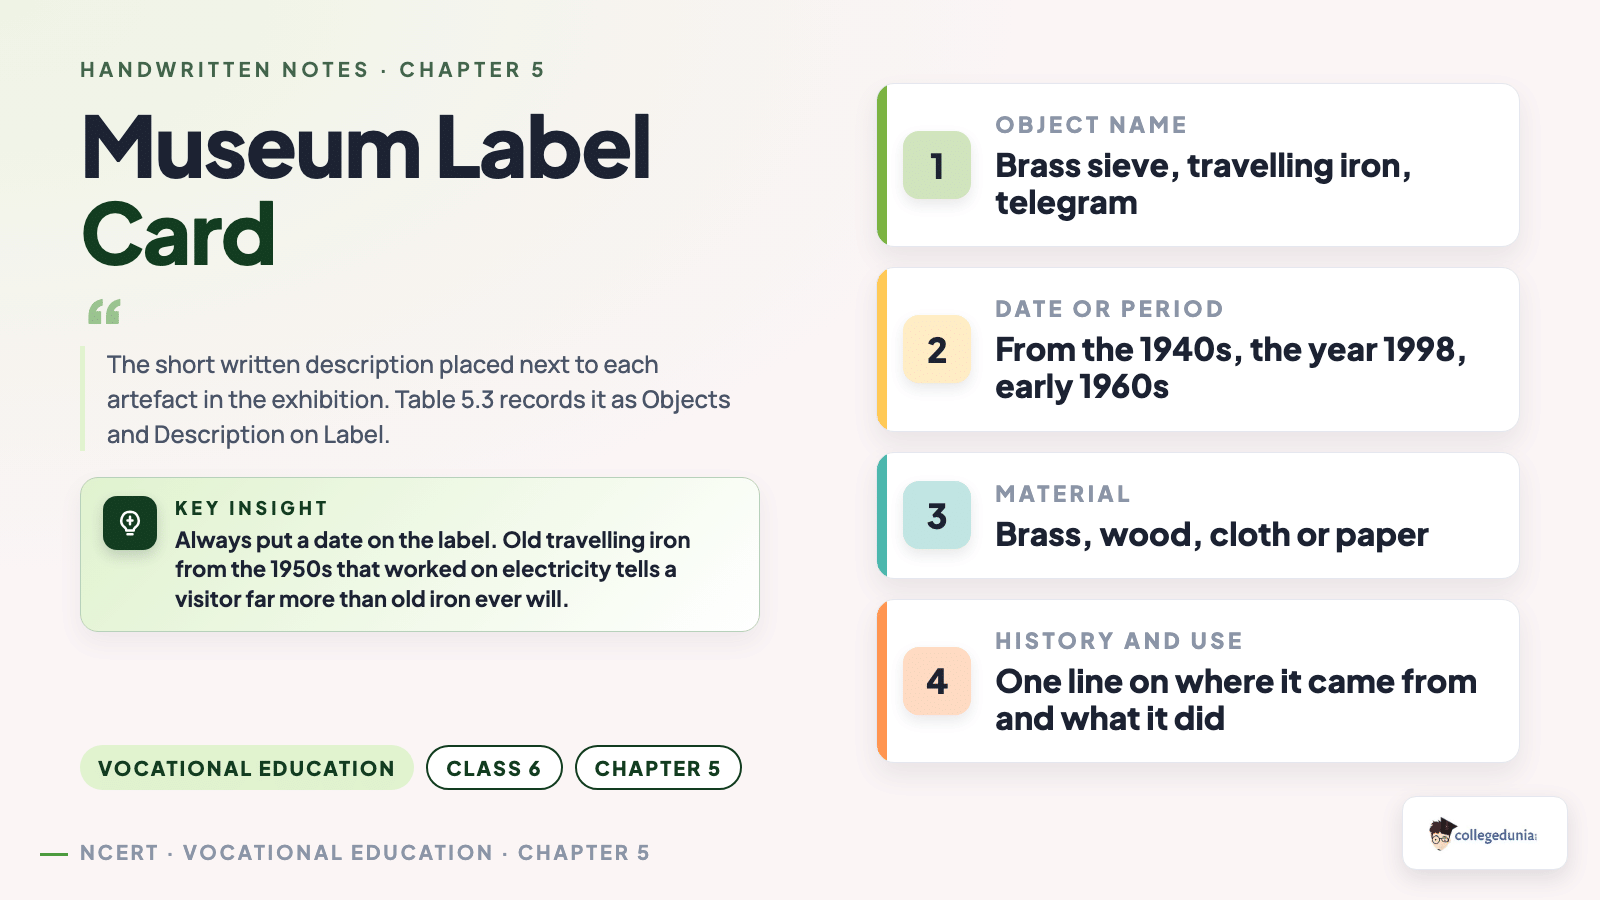
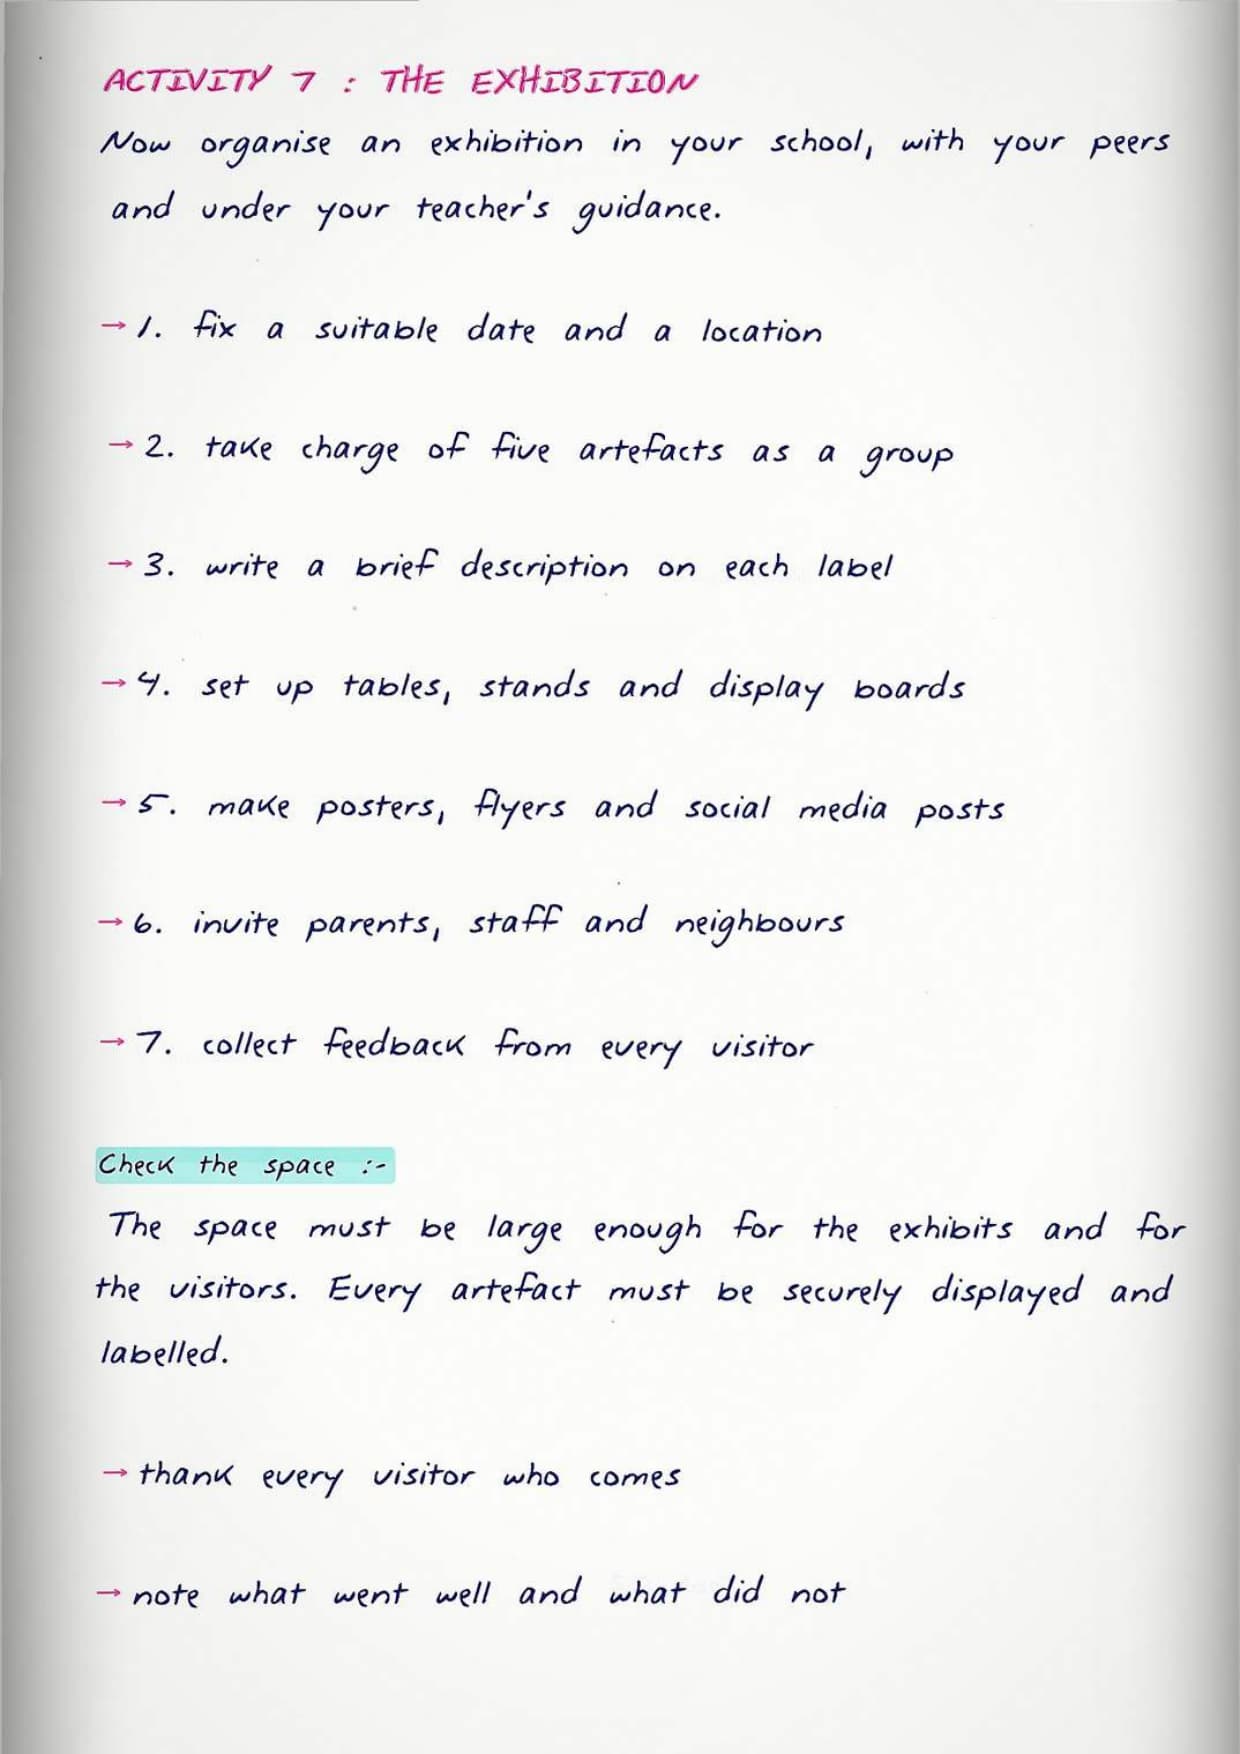
Activity 7 is the last activity and the one your class is judged on. Six steps are given, and they run in order from planning to feedback.
- Decide a suitable date and location inside the school. The space must be large enough for the exhibits and the visitors.
- Take responsibility for five artefacts with your peers, finalise a brief description of each, and write the final descriptions neatly on labels.
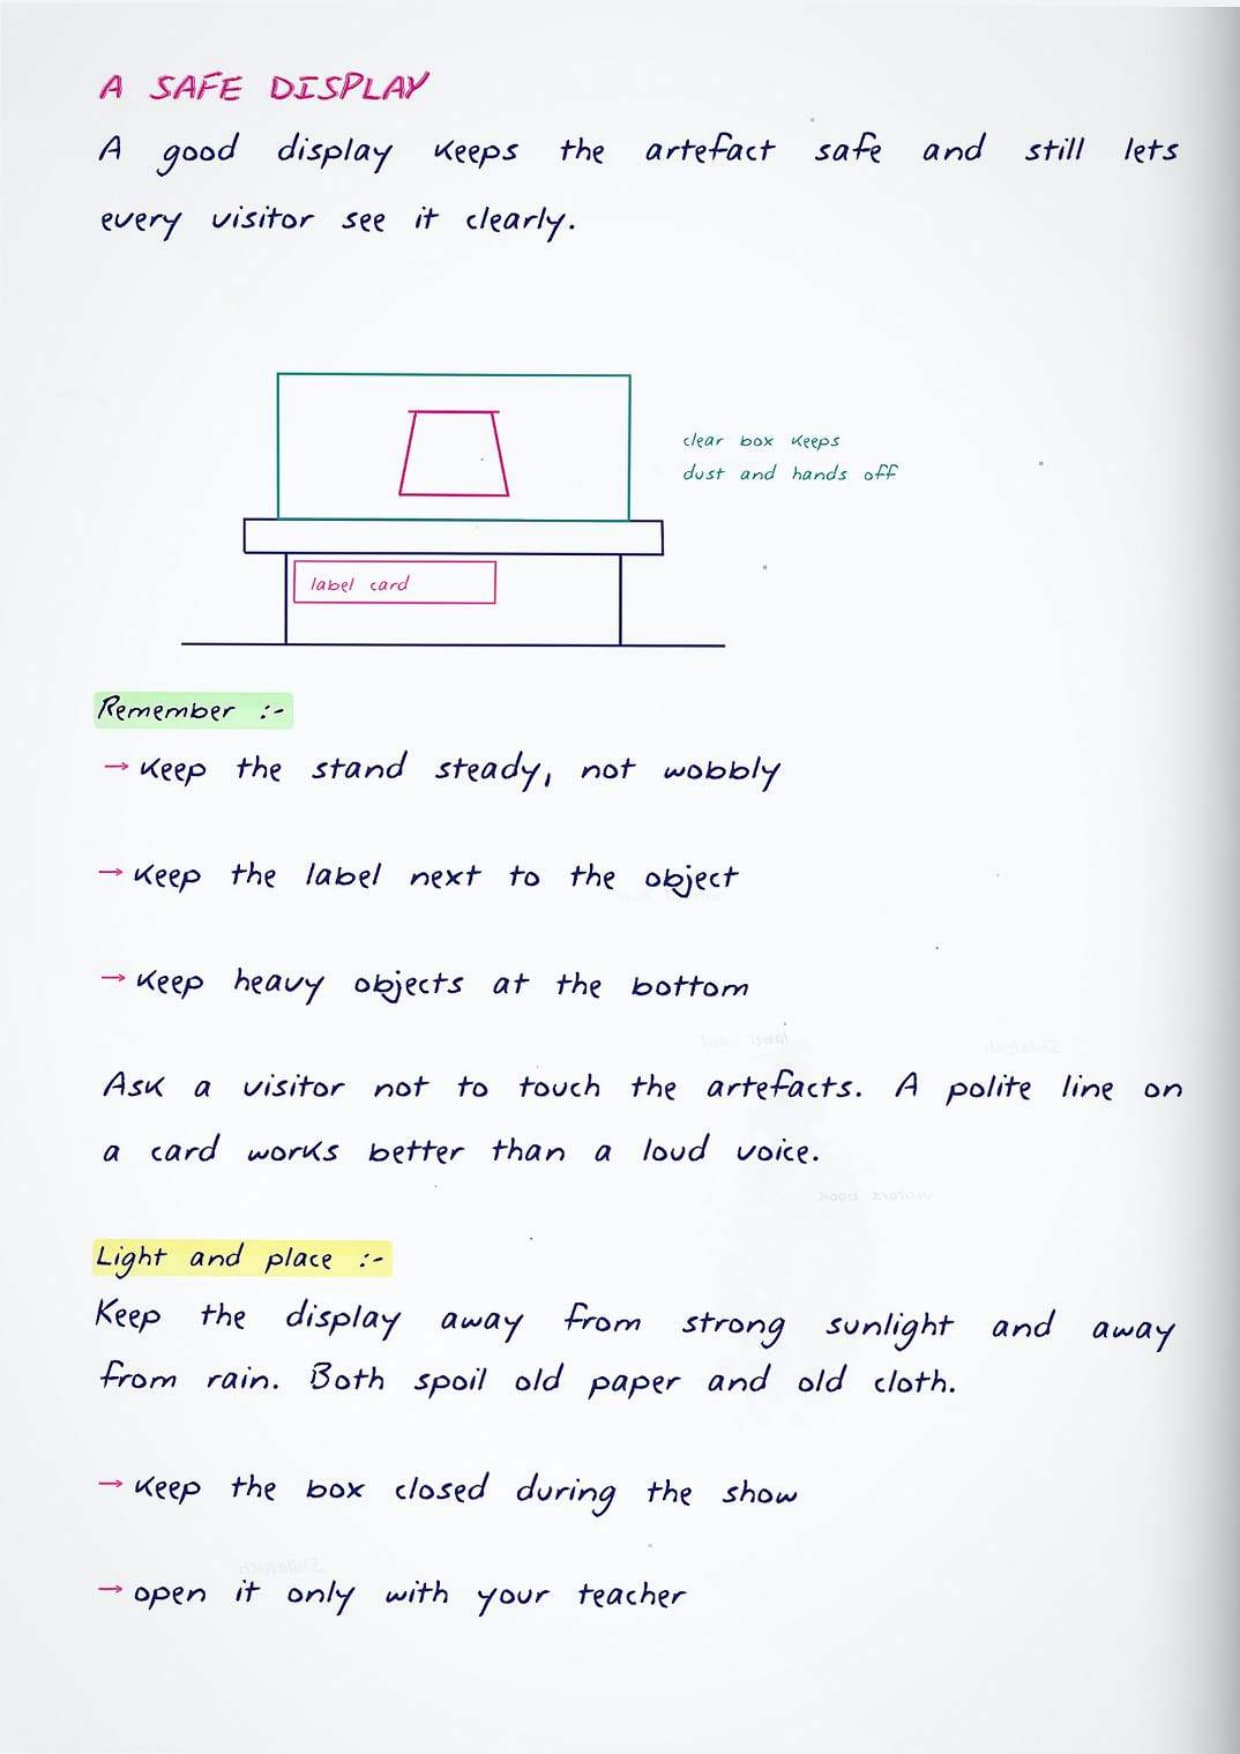
- Set up tables, stands and display boards, and make sure every artefact is securely displayed and labelled.
- Create posters, flyers and social media posts to promote the exhibition.
- Send invitations to parents, family, friends, school staff and community members.
- Hold the exhibition and collect feedback from visitors, students and teachers.
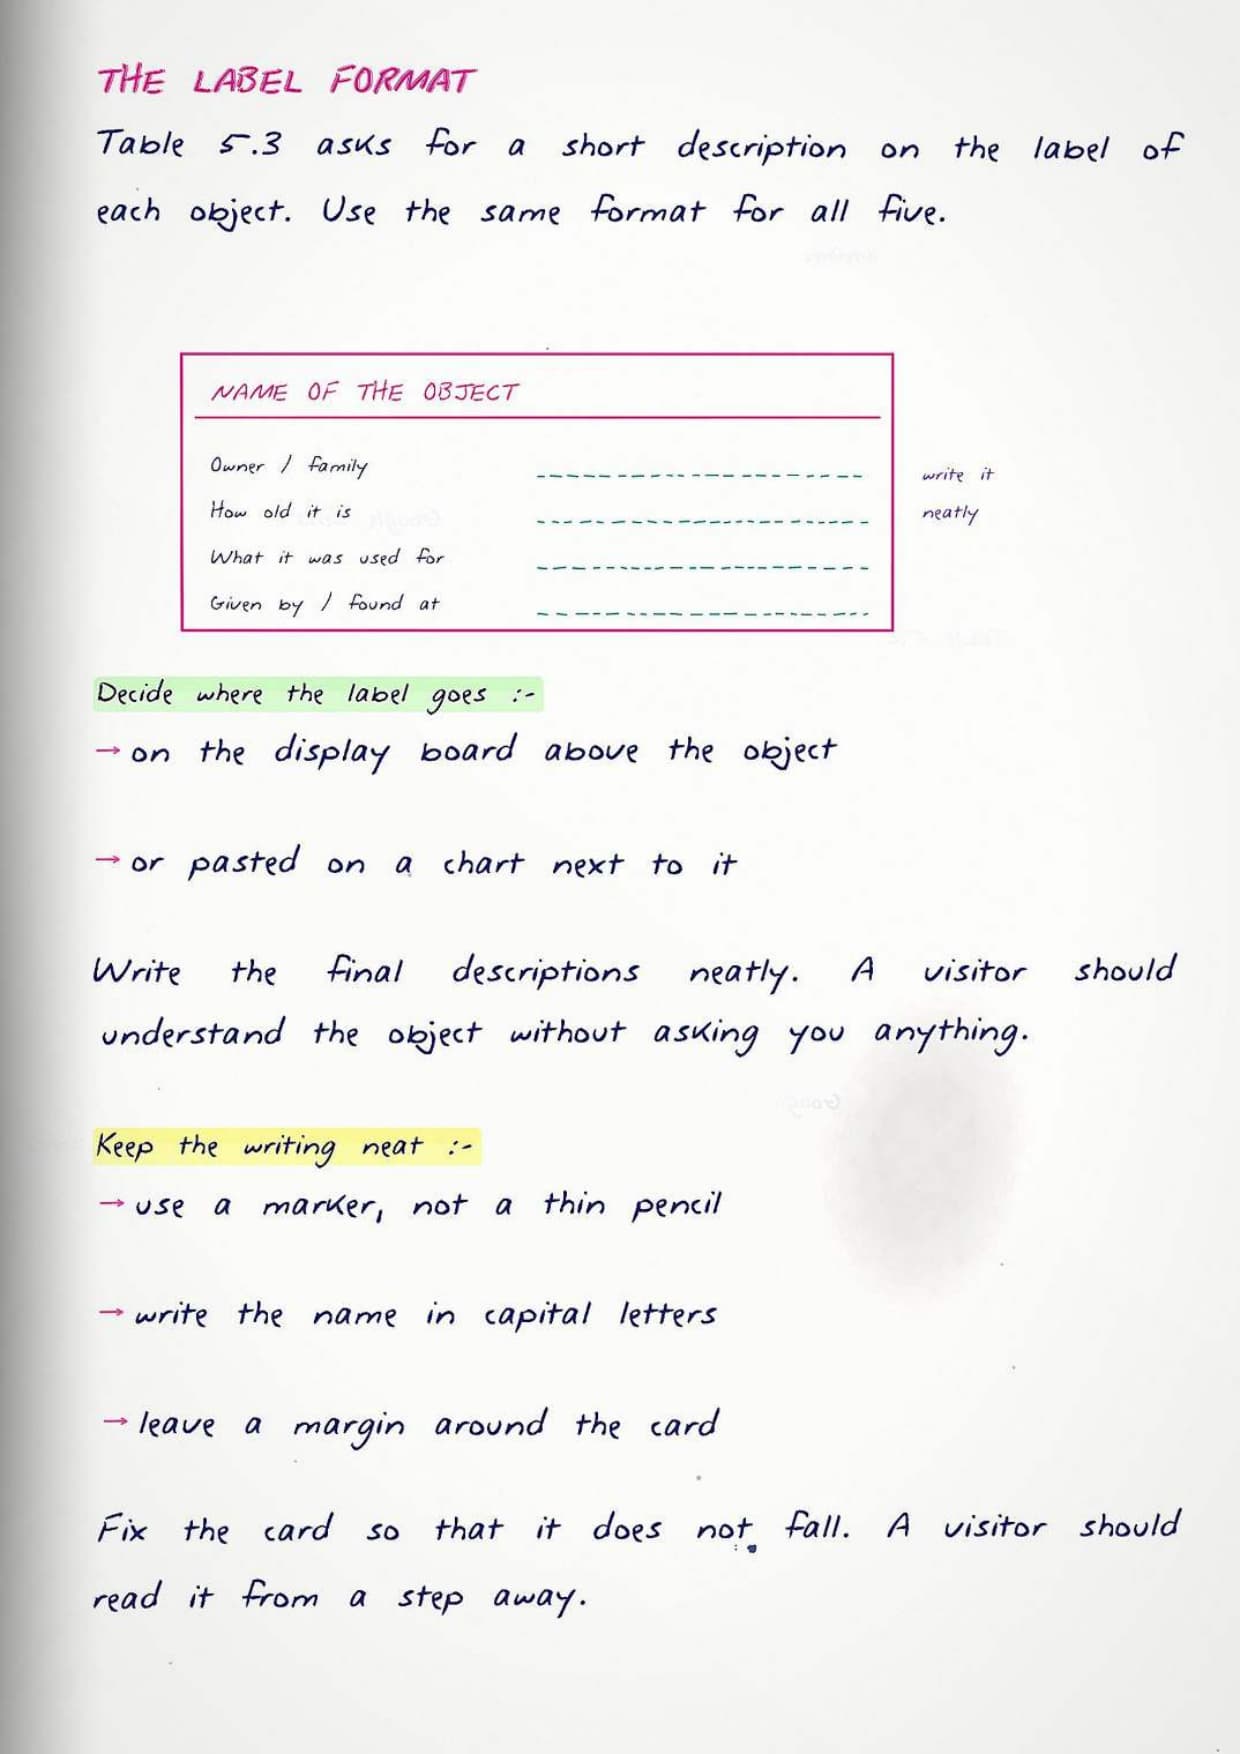
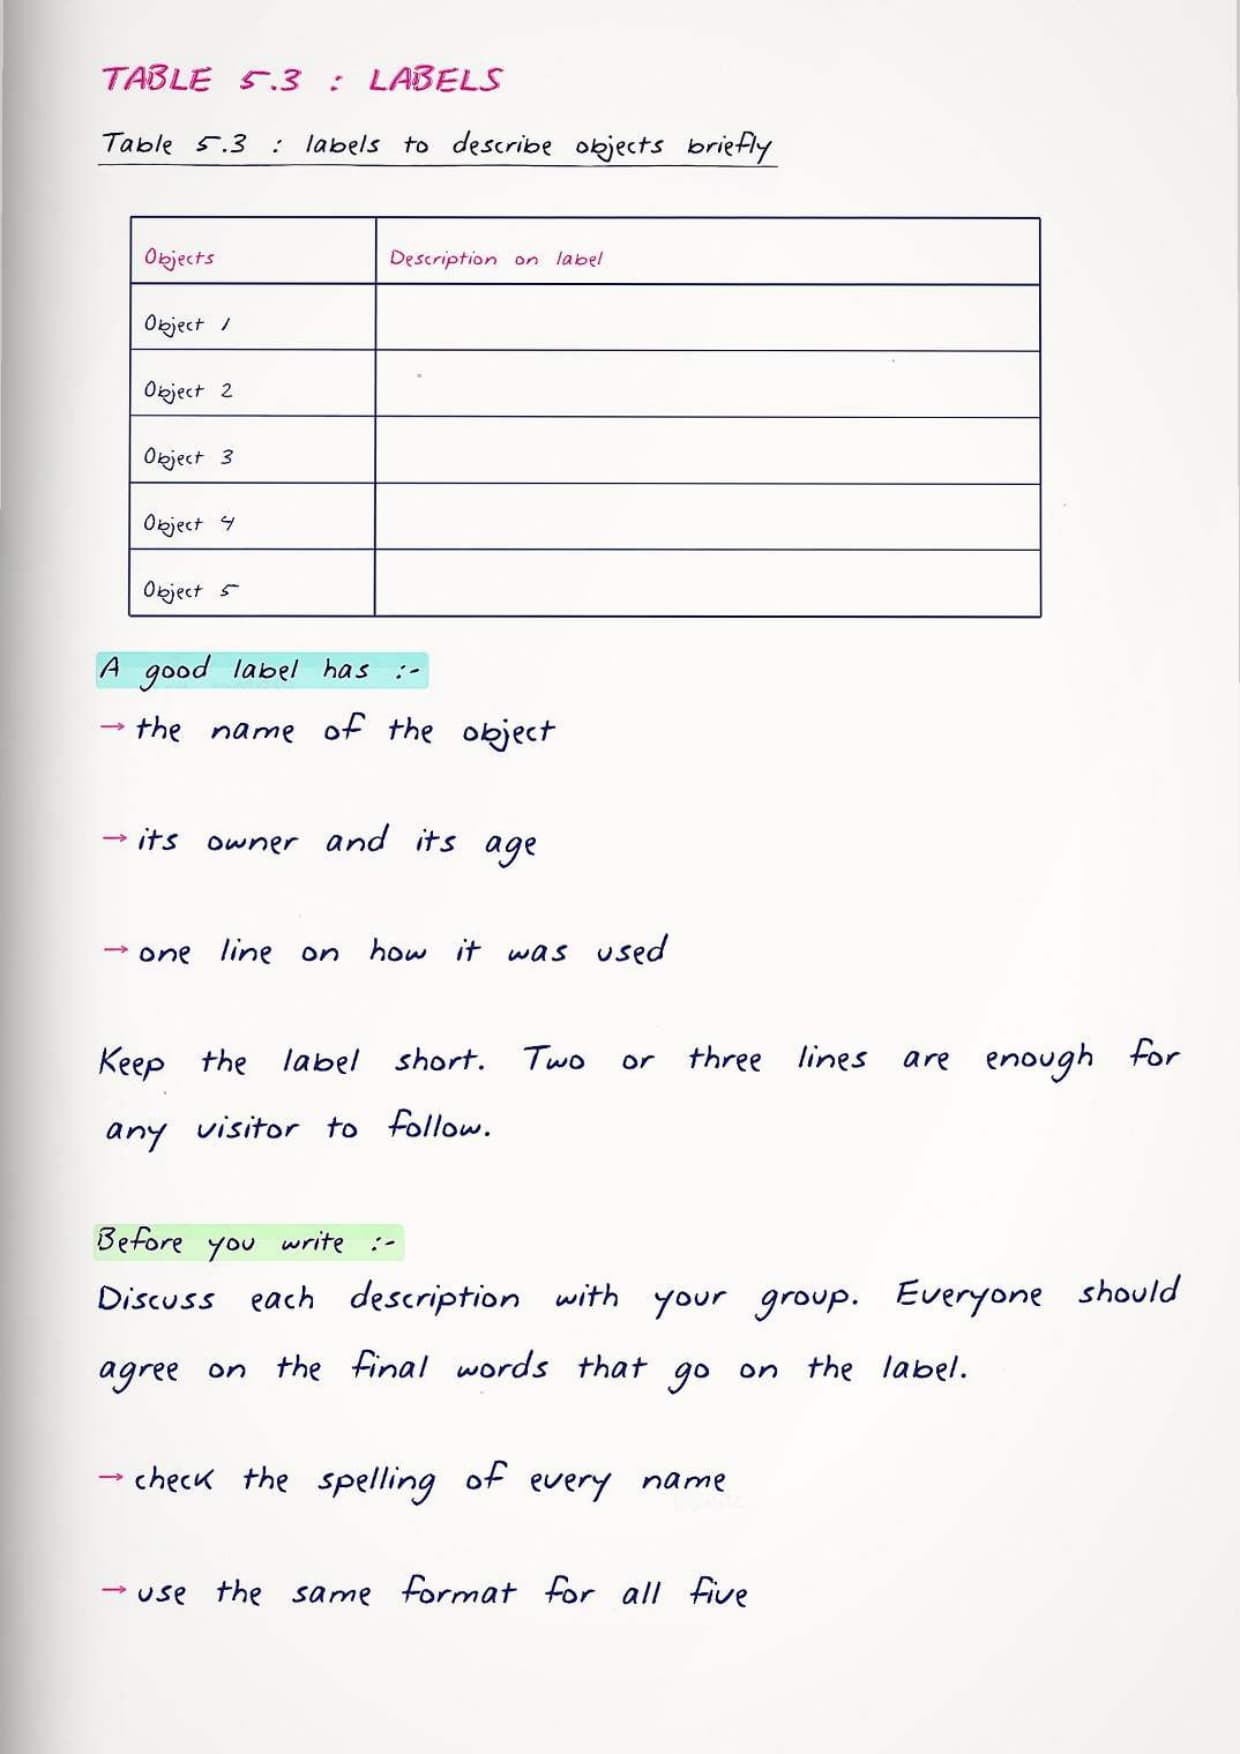
Table 5.3 is the label sheet. It has only two columns, Objects and Description on Label, with rows for Object 1 to Object 5. You also decide how the labels will be placed, either on display boards or pasted on charts next to the artefacts.
Tip: put a date in every label. The chapter captions its own objects that way, so copy the style. "Old travelling iron from the 1950s that worked on electricity" tells a visitor more than "old iron" ever will.
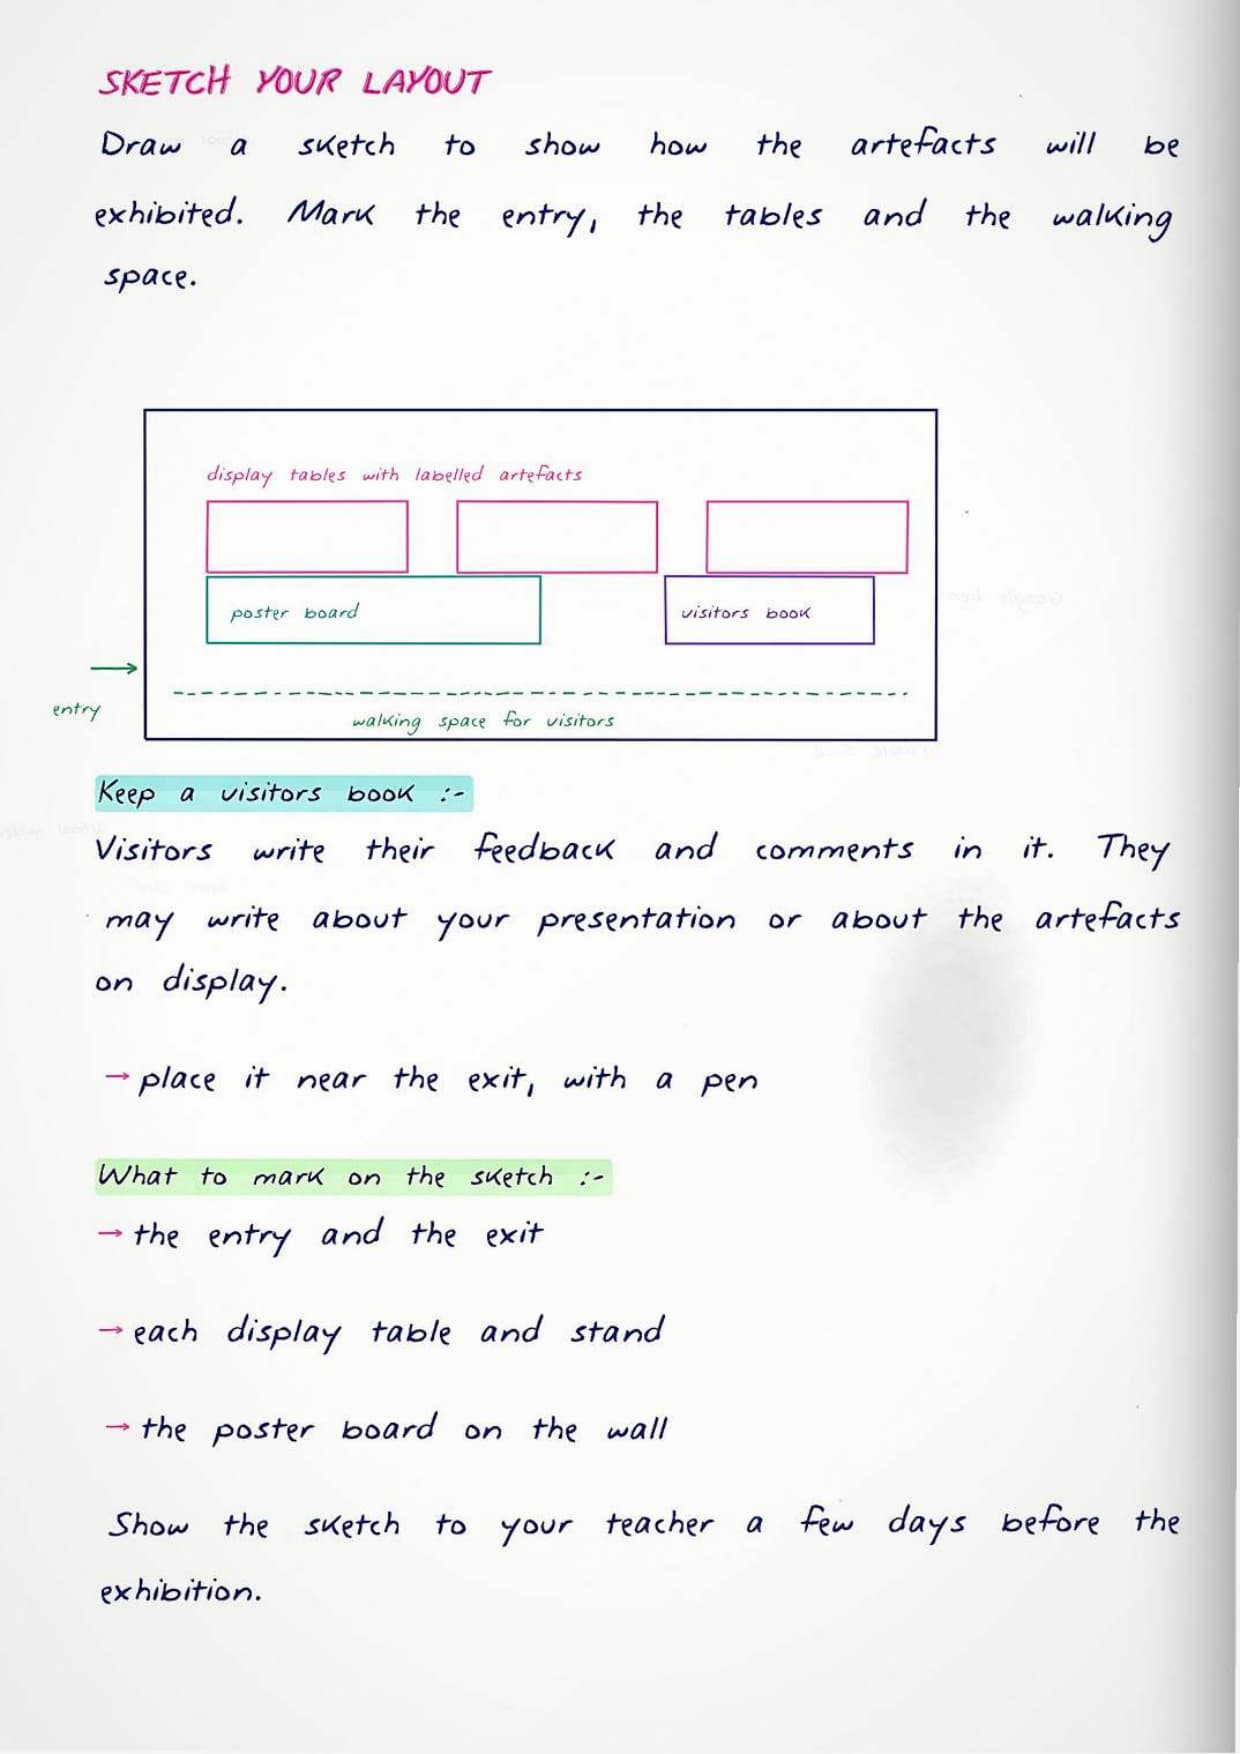
Two more things close the activity. Draw a sketch of the layout showing how the artefacts will be exhibited. Then keep a visitors book for comments about your presentation and the artefacts on display.
- Write down three examples of visitor feedback, then write what you learnt from that feedback.
- If you invited a museum worker, a historian or an archaeologist, write at least three things you learnt from them.
- Fill the time chart at the end, marking how many periods each of the seven activities took.
AI Tools in the School Museum Chapter: Google Lens, Bhashini Anuvaad and Google Translate
Three boxes in the chapter deal with digital tools, and questions from them are becoming common. Learn what each tool does in one line, then learn the Google Lens steps.
| Tool | What it does in the project |
|---|---|
| Google Lens | Point the phone camera at an artefact, monument or landmark and it gives information about it. It also reads text from images using OCR |
| OCR tools | Microsoft Office Lens, Adobe Scan and Text Fairy also read text from images, so you can read old documents that are hard to read |
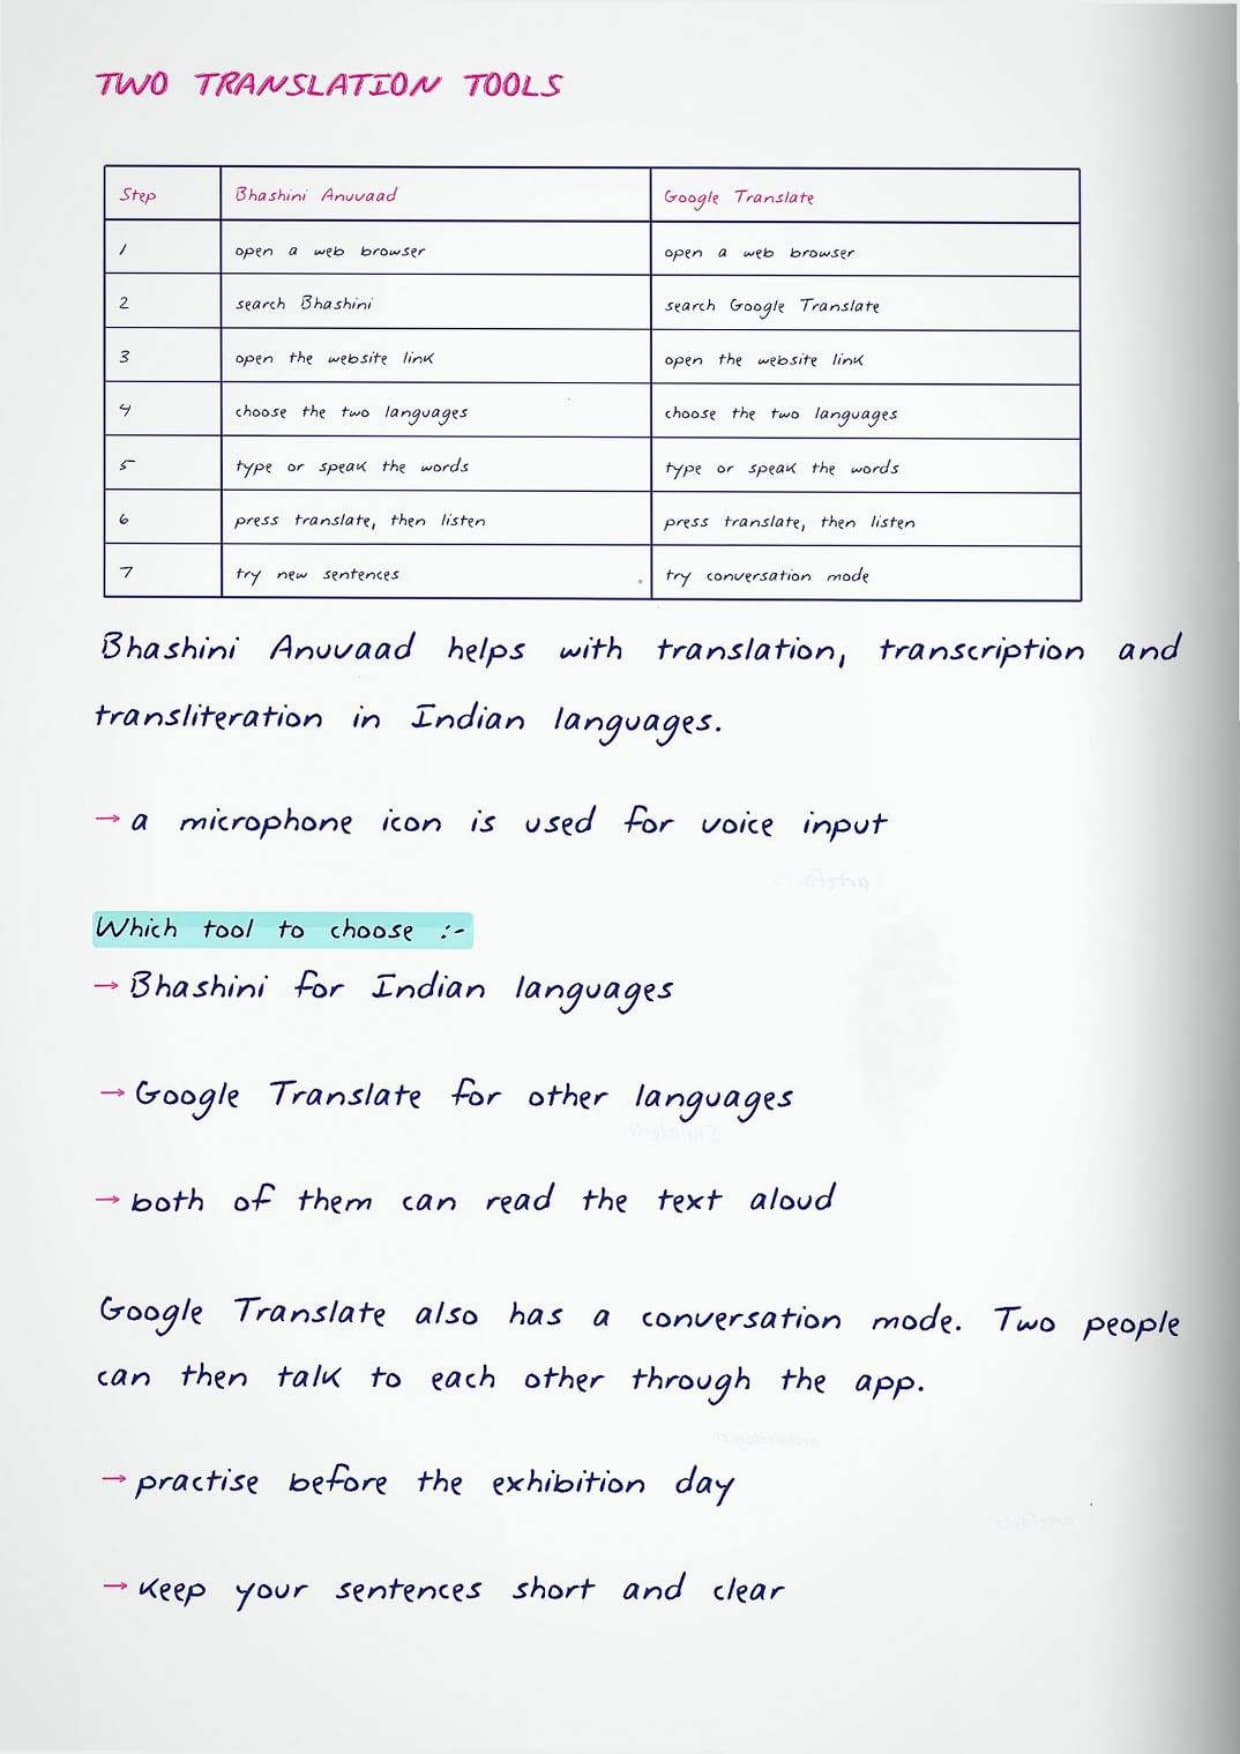
| Bhashini Anuvaad | A set of AI tools that translate spoken words from one language to another, and help with translation, transcription and transliteration in Indian languages |
| Google Translate | Instantly translates words, phrases and web pages from English into over 100 other languages |
The book prints four steps for using Google Lens on an old document. OCR stands for Optical Character Recognition, and that full form is worth learning.
- Download and open the Google app on the smartphone.
- Find the Google Lens icon in the search bar and tap it.
- Point the camera at the text, keep it clear and in focus, and use the highlighters to select the part you want.
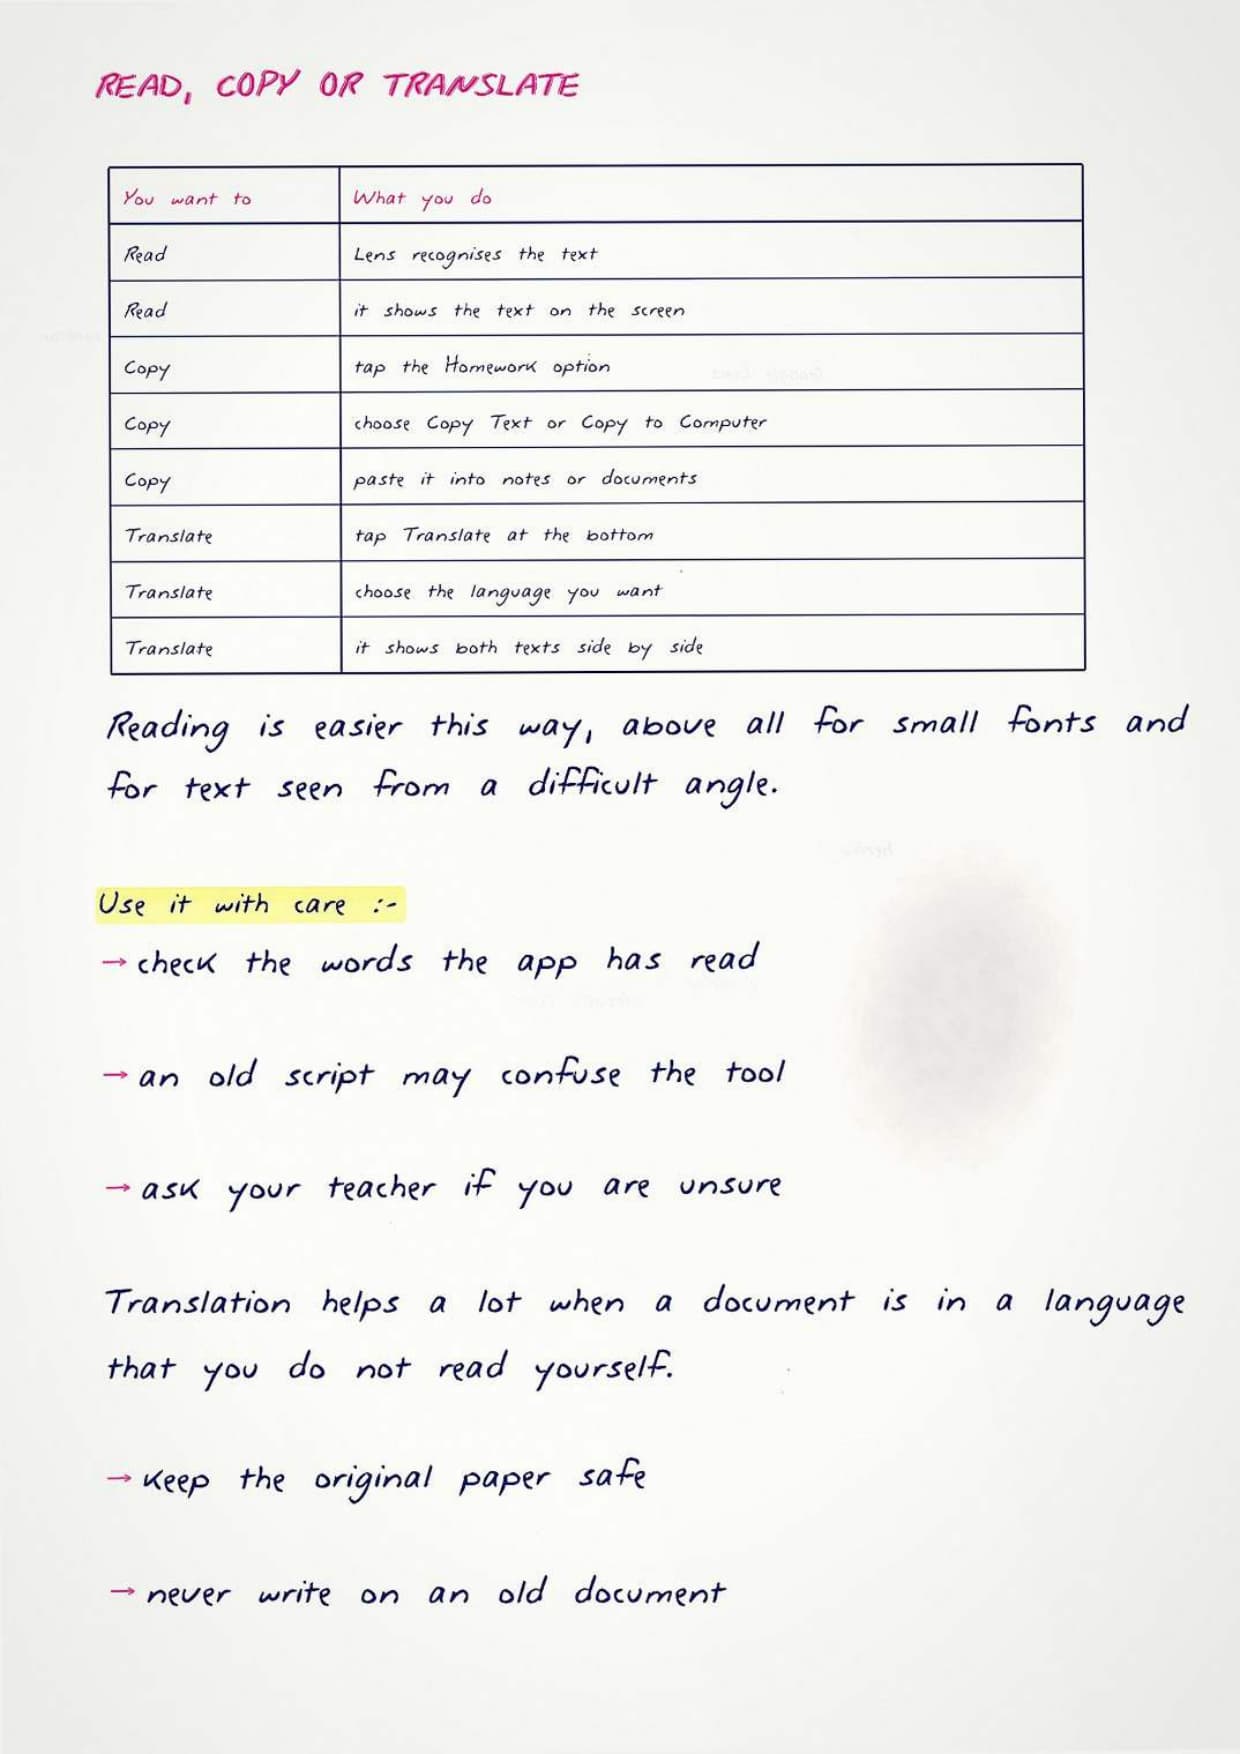
- Then choose your action. To read, the tool displays the recognised text. To copy, use the Homework option and tap Copy Text. To translate, tap Translate and pick the language you want.
Common Mistakes Students Make in the School Museum Chapter
Five slips that cost easy marks in the Class 6 project file:
- Writing that a museum is only about ancient things. The book says artefacts can be ancient or part of our lives today, and museums also show present culture and work.
- Mixing up the three tables. Table 5.1 identifies artefacts at home, Table 5.2 records the sketch, history and usage, and Table 5.3 holds only the label descriptions.
- Giving one care method for every object. Brass is washed and polished, wood is dusted with a soft brush, clothes are hung away from sharp edges, photographs go into envelopes.
- Forgetting the visitors book. Feedback from visitors is a marked step of Activity 7, not an optional extra.
- Skipping the layout sketch. The book asks for a drawing of how the artefacts will be arranged before the exhibition opens.
Tick each slip off only after you have written the correct answer once. Students who did this said the care question stopped costing them marks after two attempts.
Quick Recall Sheet: Every Term from the School Museum Chapter
This is the page to read the night before you submit the project file, and once again on exhibition morning. Everything the chapter can ask sits in one place.
| Term | One-line meaning |
|---|---|
| Artefact | An object made by humans that is old, unique and beautiful, and tied to our traditions and culture |
| Museum | A place in which artefacts are kept |
| Curator | The person who selects and looks after the artefacts in a museum |
| Manuscript | An old handwritten document, one of the things museums display |
| Shilalekh | Writing or engraving carved on stone or on the walls of caves and buildings |
| Archaeologist | A person who excavates a site and studies the artefacts and remains found there |
| Archaeological site | A place where evidence of ancient human societies is preserved, such as Dholavira |
| Virtual exhibition | A museum display you view on a website instead of visiting in person |
| OCR | Optical Character Recognition, the technology that reads text from an image |
| Label card | The short written description placed next to each object in the exhibition |
| Visitors book | The book kept at the exhibition for comments and feedback |
| Samovar | The brass pot for making tea, from Kashmir, shown as an artefact in the chapter |
| Pankha | A handmade fan of recycled wool and cloth, used before electricity reached all homes |
The notebook also carries a short memory line for the order of work: Visit, Ask, Identify, Select, Care, Present, Exhibit.
What the School Museum Class 6 Handwritten Notes PDF Contains
The file is a handwritten notebook, with sub-headings in colour and the three tables boxed by hand. Nothing is typed, so it reads like a classmate's own notes.
- Pages 1 to 7: cover page, the six steps of Figure 5.1, the four outcomes, and the artefact and museum definitions.
- Pages 8 to 14: museum examples, Dholavira and archaeological sites, the full materials list and the safety rules.
- Pages 15 to 22: Activity 1 with the virtual museum tour, Activity 2 with all eight family history questions, and Table 5.1.
- Pages 23 to 30: Activity 4 with Table 5.2, the care table of Activity 5, and the five presentation formats of Activity 6.
- Pages 31 to 38: Activity 7 with Table 5.3, the layout sketch and visitors book, the AI tool steps, the mistake list and a one-page summary.
How to Use the School Museum Handwritten Notes Most Effectively
This chapter is a hands-on project, so reading alone is not enough. Split it into three short blocks and keep the notebook open beside you while the class collects and arranges the objects.
- Block 1, 30 minutes. Learn the artefact and museum definitions, the six steps of Figure 5.1 and the four outcomes. Then list five artefacts at home.
- Block 2, 40 minutes. Fill Table 5.1 and Table 5.2 for your five objects, and build the timeline for one of them.
- Block 3, 35 minutes. Learn the care table by material, write the five label cards for Table 5.3, and draw the layout sketch.
- Night before, 10 minutes. Quick recall table, the six steps of Activity 7 and the five common mistakes, nothing else.
The chapter ends with Think and Answer. It asks what you enjoyed, what challenges you faced, what you would do differently, and how museums help us learn about our heritage and history. The jobs it names are archaeologist, historian, museum curator and tour guide.
How These Handwritten Notes Pair with the Chapter Notes and the Kaushal Bodh Book PDF
Also Check: the same chapter is being built in other formats on Collegedunia. Read the book chapter first, keep the typed notes for detail, and use the handwritten pages for the last revision round.
| Resource | Best used for | Open it |
|---|---|---|
| Revision Notes | Typed chapter notes with every activity and all three tables explained in full | School Museum Class 6 Notes (coming soon) |
| NCERT Book PDF | The official Kaushal Bodh chapter with all the artefact figures and the original tables | School Museum Class 6 Book PDF (coming soon) |
| Closest related project | The project on recording and describing the plants and animals around your school | Biodiversity Register Class 6 Handwritten Notes |
| Previous chapter | The project on making your own animations and simple games | Animation and Games Class 6 Handwritten Notes |
| Next chapter | The project on preparing food and snacks without using fire | Cooking without Fire Class 6 Handwritten Notes (coming soon) |
NCERT Handwritten Notes for Class 6 Vocational Education Kaushal Bodh: All Chapters
Related Links: handwritten revision notes for every chapter of the Class 6 Kaushal Bodh textbook, written to the 2026-27 syllabus.
| Chapter | Class 6 Vocational Education Kaushal Bodh Handwritten Notes |
|---|---|
| Chapter 1 | School Kitchen Garden Class 6 Handwritten Notes |
| Chapter 2 | Biodiversity Register Class 6 Handwritten Notes |
| Chapter 3 | Maker Skills Class 6 Handwritten Notes |
| Chapter 4 | Animation and Games Class 6 Handwritten Notes |
| Chapter 5 | School Museum Class 6 Handwritten Notes (this page) |
| Chapter 6 | Cooking without Fire Class 6 Handwritten Notes (coming soon) |
School Museum Class 6 Handwritten Notes FAQs
Questions Students Ask About the School Museum Notes
Ques. What is an artefact in Class 6 Vocational Education Chapter 5?
Ans. An artefact is an object made by humans that is old, unique and beautiful, and related to our traditions and culture. Artefacts can be ancient, or they can be a part of our lives and societies in the present. Old coins, vessels, stamps, manuscripts, statues, a radio, a gramophone and traditional clothes are all examples the book gives.
Ques. What is a museum and how does it help us?
Ans. A museum is a place in which artefacts are kept. Museums help us understand our history and culture. They show what ancient people wore, what work they did, what artwork they created such as paintings and sculptures, and what they wrote in manuscripts. They also show the present culture and work of different groups of people in India and the world.
Ques. What is Shilalekh in the School Museum chapter?
Ans. Shilalekh means inscriptions, that is writing or engraving, carved on stone or on the walls of caves or buildings. The book lists it as one of the artefacts you can look for around your home and neighbourhood, along with old coins, wood carving, stone carving and ancient manuscripts.
Ques. What are the seven activities in the School Museum project?
Ans. Activity 1 is visiting a museum. Activity 2 is learning the history of your family and area. Activity 3 is identifying artefacts and filling Table 5.1. Activity 4 is selecting five artefacts for the museum and filling Table 5.2. Activity 5 is keeping the artefacts safe. Activity 6 is preparing a presentation on the artefacts. Activity 7 is organising an exhibition of artefacts.
Ques. How do you keep artefacts safe in the school museum?
Ans. Each material needs its own care. A brass article needs to be washed and polished. A wooden object needs to be dusted with a soft brush. Clothes should be hung carefully, away from any nail or sharp edge. Photographs should be kept in envelopes so they do not get bent or out of shape.
Ques. What do you write in Table 5.1, Table 5.2 and Table 5.3?
Ans. Table 5.1 asks what the artefact is, who the owner is, how old it is, and whether you will bring the object or a photograph. Table 5.2 records the object, a sketch or photograph, its history and usage, and whether it is still being used. Table 5.3 holds only the short description written on each object's label.
Ques. Who is a curator in a museum?
Ans. A curator is the person who selects and looks after the artefacts in a museum. The book suggests you discuss your observations with a curator or a local historian during your museum visit, and ask them any questions you have about the exhibits.
Ques. How can I take a virtual museum tour for this project?
Ans. You can take a virtual tour of museums in India on the website of the Ministry of Culture, Government of India. The book suggests using the search keywords "ministry of culture" plus "virtual museums". Many museums also run virtual exhibitions on their own websites, and you can use Google Lens to find more about their collections.
Ques. How is Google Lens used in the School Museum chapter?
Ans. Google Lens gives information about artefacts, monuments, landmarks and artworks when you point a smartphone camera at them. It also reads text from images using Optical Character Recognition, so you can read or translate old documents. Open the Google app, tap the Lens icon in the search bar, point the camera at clear text, then choose to read, copy or translate it.
Ques. What is Bhashini Anuvaad and how is it different from Google Translate?
Ans. Bhashini Anuvaad is a set of AI tools that translate spoken words from one language to another. It helps with translation, transcription and transliteration in Indian languages, so students can create content in their preferred Indian language. Google Translate instantly translates words, phrases and web pages from English into over 100 other languages, and also offers a conversation mode.
Ques. What are archaeological sites and why are they important?
Ans. Archaeological sites are places where evidence of ancient human societies is preserved. Archaeologists carefully dig up these sites and analyse the artefacts and remains that are uncovered. These artefacts help us understand the kind of societies that lived there many years ago. The objects discovered during excavation are kept in a museum located near the site, as at Dholavira.
Ques. How do you organise the exhibition of artefacts in Activity 7?
Ans. Decide a date and a location in the school with enough space. Take responsibility for five artefacts, finalise a brief description of each, and write the descriptions neatly on labels. Set up tables, stands and display boards so every artefact is secure and labelled. Make posters and flyers, invite parents and community members, then collect feedback from visitors, students and teachers.
Ques. Which jobs are related to the School Museum project?
Ans. The book names archaeologist, historian, museum curator and tour guide. The project also asks you to invite a museum worker or a historian to your class, so a museum guide and a conservator are other useful answers for your project file.
Ques. Where can I download the Class 6 Vocational Education Chapter 5 handwritten notes PDF?
Ans. Use the download option at the top of this page. The file is free and printable, runs to 38 handwritten pages, and follows the 2026-27 Kaushal Bodh chapter order, so it can sit open beside the textbook and your project file while your class collects, labels and displays the artefacts.



Comments